![White Logo Blue Banner copy-100.jpg]](https://knowledge.fisikal.com/hs-fs/hubfs/White%20Logo%20Blue%20Banner%20copy-100.jpg?height=50&name=White%20Logo%20Blue%20Banner%20copy-100.jpg)
ADD TEAM MEMBER
Users should be happy that they have added the Team member to the software and they are ACTIVE.
To learn more about Team member management click here.
As a checklist, Users should ensure that the following attributes are configured correctly:
- Headshot
- Coverwall
- Home Club
- Additional Locations (if required)
- Qualifications
- Bio
- Schedule is published (if required)
- Trainer is added to Groups (if required)
TRAINER WORKING HOUR ASSIGNMENT
It is recommended that once a Trainer has been added to the Club, their Working Hours are correctly configured to minimise scheduling conflicts. Users can select to BLOCK ALL Working Hours applied to the Trainers Working Hours after which a REVIEW form is shown to summarise the action.
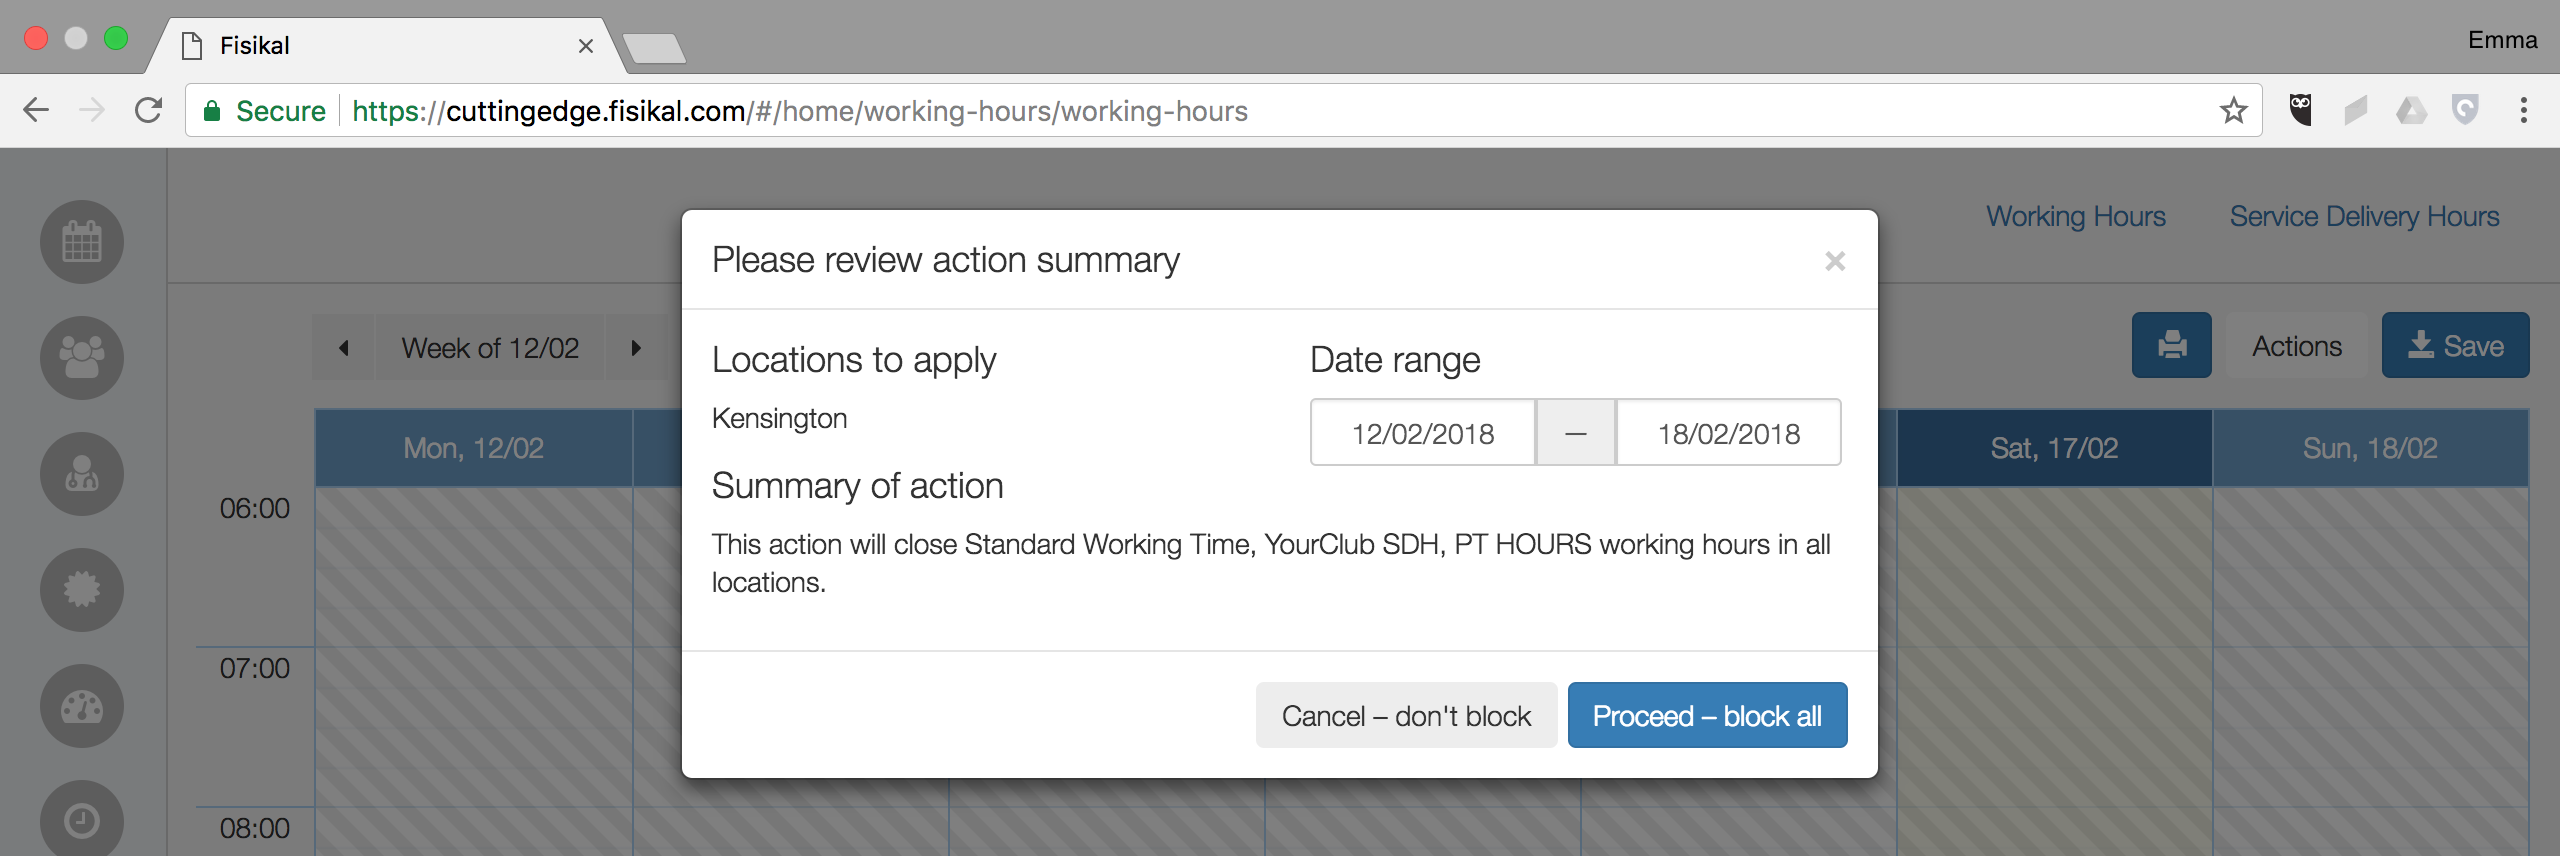
It is recommended that Trainer availability for new Trainers is closed out until the date the next class timetable is due to be applied on or for a specific period in the future when it is unlikely clients will book until - for example 3-months.
If Trainers are associated to multiple Locations, Users should BLOCK ALL working hours for all associated Locations.
To learn more about Working Hours management click here.
TRAINER SERVICE ASSOCIATION
Once a Trainer has been successfully added to the system and their Working Hours closed, Users should next associate Trainers to Services. There are multiple ways to add Trainers to Services depending on if you want to add them to an existing Service or they need to have new Services created for them.
BULK EDIT SERVICES
This can be done by selecting SERVICES > SERVICES > BULK EDIT button. The form will load to show the following:

When users select the CLIENT option, Users can make changes to the settings of the Services and also add and remove Trainers.

To add Trainers to the selected Services at the same time, Users should scroll the bottom of the form where they will see +TRAINER ACTIVITIES TO ADD.
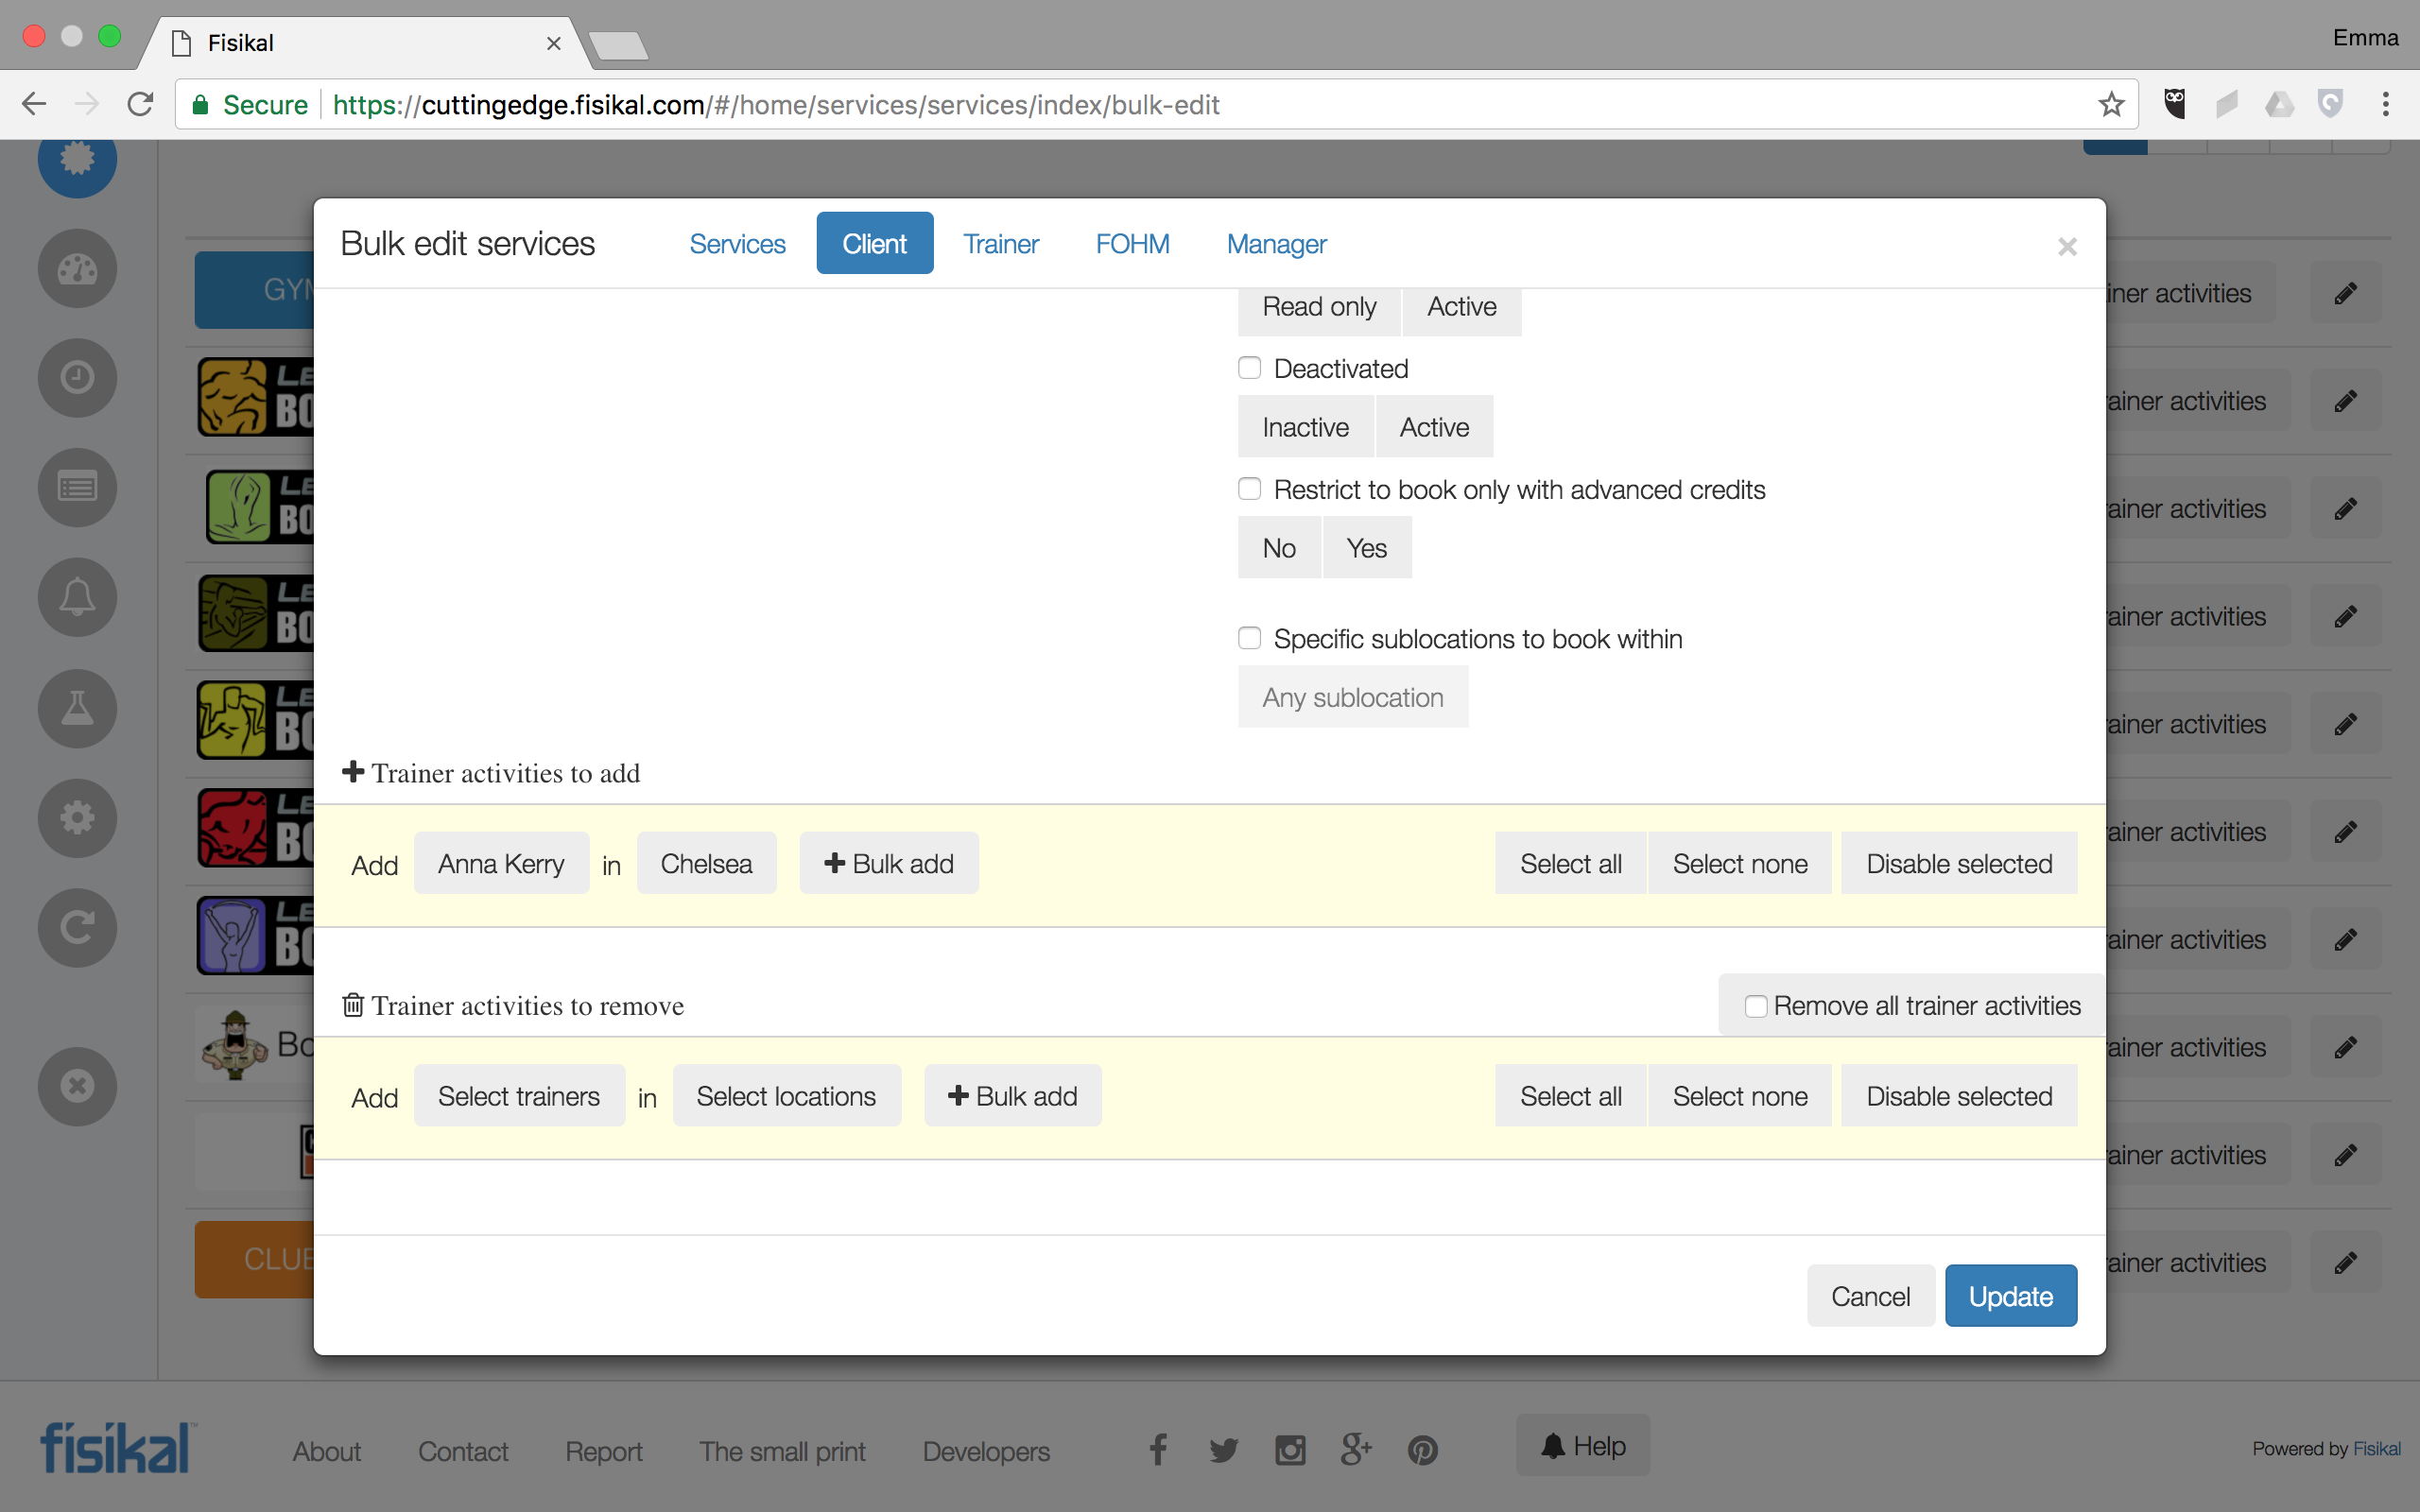
Users should select the TRAINERS button and then select and apply a Trainer(s).
Users then should select the LOCATIONS button and select and apply a Location(s).
In order to associate the Trainer(s) at the Location(s) to the Service(s), Users MUST select the +BULK ADD button. Users will then see the that they have been associated to form as follows:
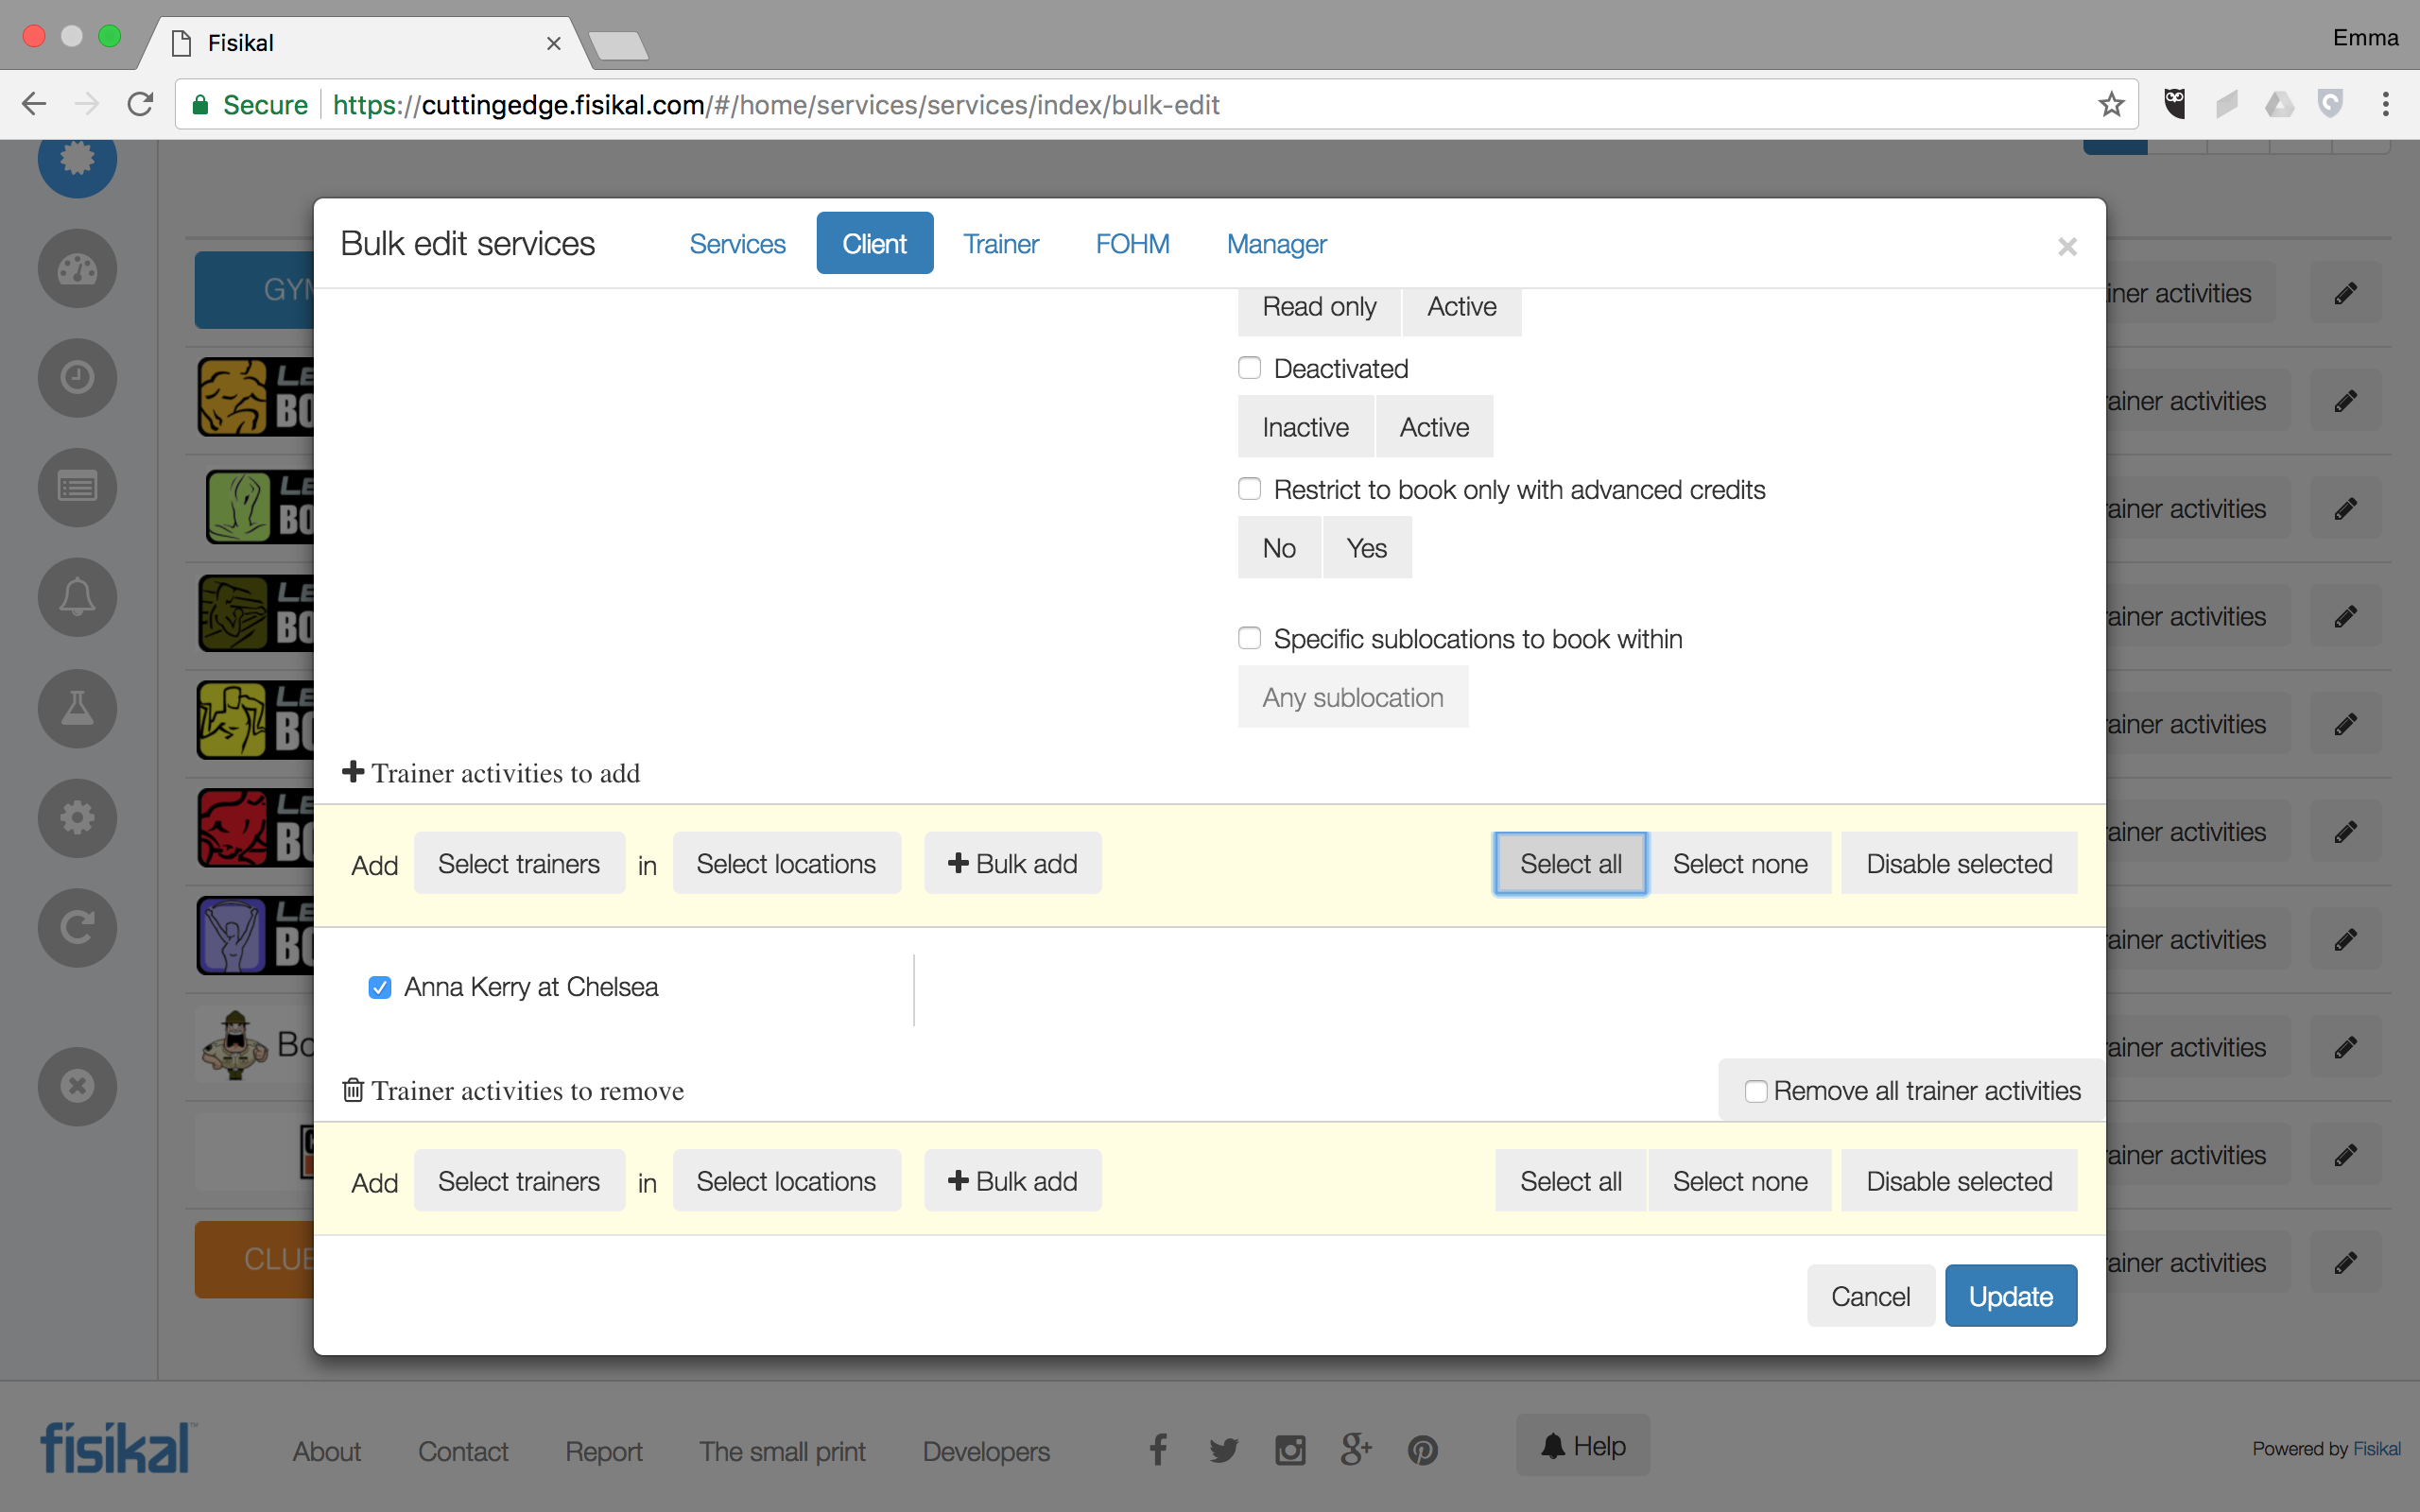
To complete the association of Trainers to the Services, Users should select the SELECT ALL button and then UPDATE. The form will save and Trainers can now have bookings with the Services that have just been associated to their profiles.
CREATING A NEW SERVICE
Creating a new Service for Trainers is a good approach for Clubs that want to make sure that members buy specific Service Packages with Trainers where the credit cannot be delivered by other Trainers in the club (unless they have been specifically associated to it). A Service example where it relates to a specific Trainer could be as follows:
PT 60mins RL-CH
In the example above the title includes a number of components as follows:
- PT - this relates to the type of Service (Personal Training)
- 60mins - this relates to the duration of the Service (60mins)
- RL - this includes the initials of the Trainer (Rob Lander)
- CH - this includes the short-code of the Club Location (Chelsea)
NOTE - THIS METHOD IS ONLY USED BY CERTAIN ORGANISATIONS AND IS ONLY USED IN VERY SPECIFIC CIRCUMSTANCES.
To learn more about creating a new Service for Trainers please click here.
If the Club is going to configure the system so that Trainers can deliver the same Service (Such as PT 60mins) and Services do not need to be Trainer specific, they should move directly to the BULK EDIT SERVICES option below.
PACKAGES
If Trainers are associated to generic Services then there is no need to configure new Packages for them. If a Trainer has a new Service created specifically for them, then as part of the new team member on-boarding process Users may need to create custom Packages to include the new Service.
To learn more about creating a new Package for Trainers please click here.
ADDING TRAINERS TO CLASSES
Now that Trainers have been added to the system, their Working Hours closed and they have been associated to Services, Users should now create appointment for them for Classes or individual sessions. For more information about Timetabling recommendations Users should select here.
CONFIGURING SERVICE DELIVERY HOURS
If you have created a new Service specifically for the Trainer, you will need to make sure that this new Service is associated to Service Delivery Hours as if it is not, the Trainer may have their shift assigned to them but no one will be able to book with them as you have not created a relationship between the shift and the new Service.
To learn more about how to configure Service Delivery Hours please click here.
APPLYING WORKING HOURS
The penultimate stage in correctly configuring Trainers is to apply their Working Hours so that Users can view their availability for all types of appointments.
For more information about applying Working Hours, Users should select here.
PUBLISH SCHEDULE
The final stage of the adding a team member on board is to make sure that their profile has the the Schedule will be published option = YES. To do this Users should do the following:
- Go to TEAM and select the Trainers Name and then EDIT on their Profile
- Scroll to the bottom of the EDIT form and see "Schedule will be published" option, select YES
Once this is done you should check how the Trainer shows in the Member app, Member web portal and associated Schedules.