![White Logo Blue Banner copy-100.jpg]](https://knowledge.fisikal.com/hs-fs/hubfs/White%20Logo%20Blue%20Banner%20copy-100.jpg?height=50&name=White%20Logo%20Blue%20Banner%20copy-100.jpg)
PREREQUISITES
- Make sure you have a spreadsheet showing all the information you need in order to schedule the classes
- Make sure you have set up all the Sub Locations (Studios's) where the classes will take place
- Make sure you have associated the Sub Location to the specific Services, so your team members always schedule the classes in the right studios
- Make sure you know the Group Size for each class if this is different from the default Group Size associated to the Service
SPREADSHEET
It is advisable to lay all the data out in an Excel spreadsheet similar to the one shown below:
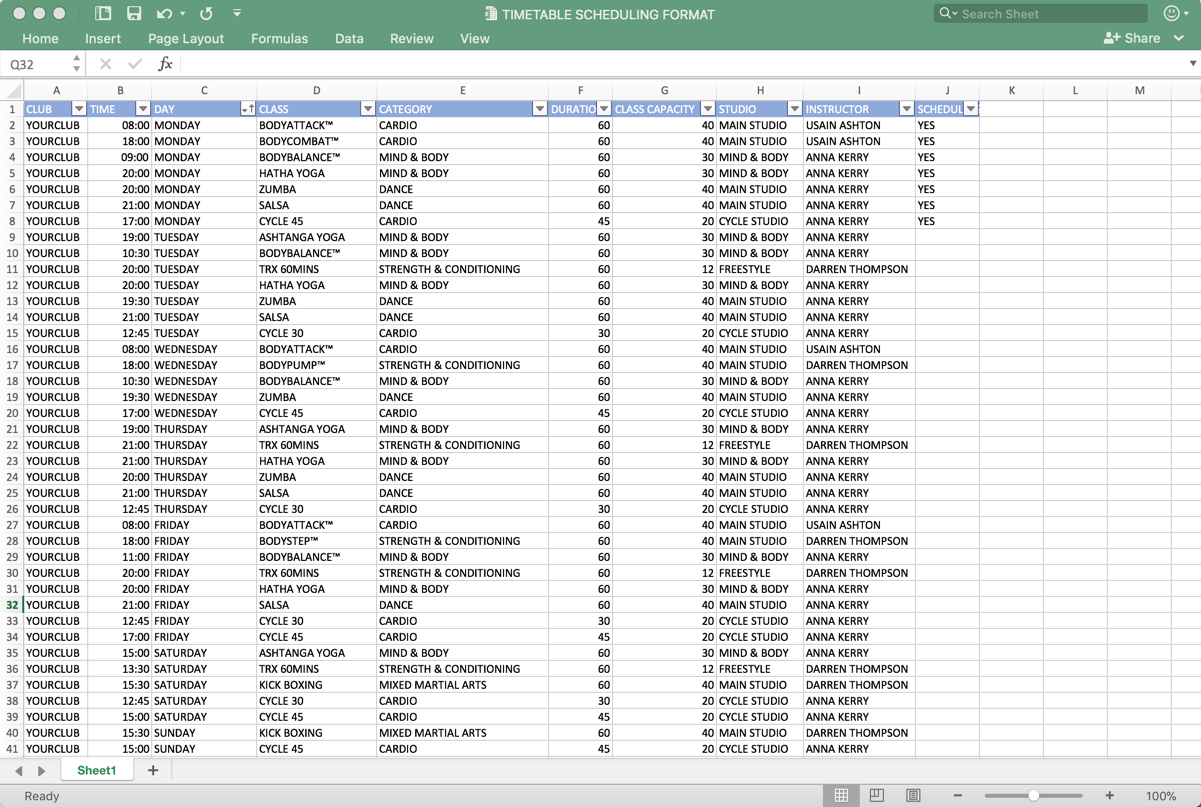
Once you have all the data laid out and you have checked that there are no BLANKS when you filter on a specific header, you can then start to schedule the classes on Fisikal.
We recommend that you first filter on CLASSES and then select the first Service type shown. In the example below ASHTANGA YOGA.
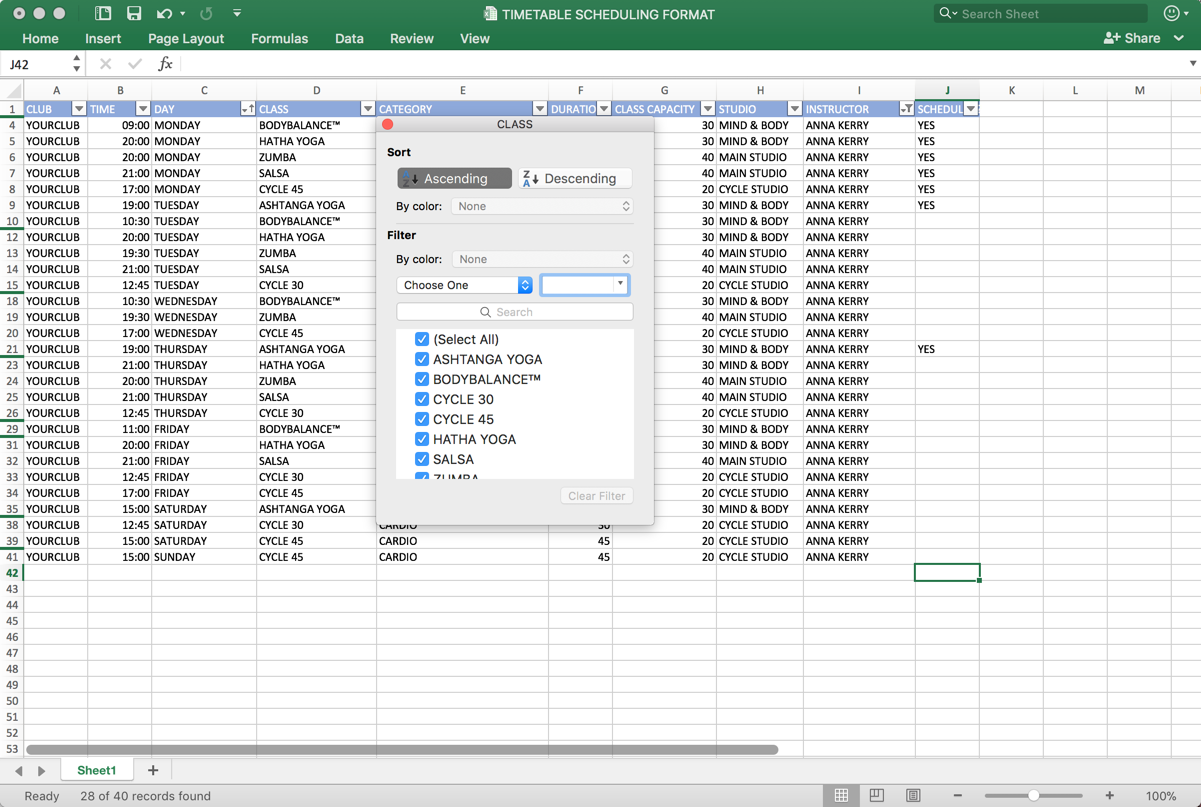
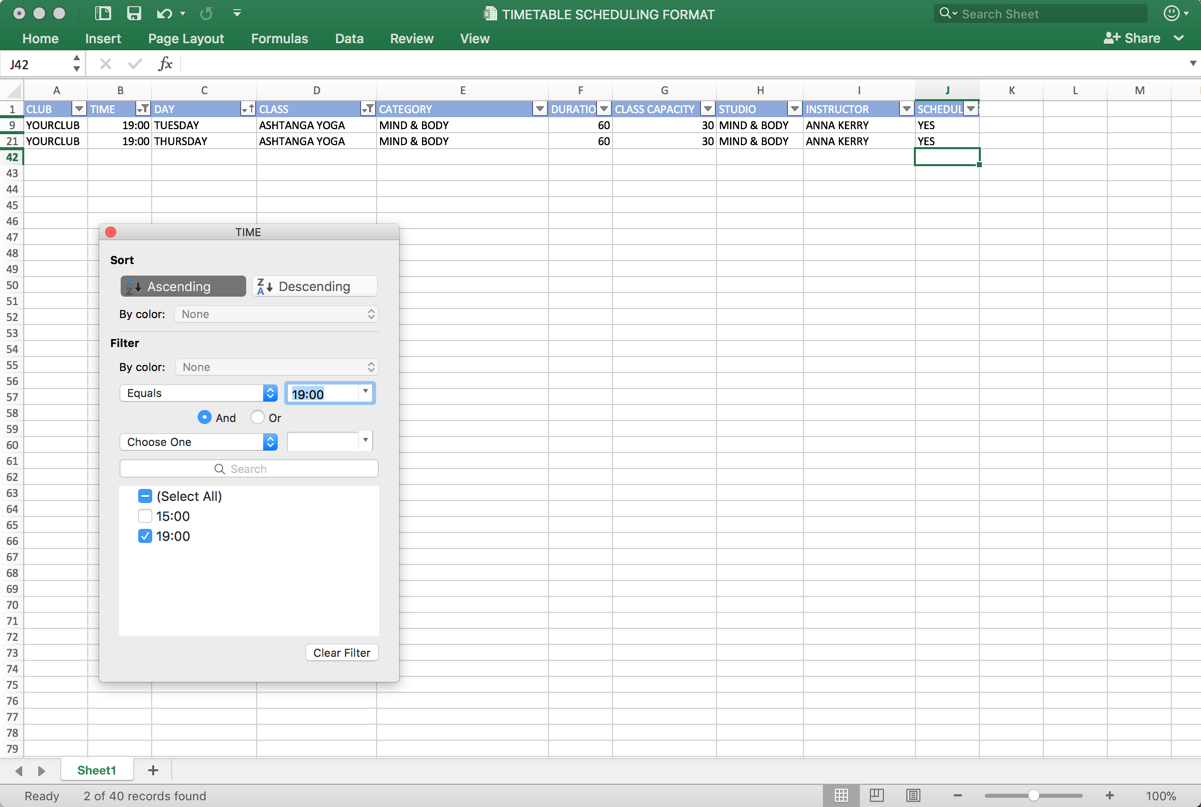
Once the data has filtered by Class (Service) you will be able to identify if there are any days of the week that have the same start time. If there are, you can schedule these at the same time which will make loading the timetable much faster. To do this filter on the TIME column as shown below:
APPOINTMENT FORM
Now in Fisikal go to Schedule and select the time and day on the Schedule to load the booking form. It is recommended that you do this on CLUB WEEK VIEW as shown below:

WHAT?
On the form select the Service filter and filter Services by the Service you want to Schedule (if this example by ASHTANGA YOGA), the form will show all the Trainers associated to this Service


Once a Trainer has been selected you will see the following options (make sure these are all correct):
- Duration
- Group size
- Sub-location
WHEN?
In the "When?" section, check the Start Date and Time are correct.
Select the WEEKLY option as this appointment will recur on either a specific day or multiple days in the week with the same start time
- Select the days of the weeks (select the buttons for these days) and then choose an UNTIL DATE (the date you want the timetable to run until)
- Once you are happy that the all the details are correct select BOOK
If the Trainers Working Hours has been opened correctly then the booking will be made without any further action required.
If the Trainers Working Hours has been configured to be CLOSED, you will see an additional pop up requesting to OPEN Working Hours so that the appointment can be added to the system.
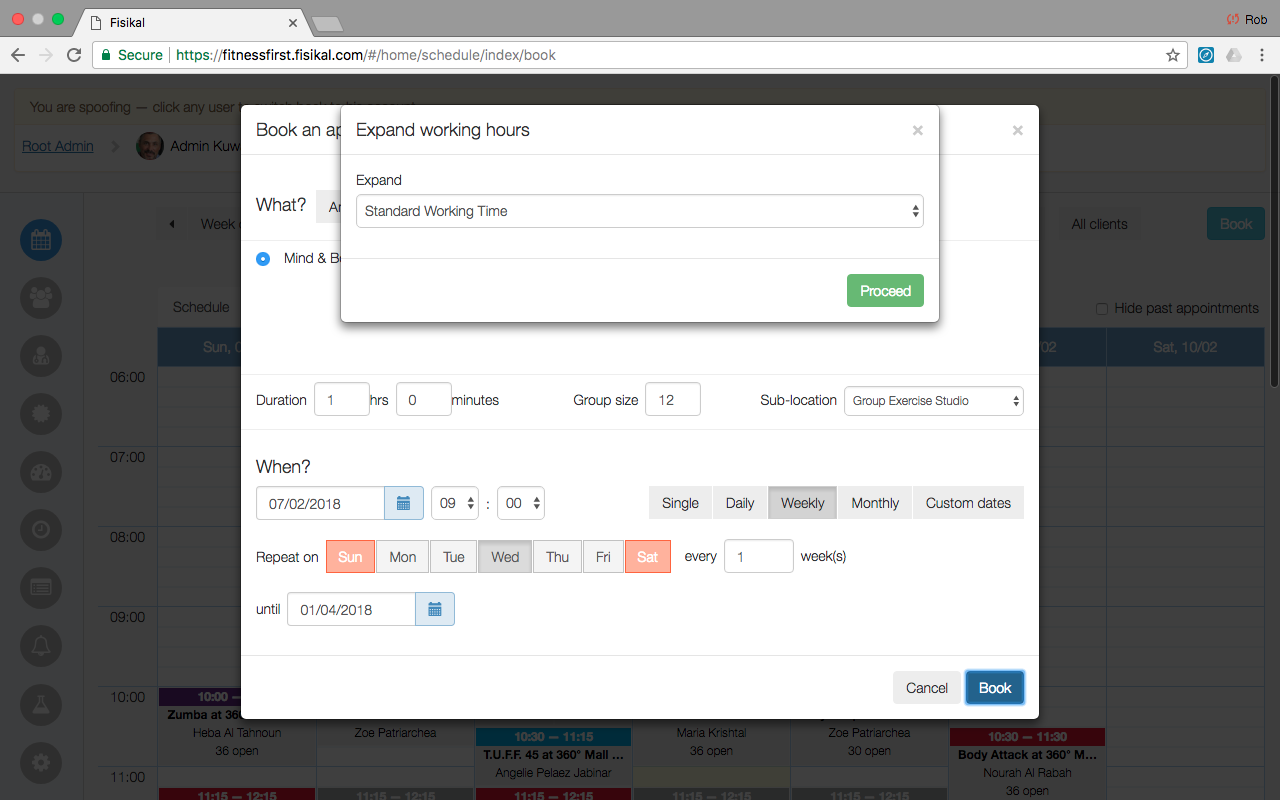
Once the Working Hours have been opened for this Trainer, Users should select the PROCEED button and the booking will be added to the Schedule.
VERIFY SCHEDULE
It is advisable to check that the bookings have all been added to the Schedule correctly. Sometimes it is easier for another person to check this.
Reopen the XLS where all the booking information was initially added to and filter by individual CLASSES and TIMES. It is recommended to do this alphabetically in order to mimimise the changes of missing a CLASS.
Make sure that the CLASS is on the Schedule and it has the been Scheduled to include the following details:
- Club Location
- Time
- Day
- Class type
- Duration
- Class capacity
- Studio
- Instructor
Once you have checked these specifics, update the spreadsheet so it has VERIFIED = YES as shown below.
