![White Logo Blue Banner copy-100.jpg]](https://knowledge.fisikal.com/hs-fs/hubfs/White%20Logo%20Blue%20Banner%20copy-100.jpg?height=50&name=White%20Logo%20Blue%20Banner%20copy-100.jpg)
OVERVIEW OF POS ITEMS
This tab shows all the POS Point of Sale products that can be sold.

ADDING A POS ITEM
New POS items can be added by a user by clicking on the + button at the top right hand of the screen.
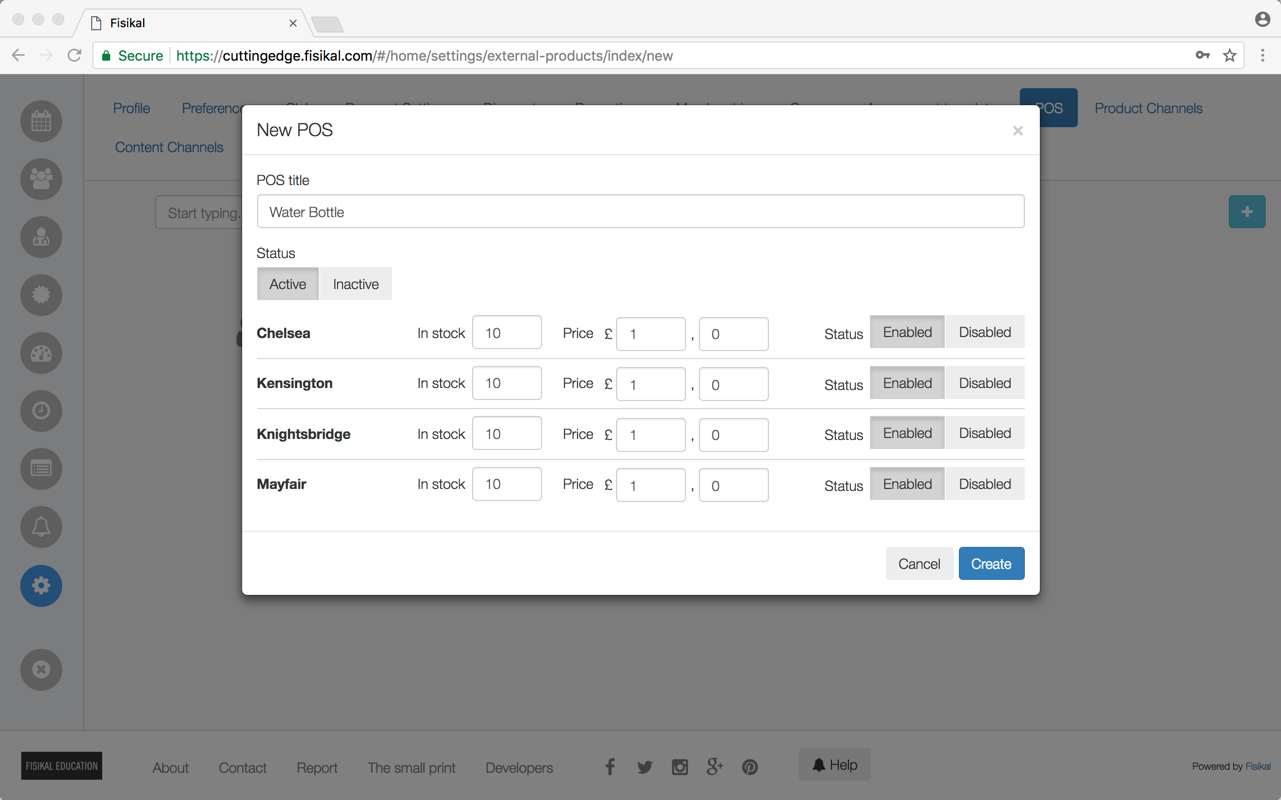
The User will need to add the name, the price and the stock available of each item in each location.
EDITING A POS ITEM
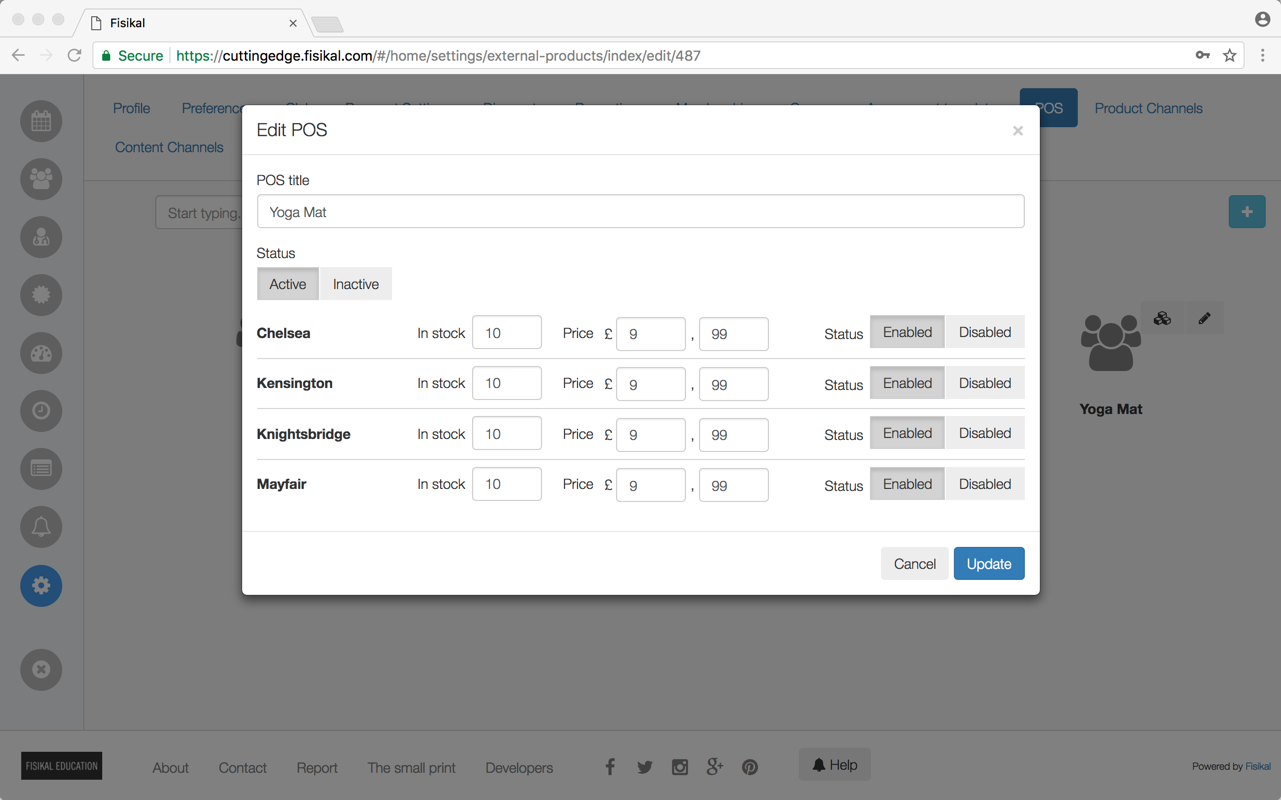
A POS item can be edited by clicking on the pencil icon to the right of each item in the POS overview.
ASSIGNING A POS ITEM TO A CLIENT
A user can assign a POS item to a student by doing the following. Go into the Students Profile
go to the courses section, click on POS and the + button. Then select the POS item you would like to add to the Student's account. Here you can also add discounts if required.
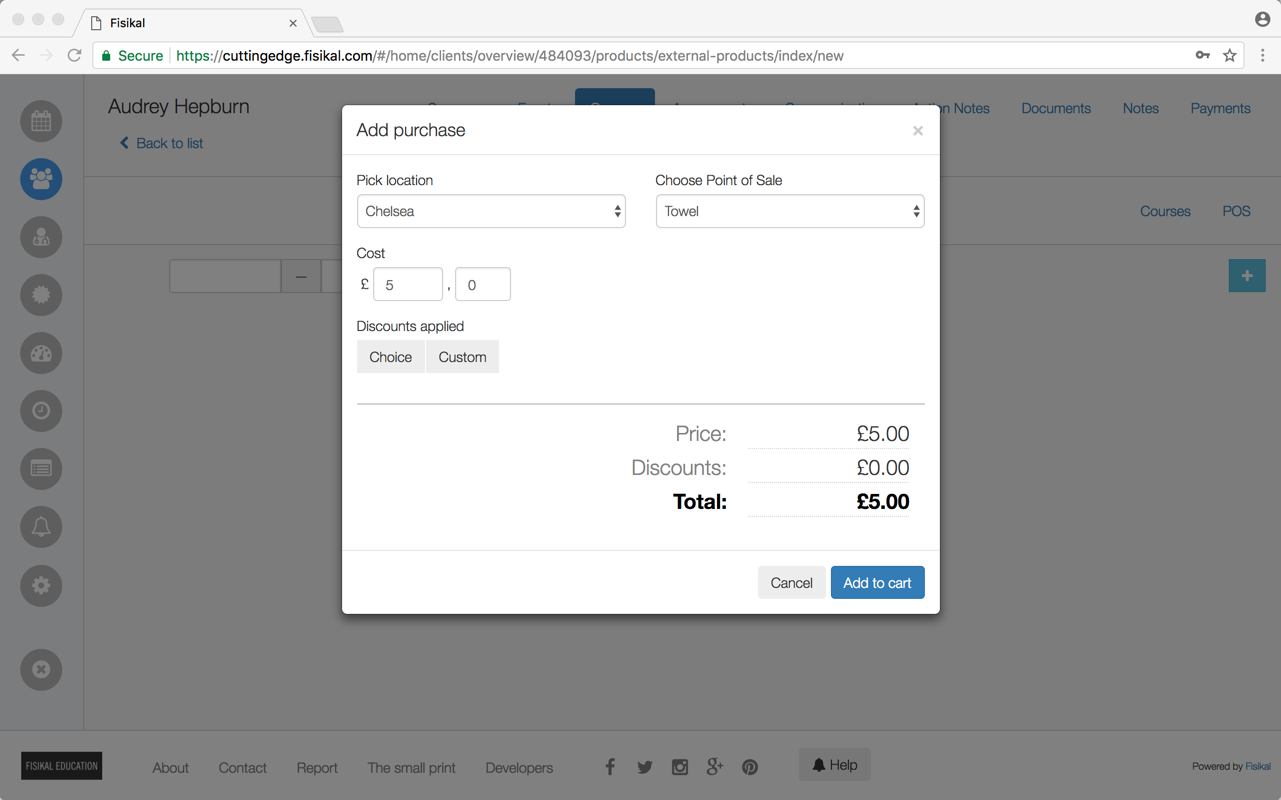
Once all Discounts have been applied to the Product, they are shown in the summary section on bottom of the form.
Once the form has been completed Users should select ADD TO CART. The page will take Users back to the POS overview page and a new link to CHECKOUT will be shown.
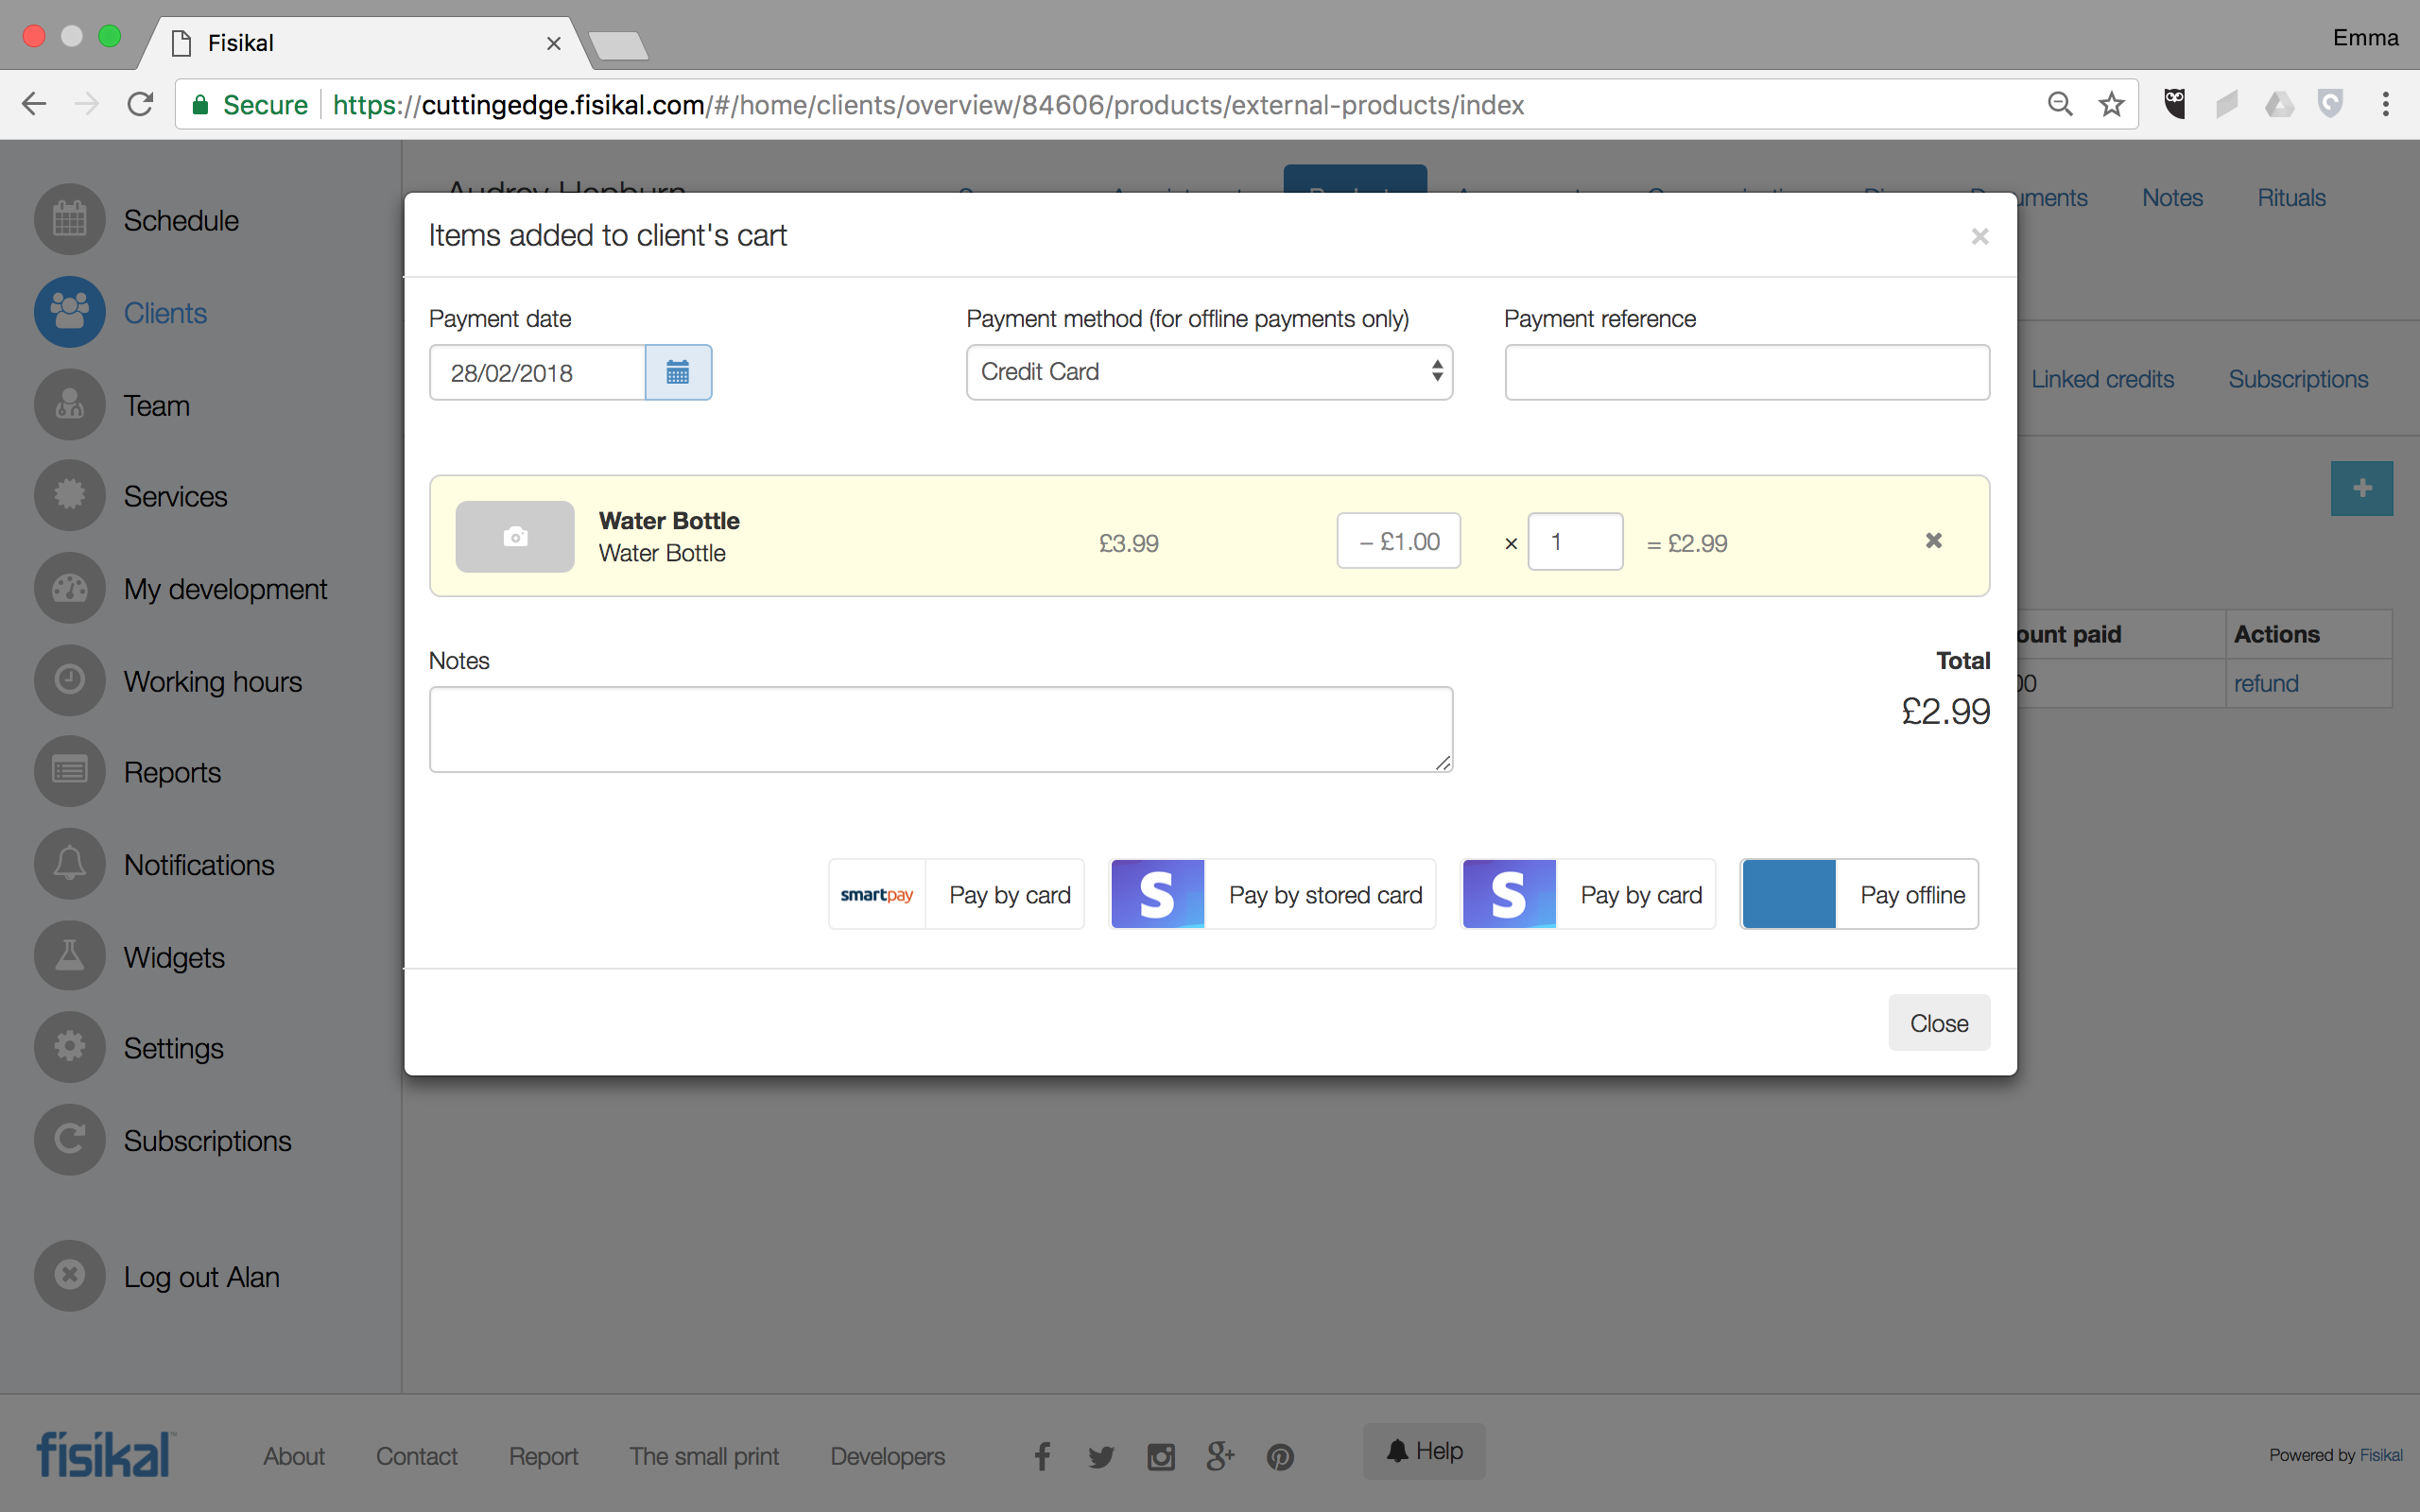
Users are able to continue assigning other POS or Packages to the Client before going to Checkout. When Users select the CHECKOUT button, they will see the Checkout form load as follows:

Users should fill in the form as required and then select CHOOSE A PAYMENT METHOD. When this is selected, Users will be able to select from the configured Payment options that have been set up by the System Administrator.
If Users select the PAY BY CARD option, they will see the Stripe.com payment flow where they should enter the Users details as follows:
- Name
- Address
- Postcode
- Card details
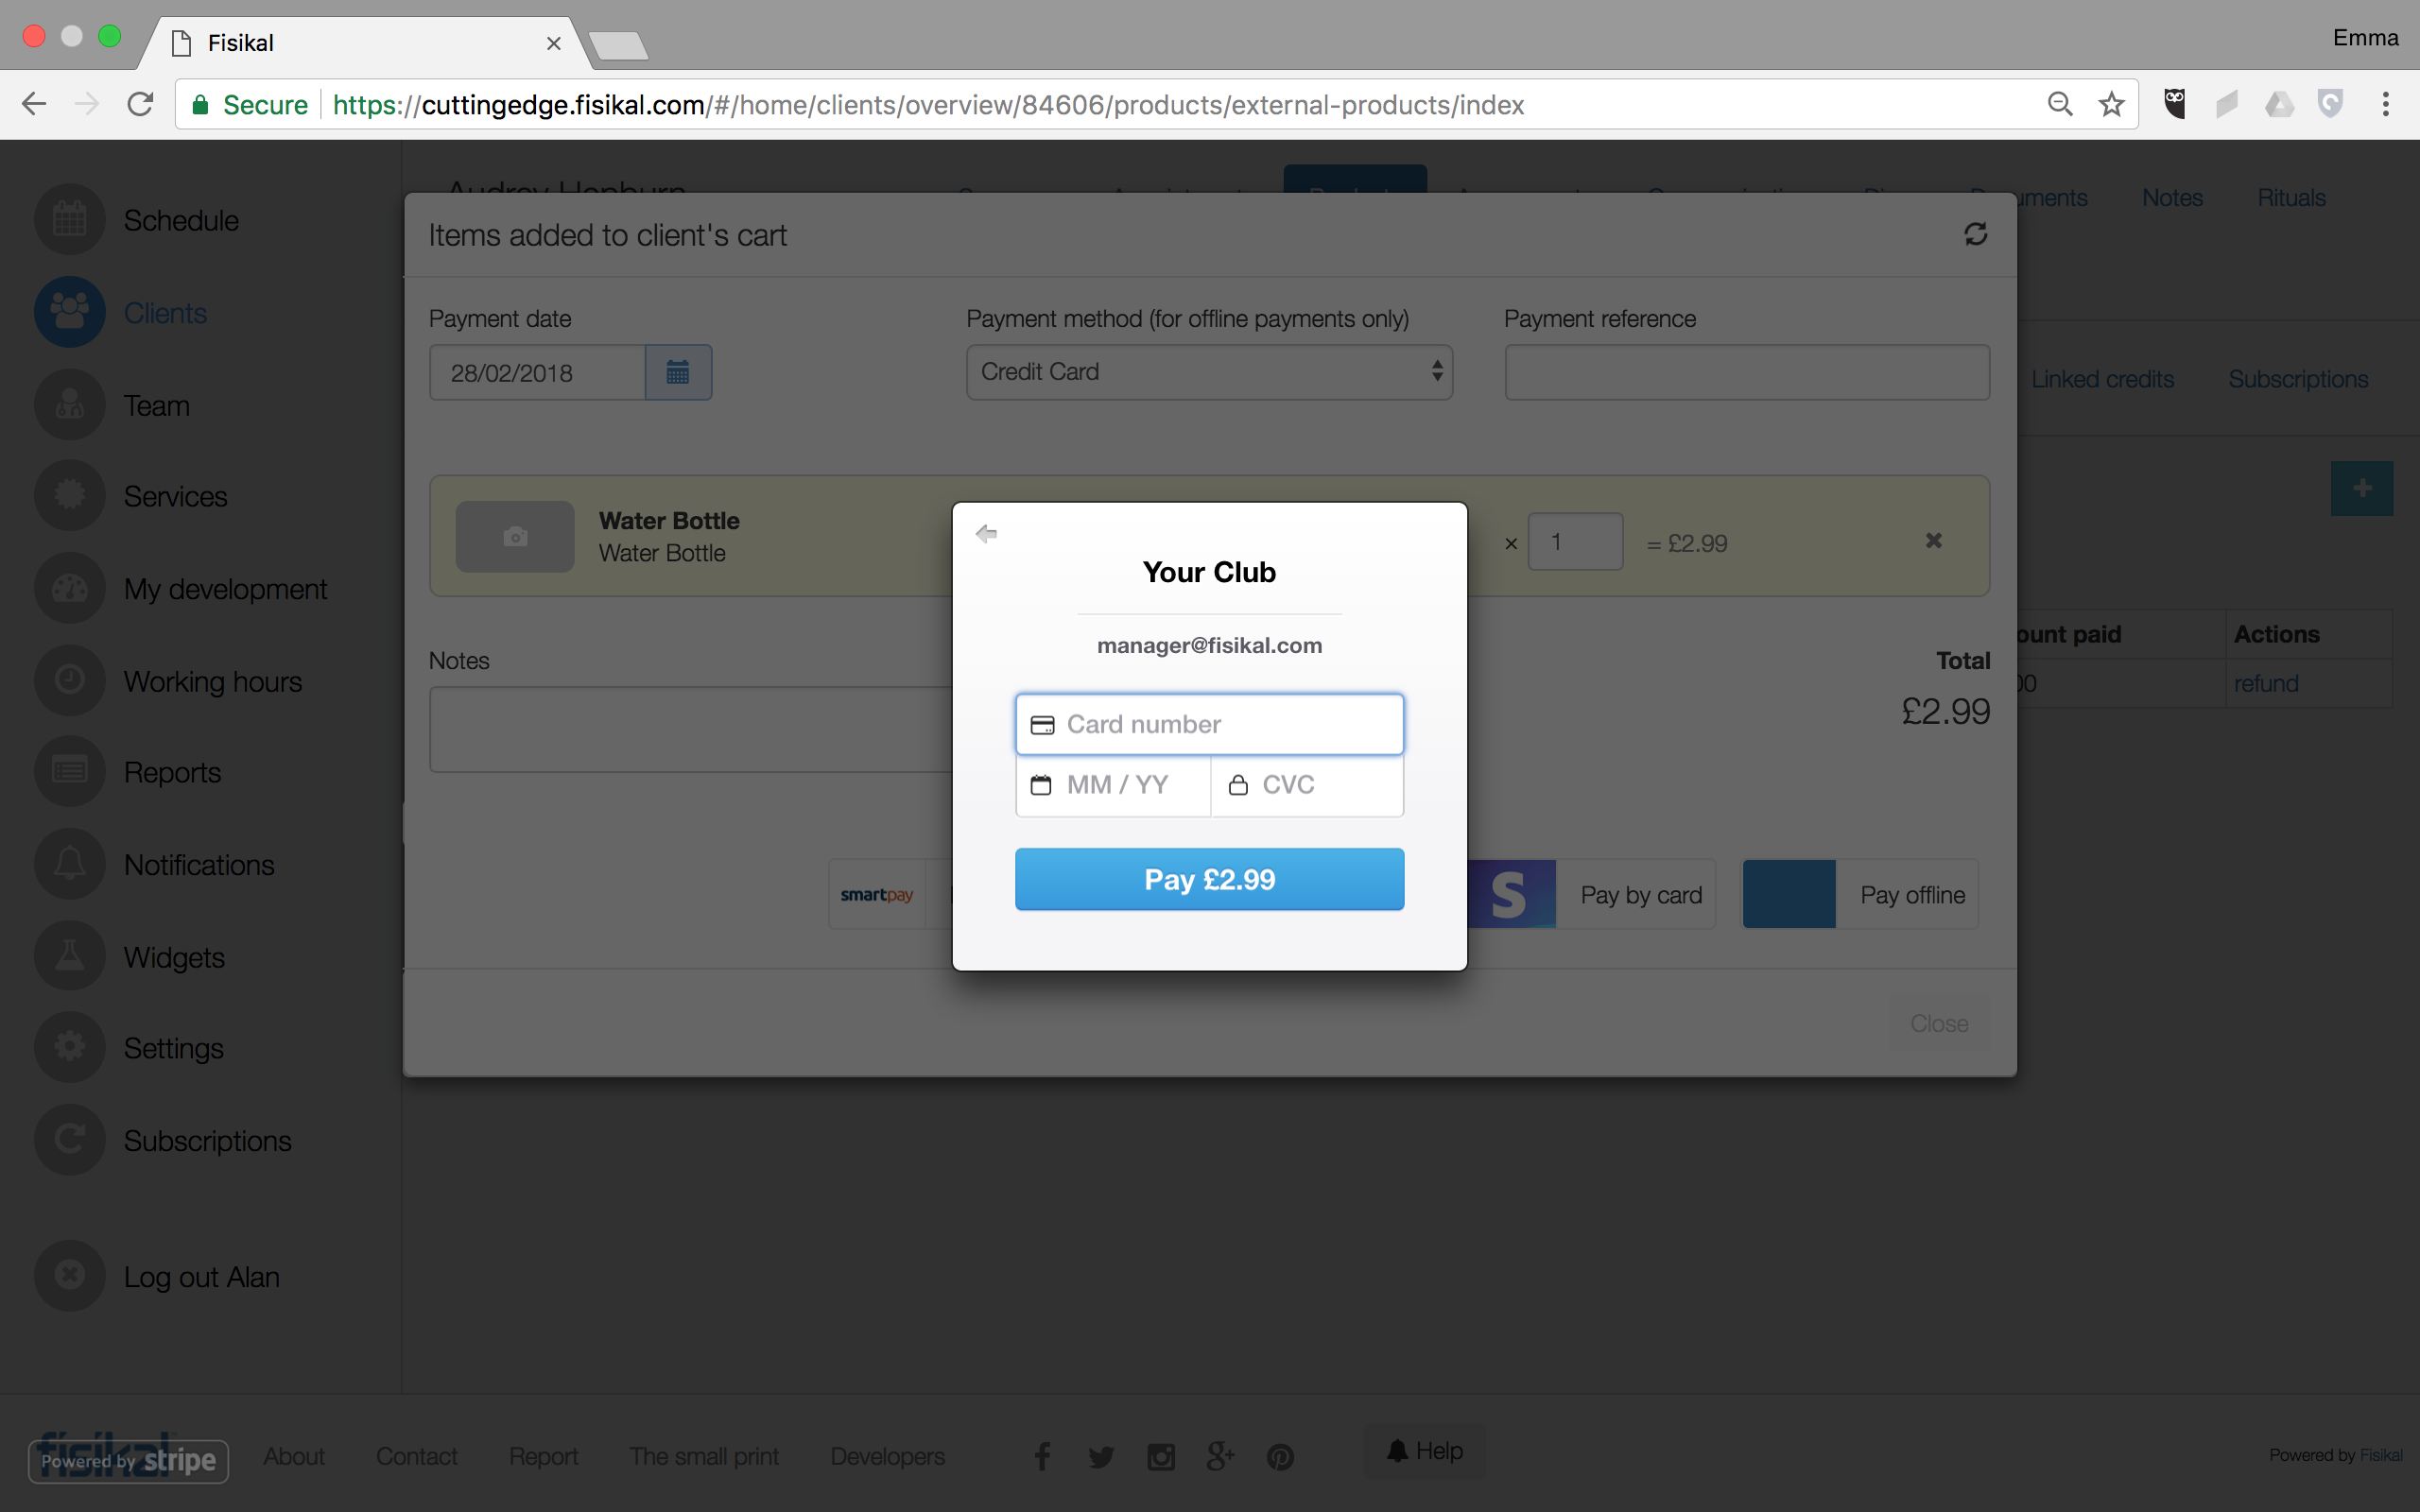
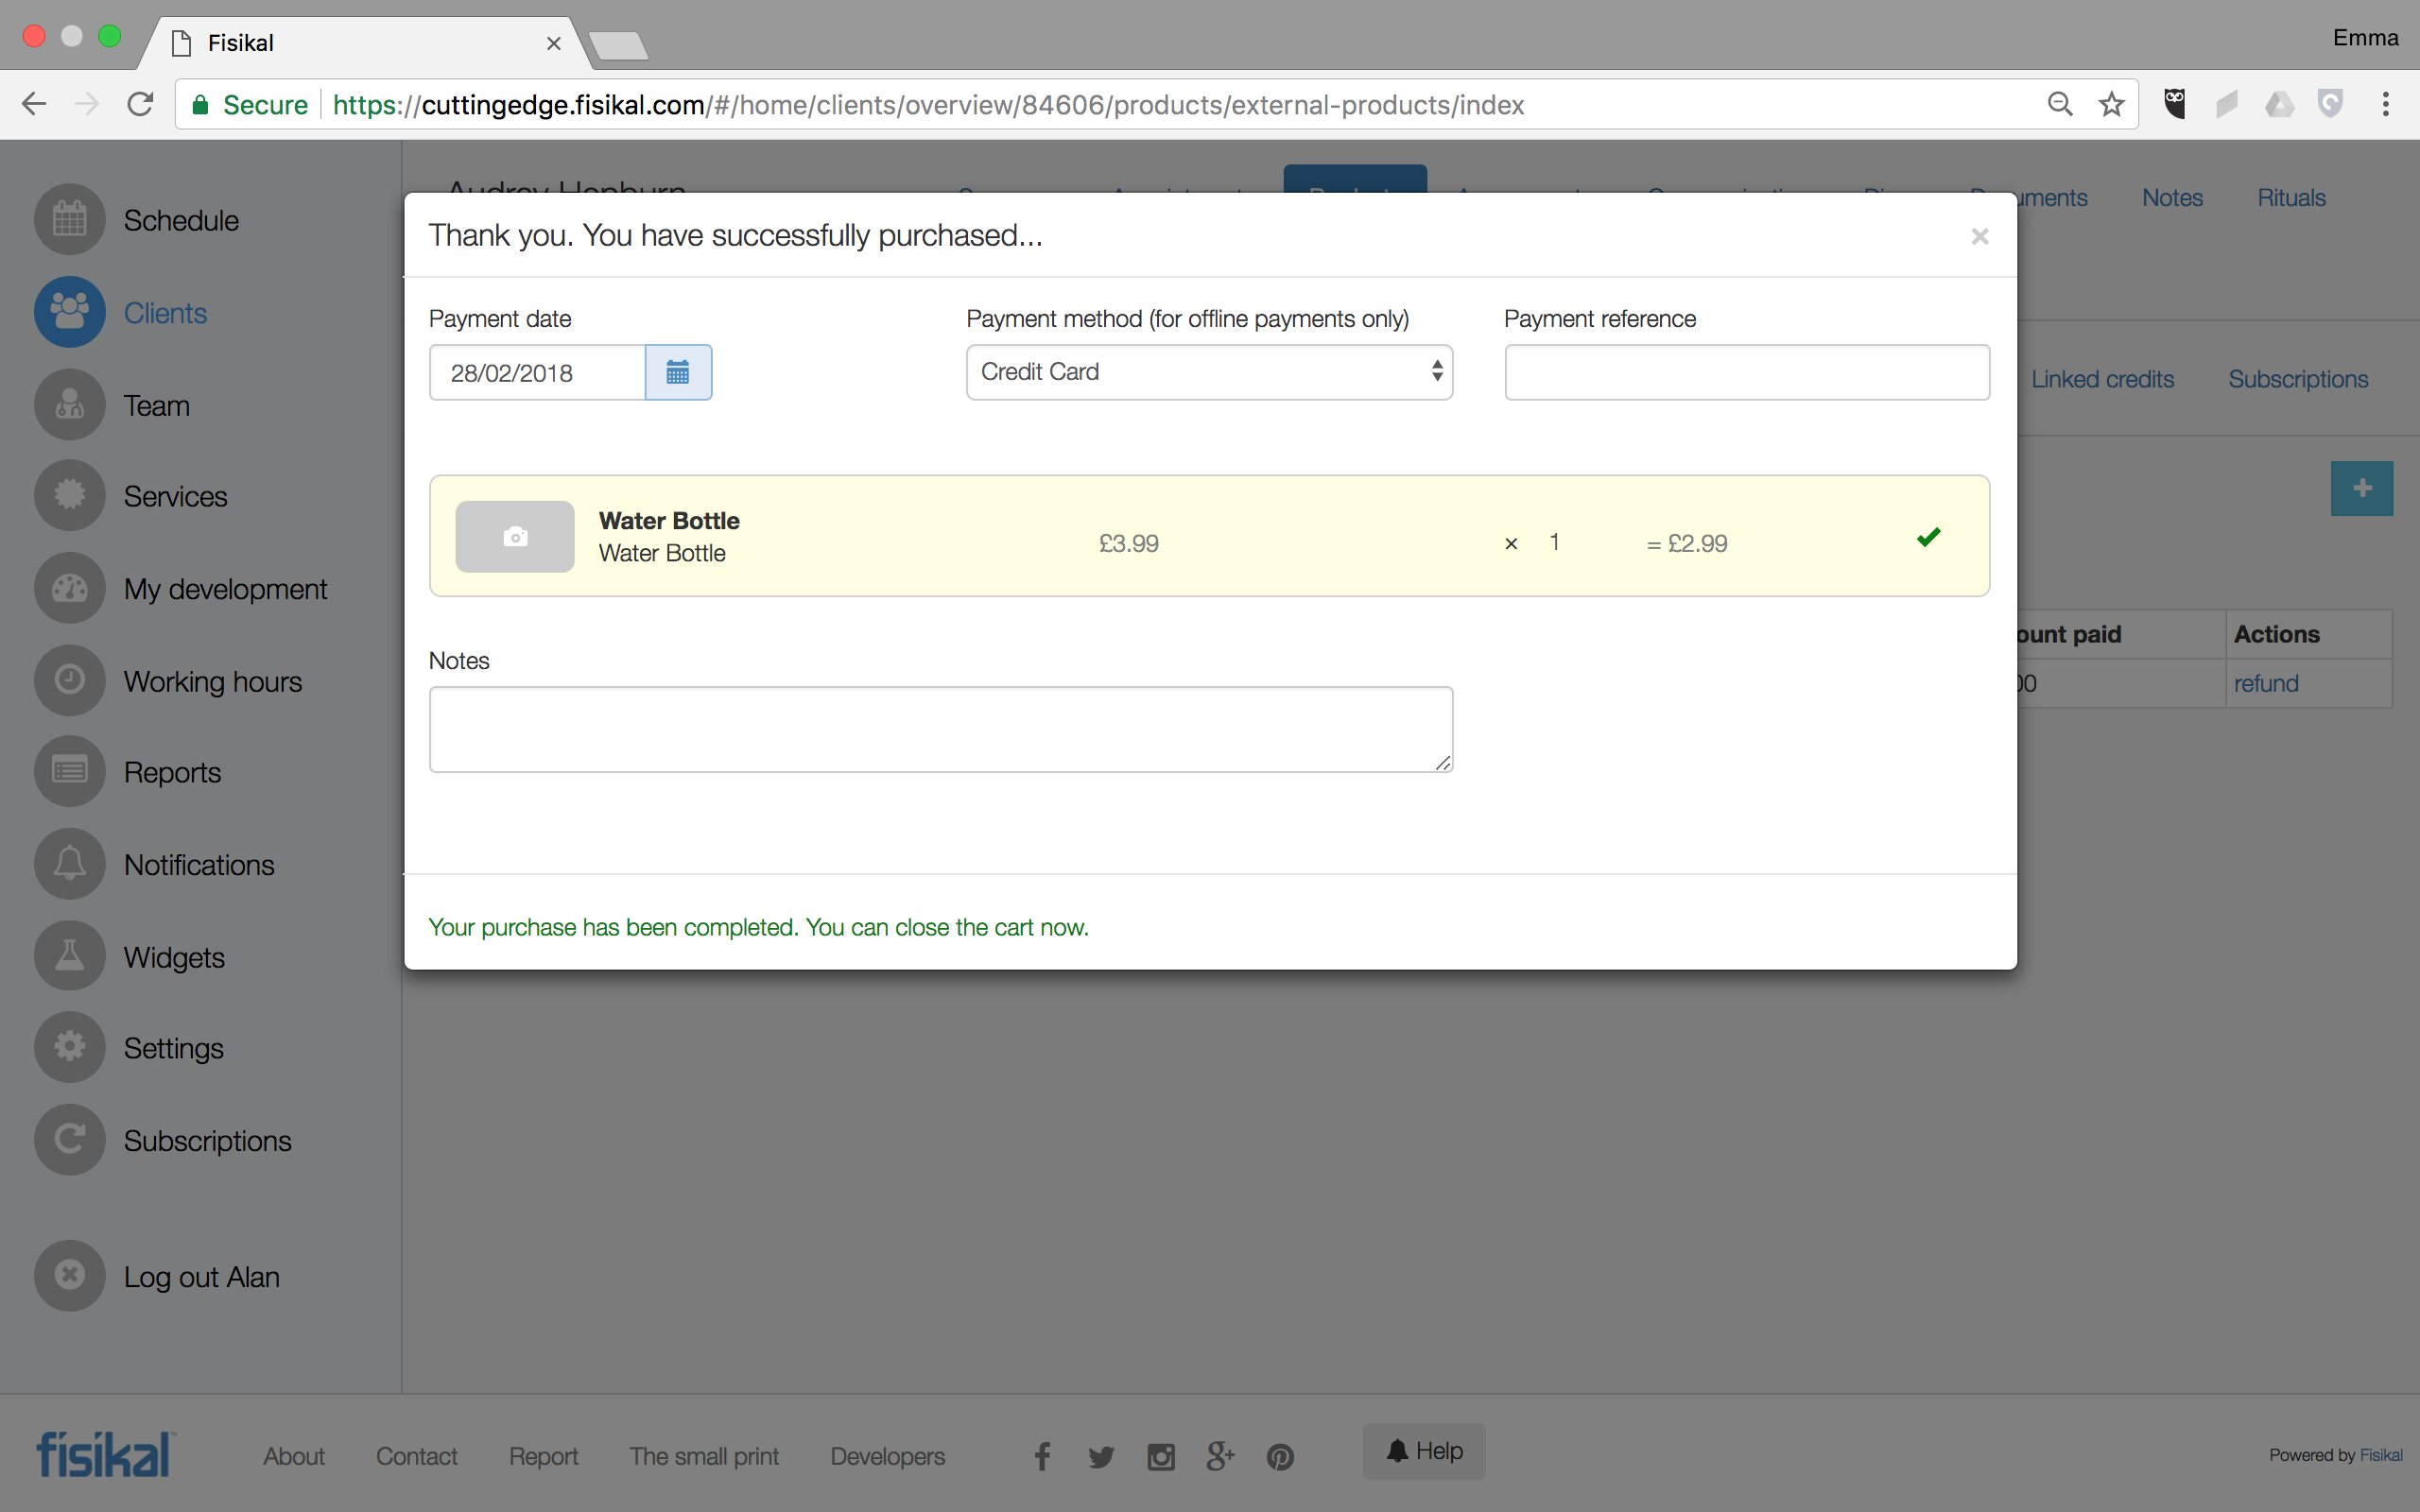
Once all the details have been correctly added the details will be verified by Stripe.com. If the payment is successful Users will Successful Purchase screen. If there were any errors with the Payment processing, Users will see these outlined on the form.
Once a Credit Card has successfully been associated to a Clients profile, Users will see an additional option on the Checkout form to show PAY WITH STORED CARD. This option only shows if the Client has a Credit Card stored on their profile.
Please note that Fisikal does not store the actual Credit Card details. Stripe.com store all Credit Card details and pass an encrypted token to Fisikal which is stored on a Clients profile.
If Users select to the PAY OFFLINE option, they will immediately see the Success Purchase screen as shown below. This option enables Users to take other forms of payment outside of the software and the payment is simply logged in the software by the User.
Once the payment has been successfully assigned in the system, Users should select the CLOSE button on the top right of the form and continue using the software as they need.
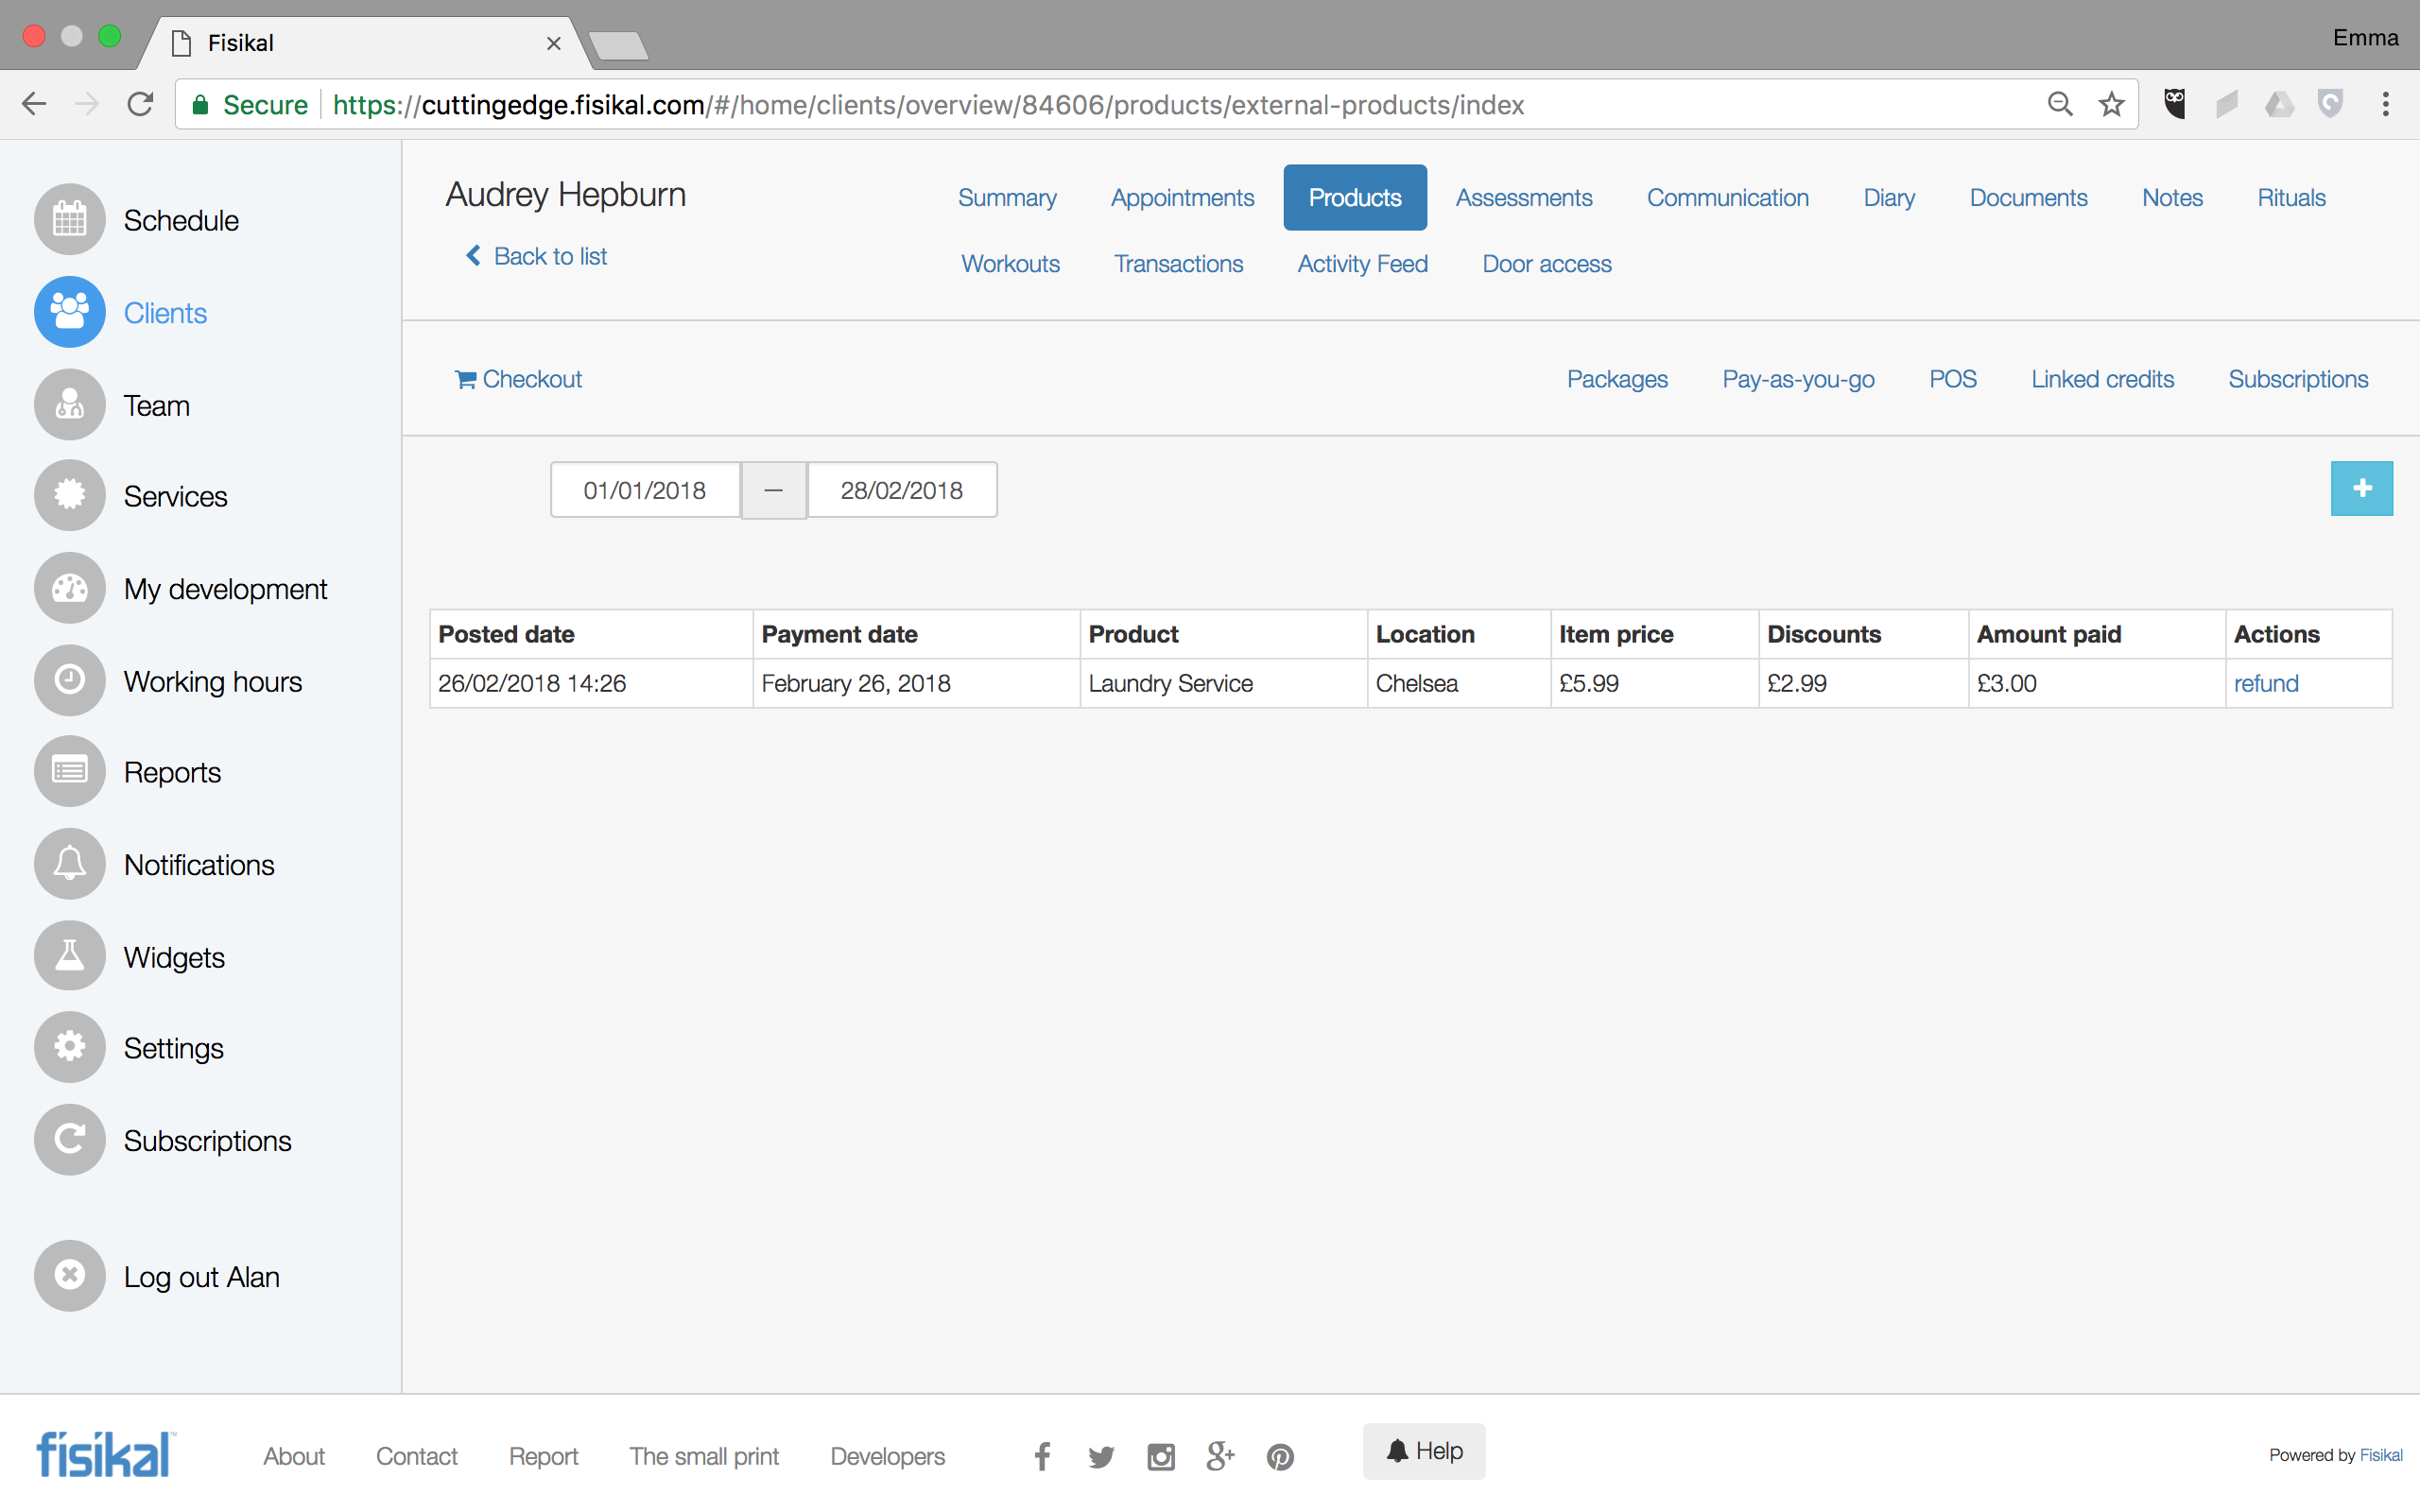
REFUNDING A POS ITEM
Users can Refund an assigned POS (Point of Sale) items to a Clients profile by navigating to the POS overview screen and selecting REFUND on the POS item. Users will be presented with a form as shown below:
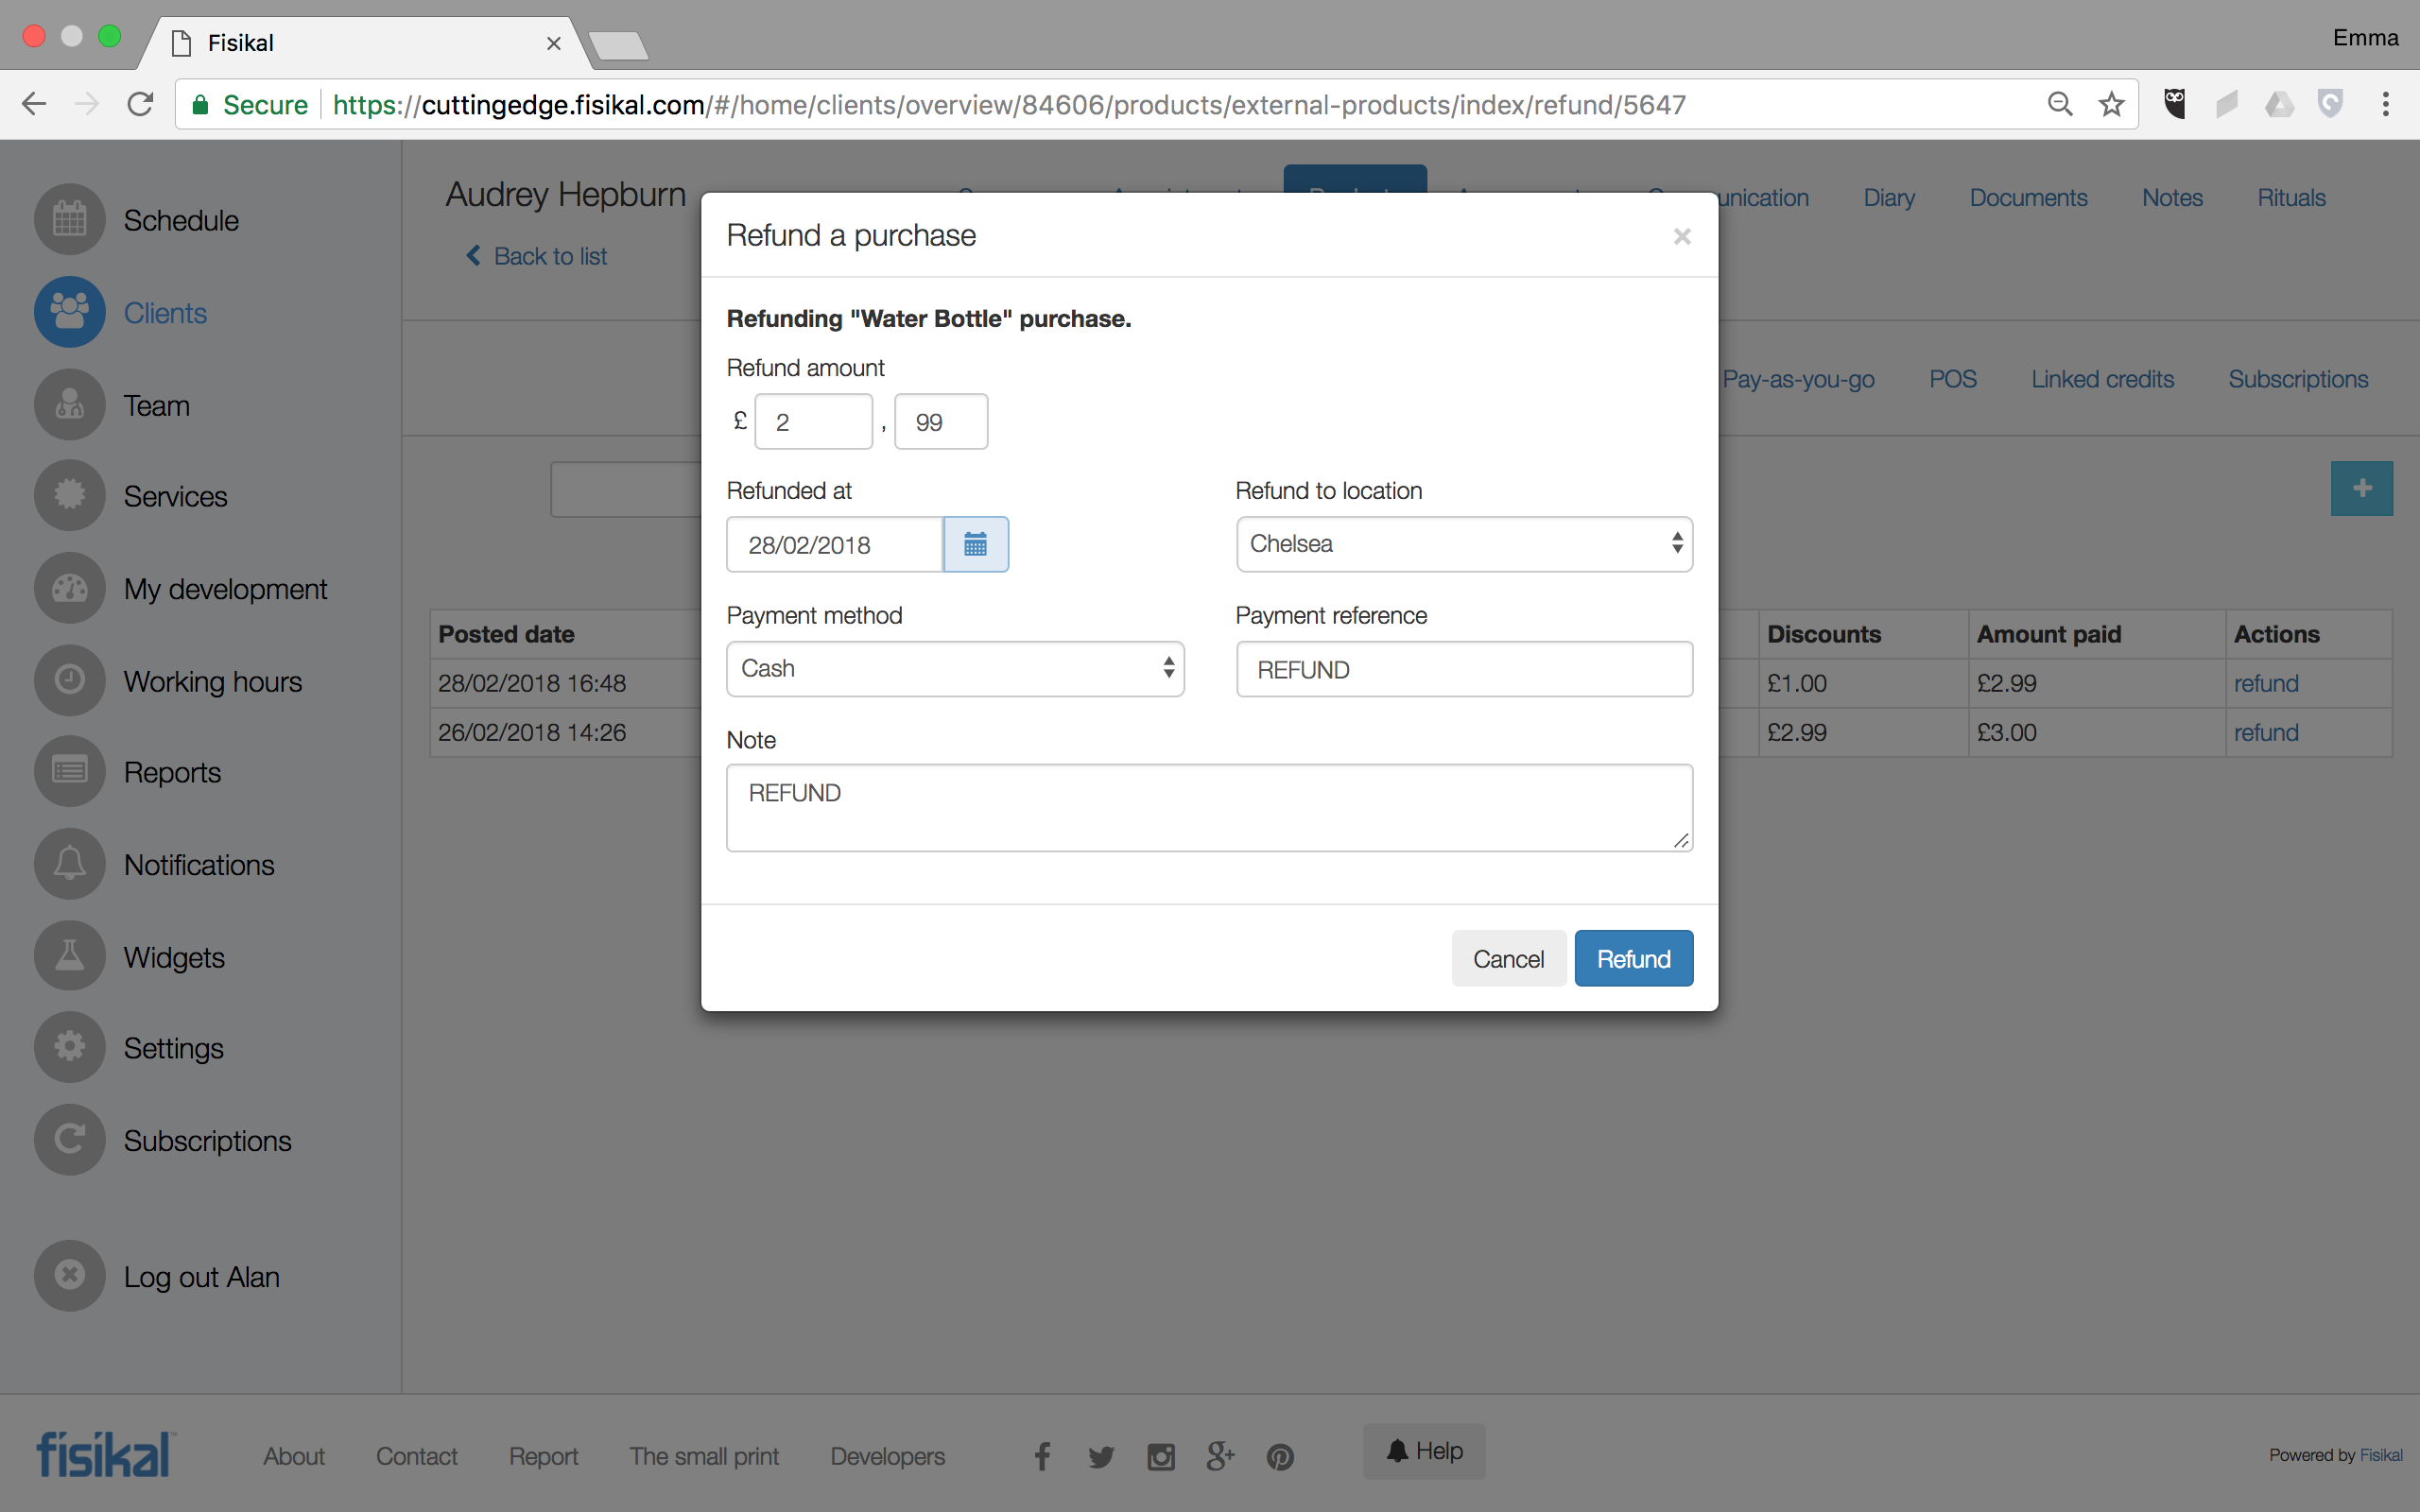
Users will see the following sections on the form:
REFUNDING "POS ITEM TITILE" PURCHASE
Users will see the title of the POS item being refunded.
REFUND AMOUNT
Users will see the full price of the POS item which can be refunded. Users can choose to Refund a different amount by adding that in the REFUND AMOUNT section.
REFUNDED AT
Users can enter a date that the Refund took place at. This information is logged in transactions and associated reports.
REFUND LOCATION
Users can enter a Location that the Refund took place at. This information is logged in transactions and associated reports.
PAYMENT METHOD
Users can enter a Payment Method to assign to the Refund. This information is logged in transactions and associated reports.
PAYMENT REFERENCE
Users can enter a Payment Reference to associate to the Refund. This information is logged in transactions and associated reports.
NOTE
Users can enter a Note to associate to the Refund. This information is logged in transactions and associated reports.
Users can complete the Refund by selecting the REFUND button or they can select the CANCEL button to stop the cancellation.
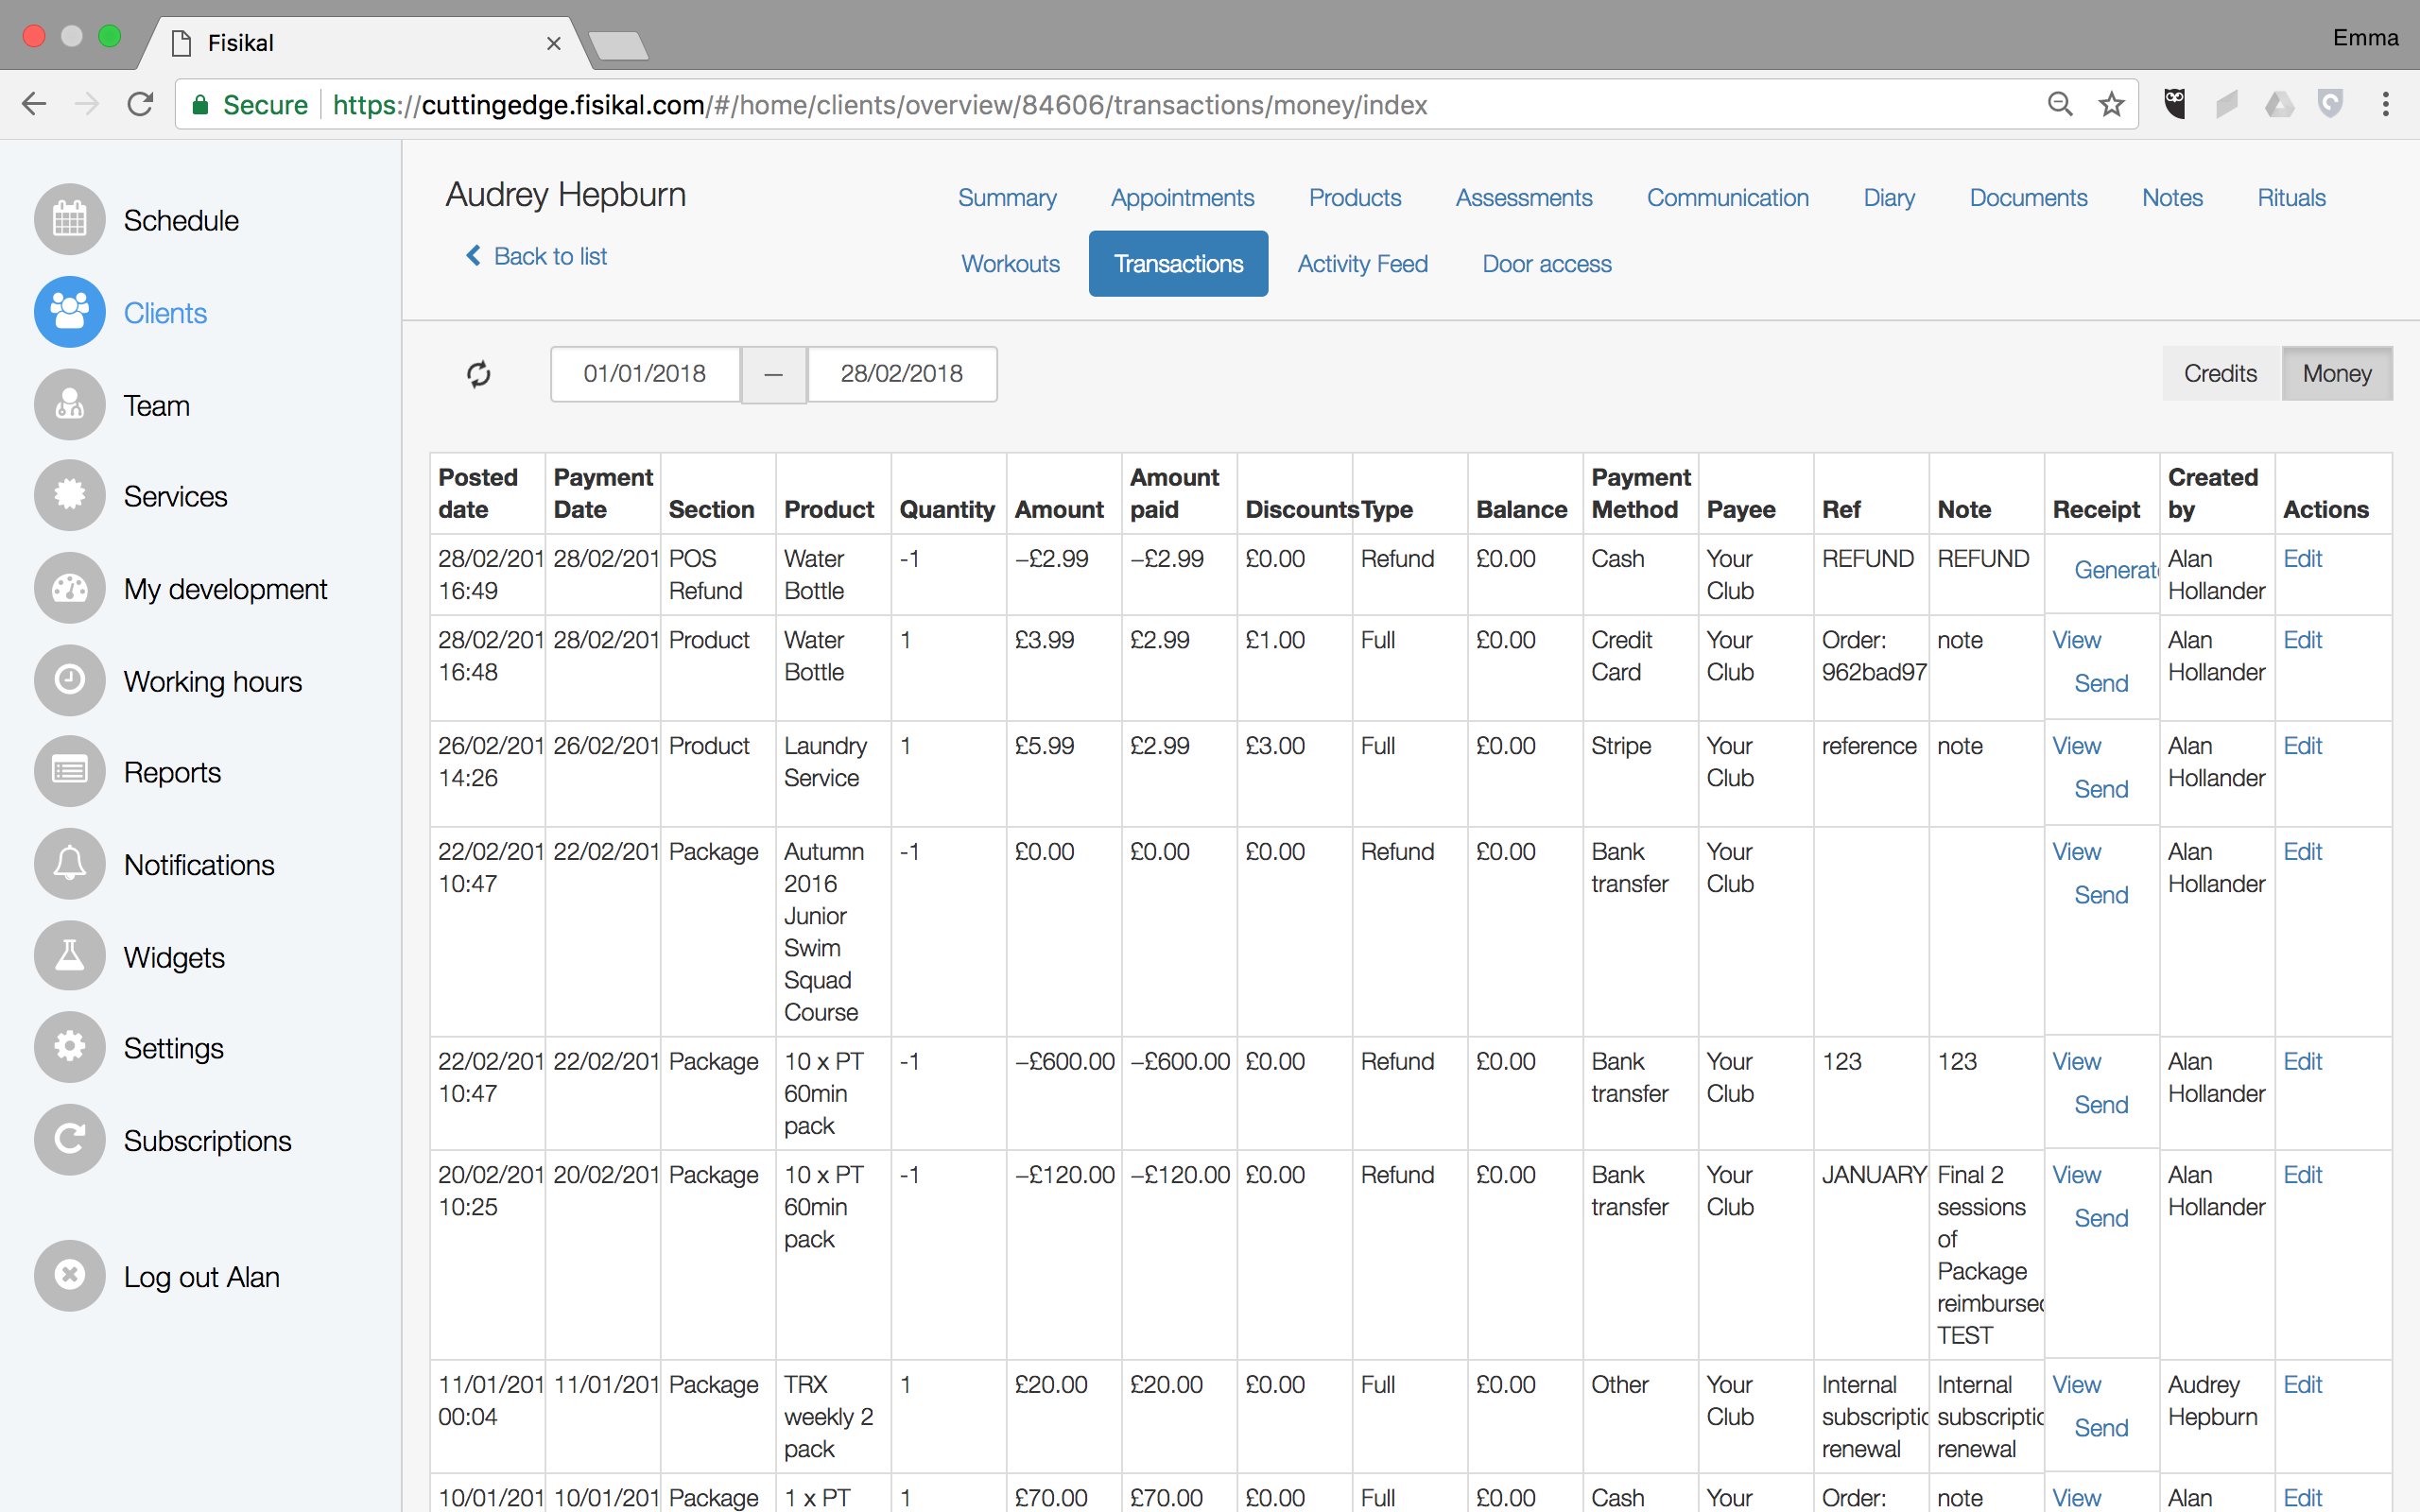
Once the Refund has been completed, the POS item will be removed from the Overview. All details of the transaction are shown on the PAYMENTS > MONEY section as shown below: