![White Logo Blue Banner copy-100.jpg]](https://knowledge.fisikal.com/hs-fs/hubfs/White%20Logo%20Blue%20Banner%20copy-100.jpg?height=50&name=White%20Logo%20Blue%20Banner%20copy-100.jpg)
CLIENT LINKING
There are some general rules about Linked Clients which are important to understand. The following example will show how this logic works.
Bing Crosby is the Lead Client for Audrey Hepburn and Frank Sinatra. As these three Clients are all linked together, Bing as Lead and Audrey and Frank as Linked to Bing. Bing cannot be anything other than a lead to Audrey and Frank (ie he cannot be linked to them other than being linked as Lead). Audrey and Frank are not Linked to each other, they are only Linked to Bing.
Bing can be Linked to another Client such as James Dean, and can also be a Lead Client for other Clients should he need to be.
LEAD CLIENT
A Lead Client is a Client that is directly associated to a specific Client and if effectively in charge of what the other linked Clients can do beneath them. A Lead Client can define:
- If a Linked Client can purchase Packages on behalf of the Lead Client
- If a Linked Client can make Bookings on behalf of the Lead Client
LINKED CLIENTS
A Linked Client is a Client that is directly associated to a specific Lead Client and can only make bookings on behalf of the Lead Client if the Lead Client has configured the Linked Client to be able to do so.
LINKING CLIENTS
In order to link Clients together, Users with the relevant permissions should go to the Clients Overview page and enter or select the Client they wish to set as the LEAD CLIENT.
When on the Client Summary page, Users should select the EDIT button on the Clients Profile section. On the EDIT form, Users should scroll to the LINKED CLIENTS section of the form.
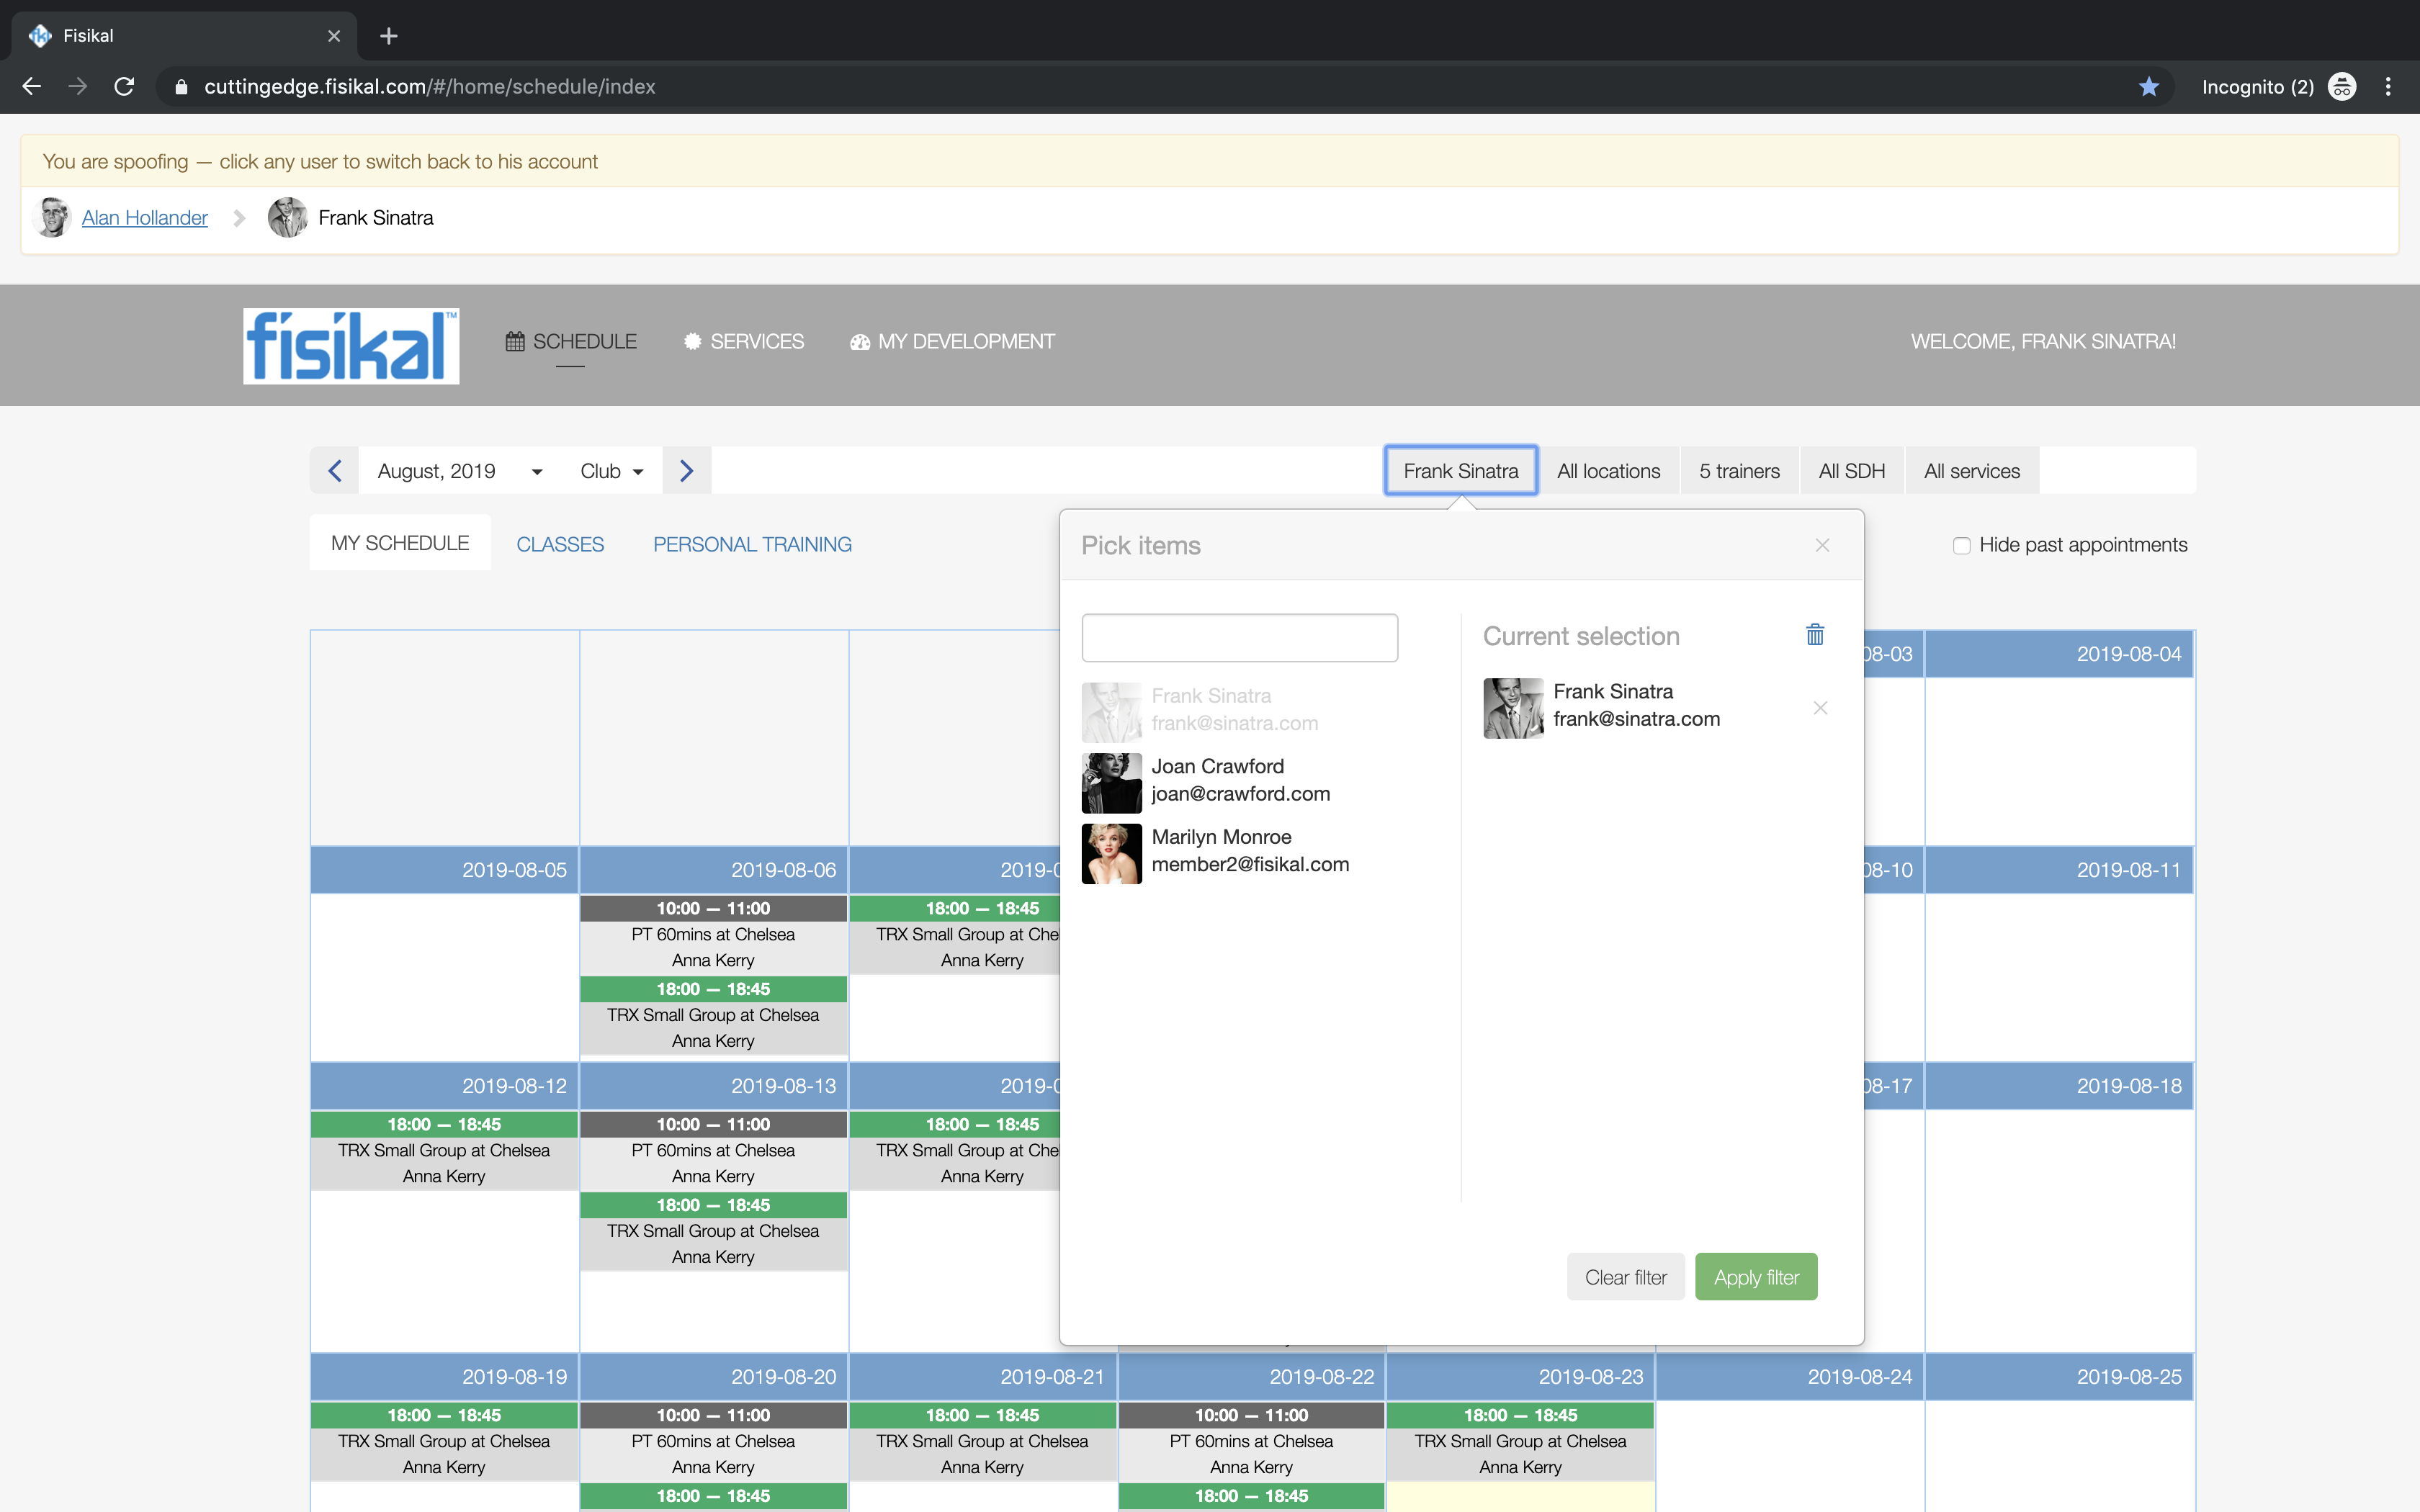
Users should select the LEAD button and then select the name of the Client they wish to associate to the Lead Client. If multiple Clients are associated to the Lead Client, the form will just show [x] Clients in the LINKED CLIENTS section as shown below:
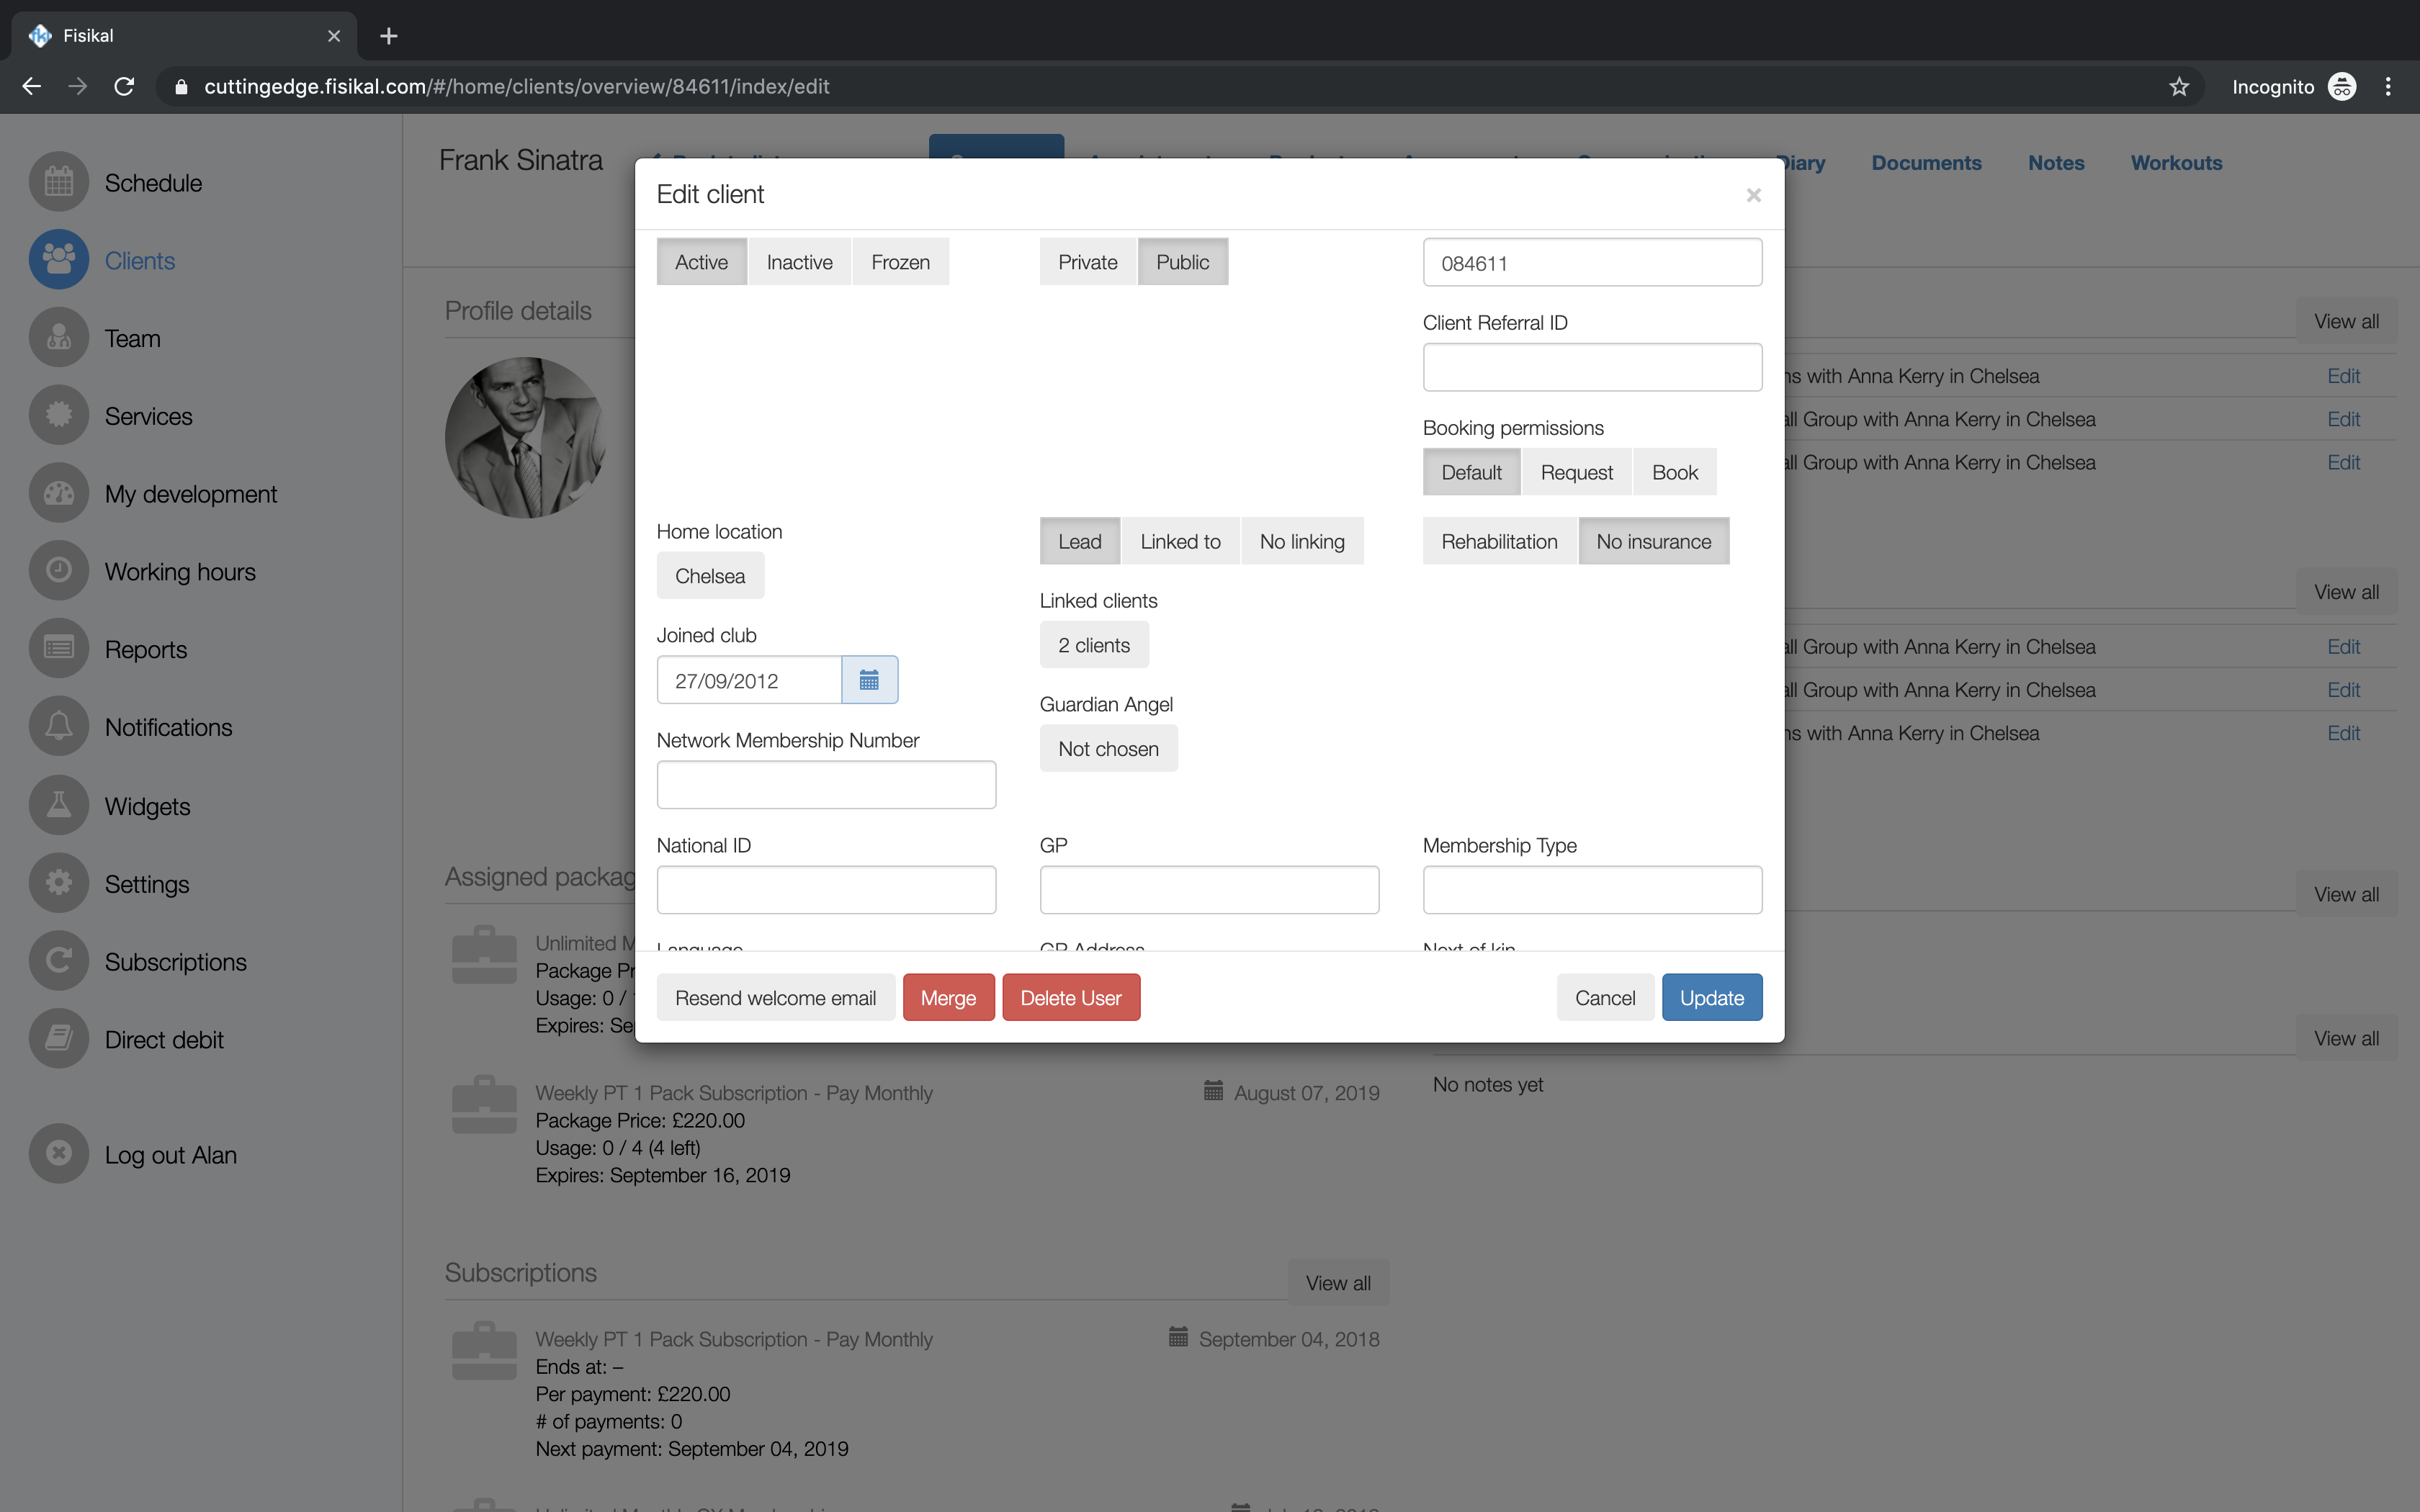
Once the linkage has been created, Users should select the UPDATE button to create the linkages between the Clients.
EDITING CLIENT LINKAGE
Users can edit the Client Linkage in the software by either removing the Linked Client from the Lead Clients' profile, or by removing the linkage from the Linked Clients' profile.
To remove the linkage from the Linked Clients' profile, Users should go to the Clients Overview page, enter or select the Client name of the Linked Client to land on the Summary page of the Linked Client. On this page, Users should select the EDIT button on the Profile section to show the following form.
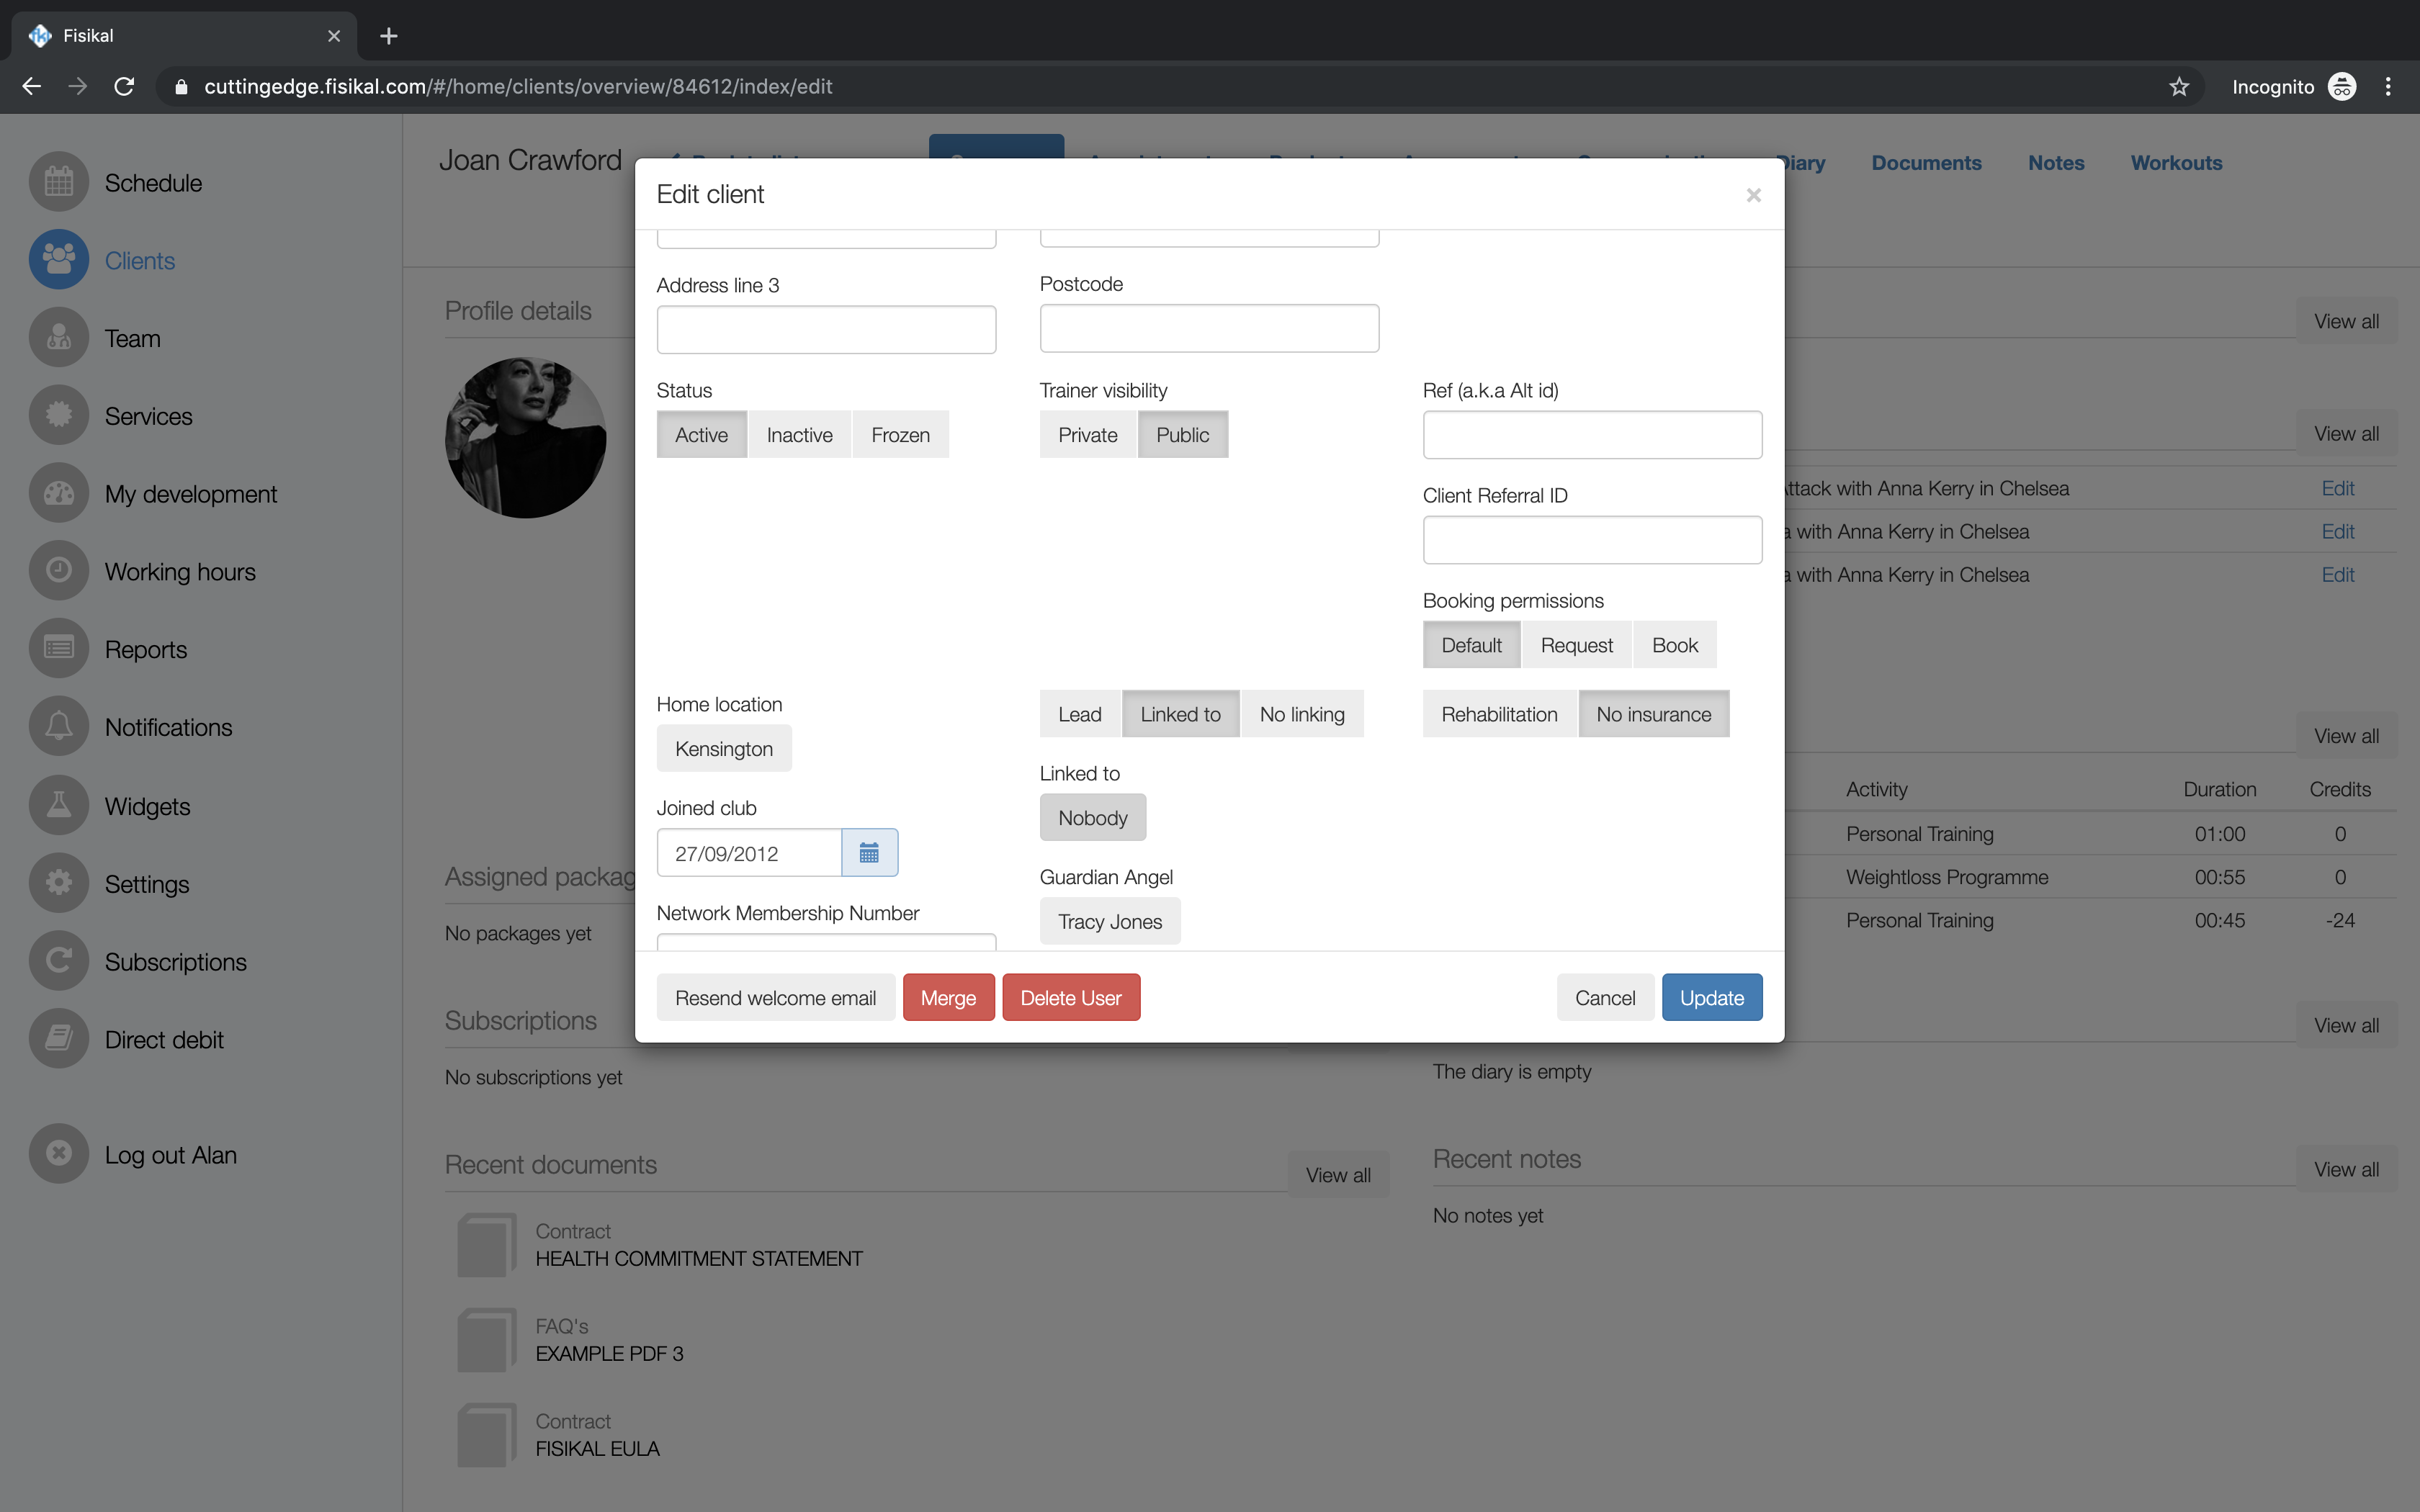
Users should select the LINKED TO button and clear the filter to remove the linkage to the Lead Client. Users should select UPDATE to complete the linkage removal and to save the changes.
CONFIGURING LINKED CLIENT PERMISSION
Lead Clients can configure what their linked Clients can do on their behalf. In order to do this Users can either Spoof as the Client or Clients can log in to their member portal to make these changes. Providing the Club has configured Clients to be able to view the PERMISSIONS section of the portal, Clients can navigate to this section of the portal by going to SETTINGS > PERMISSIONS and view the following options:
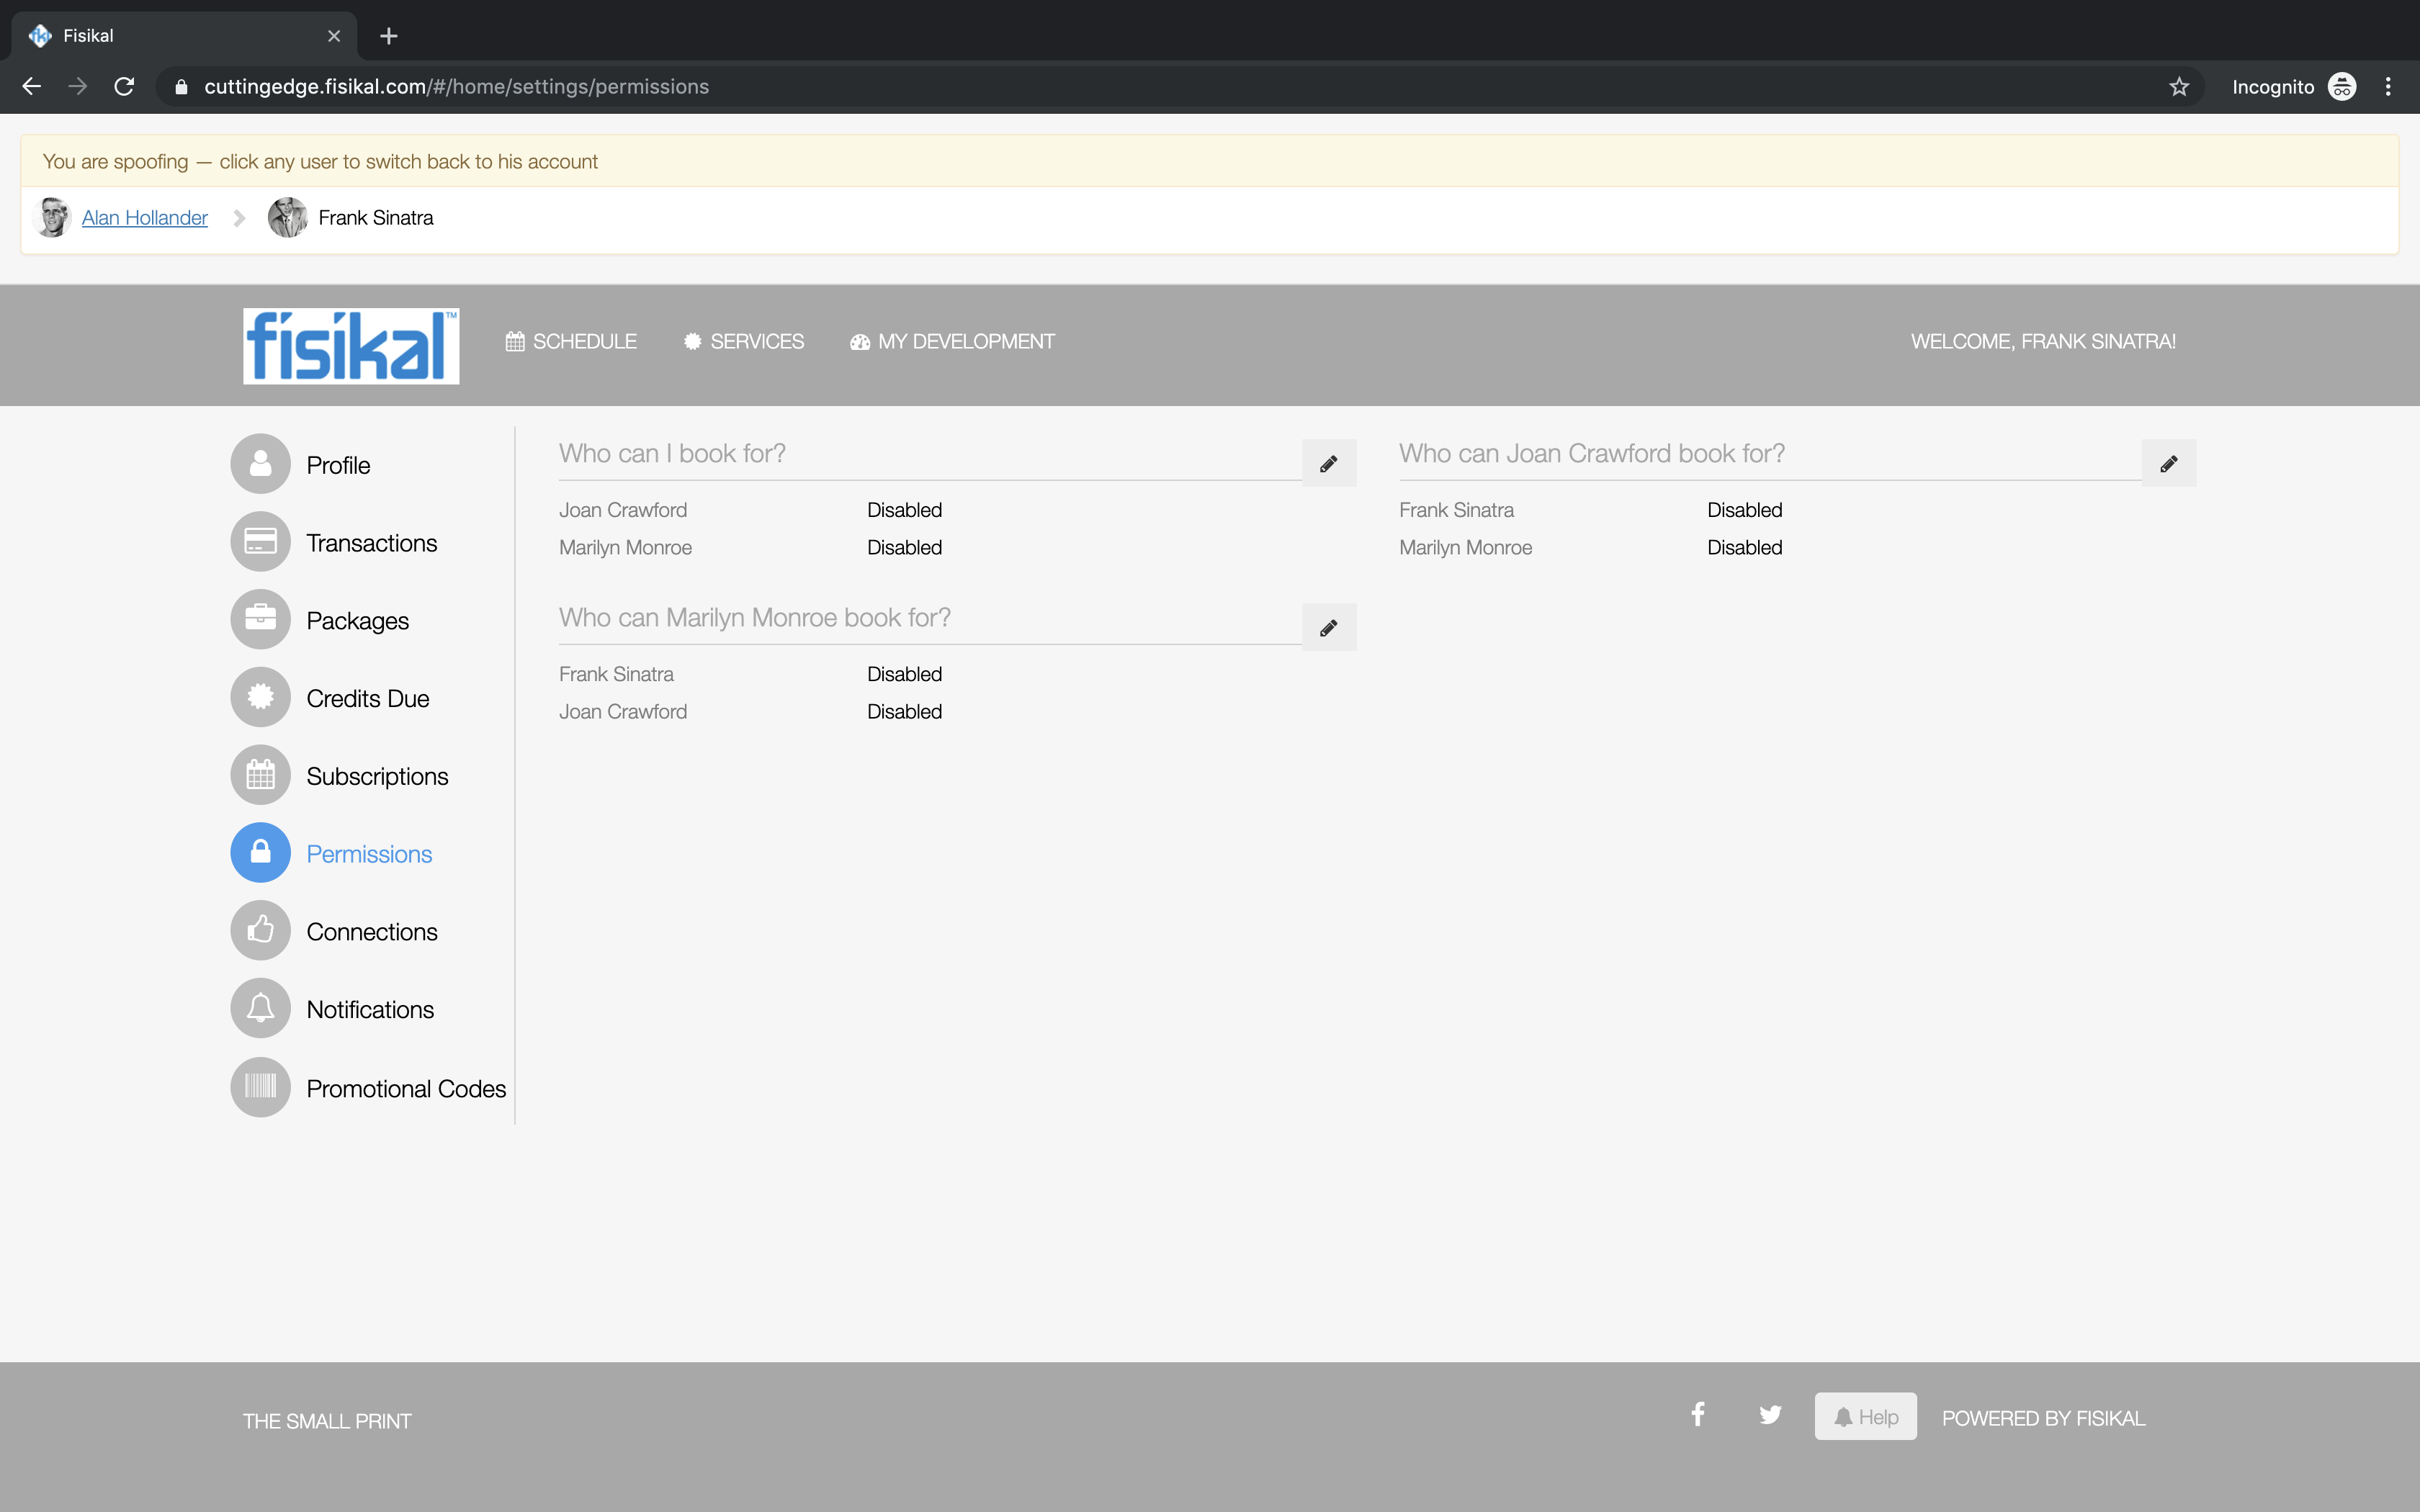
WHO CAN I BOOK FOR?
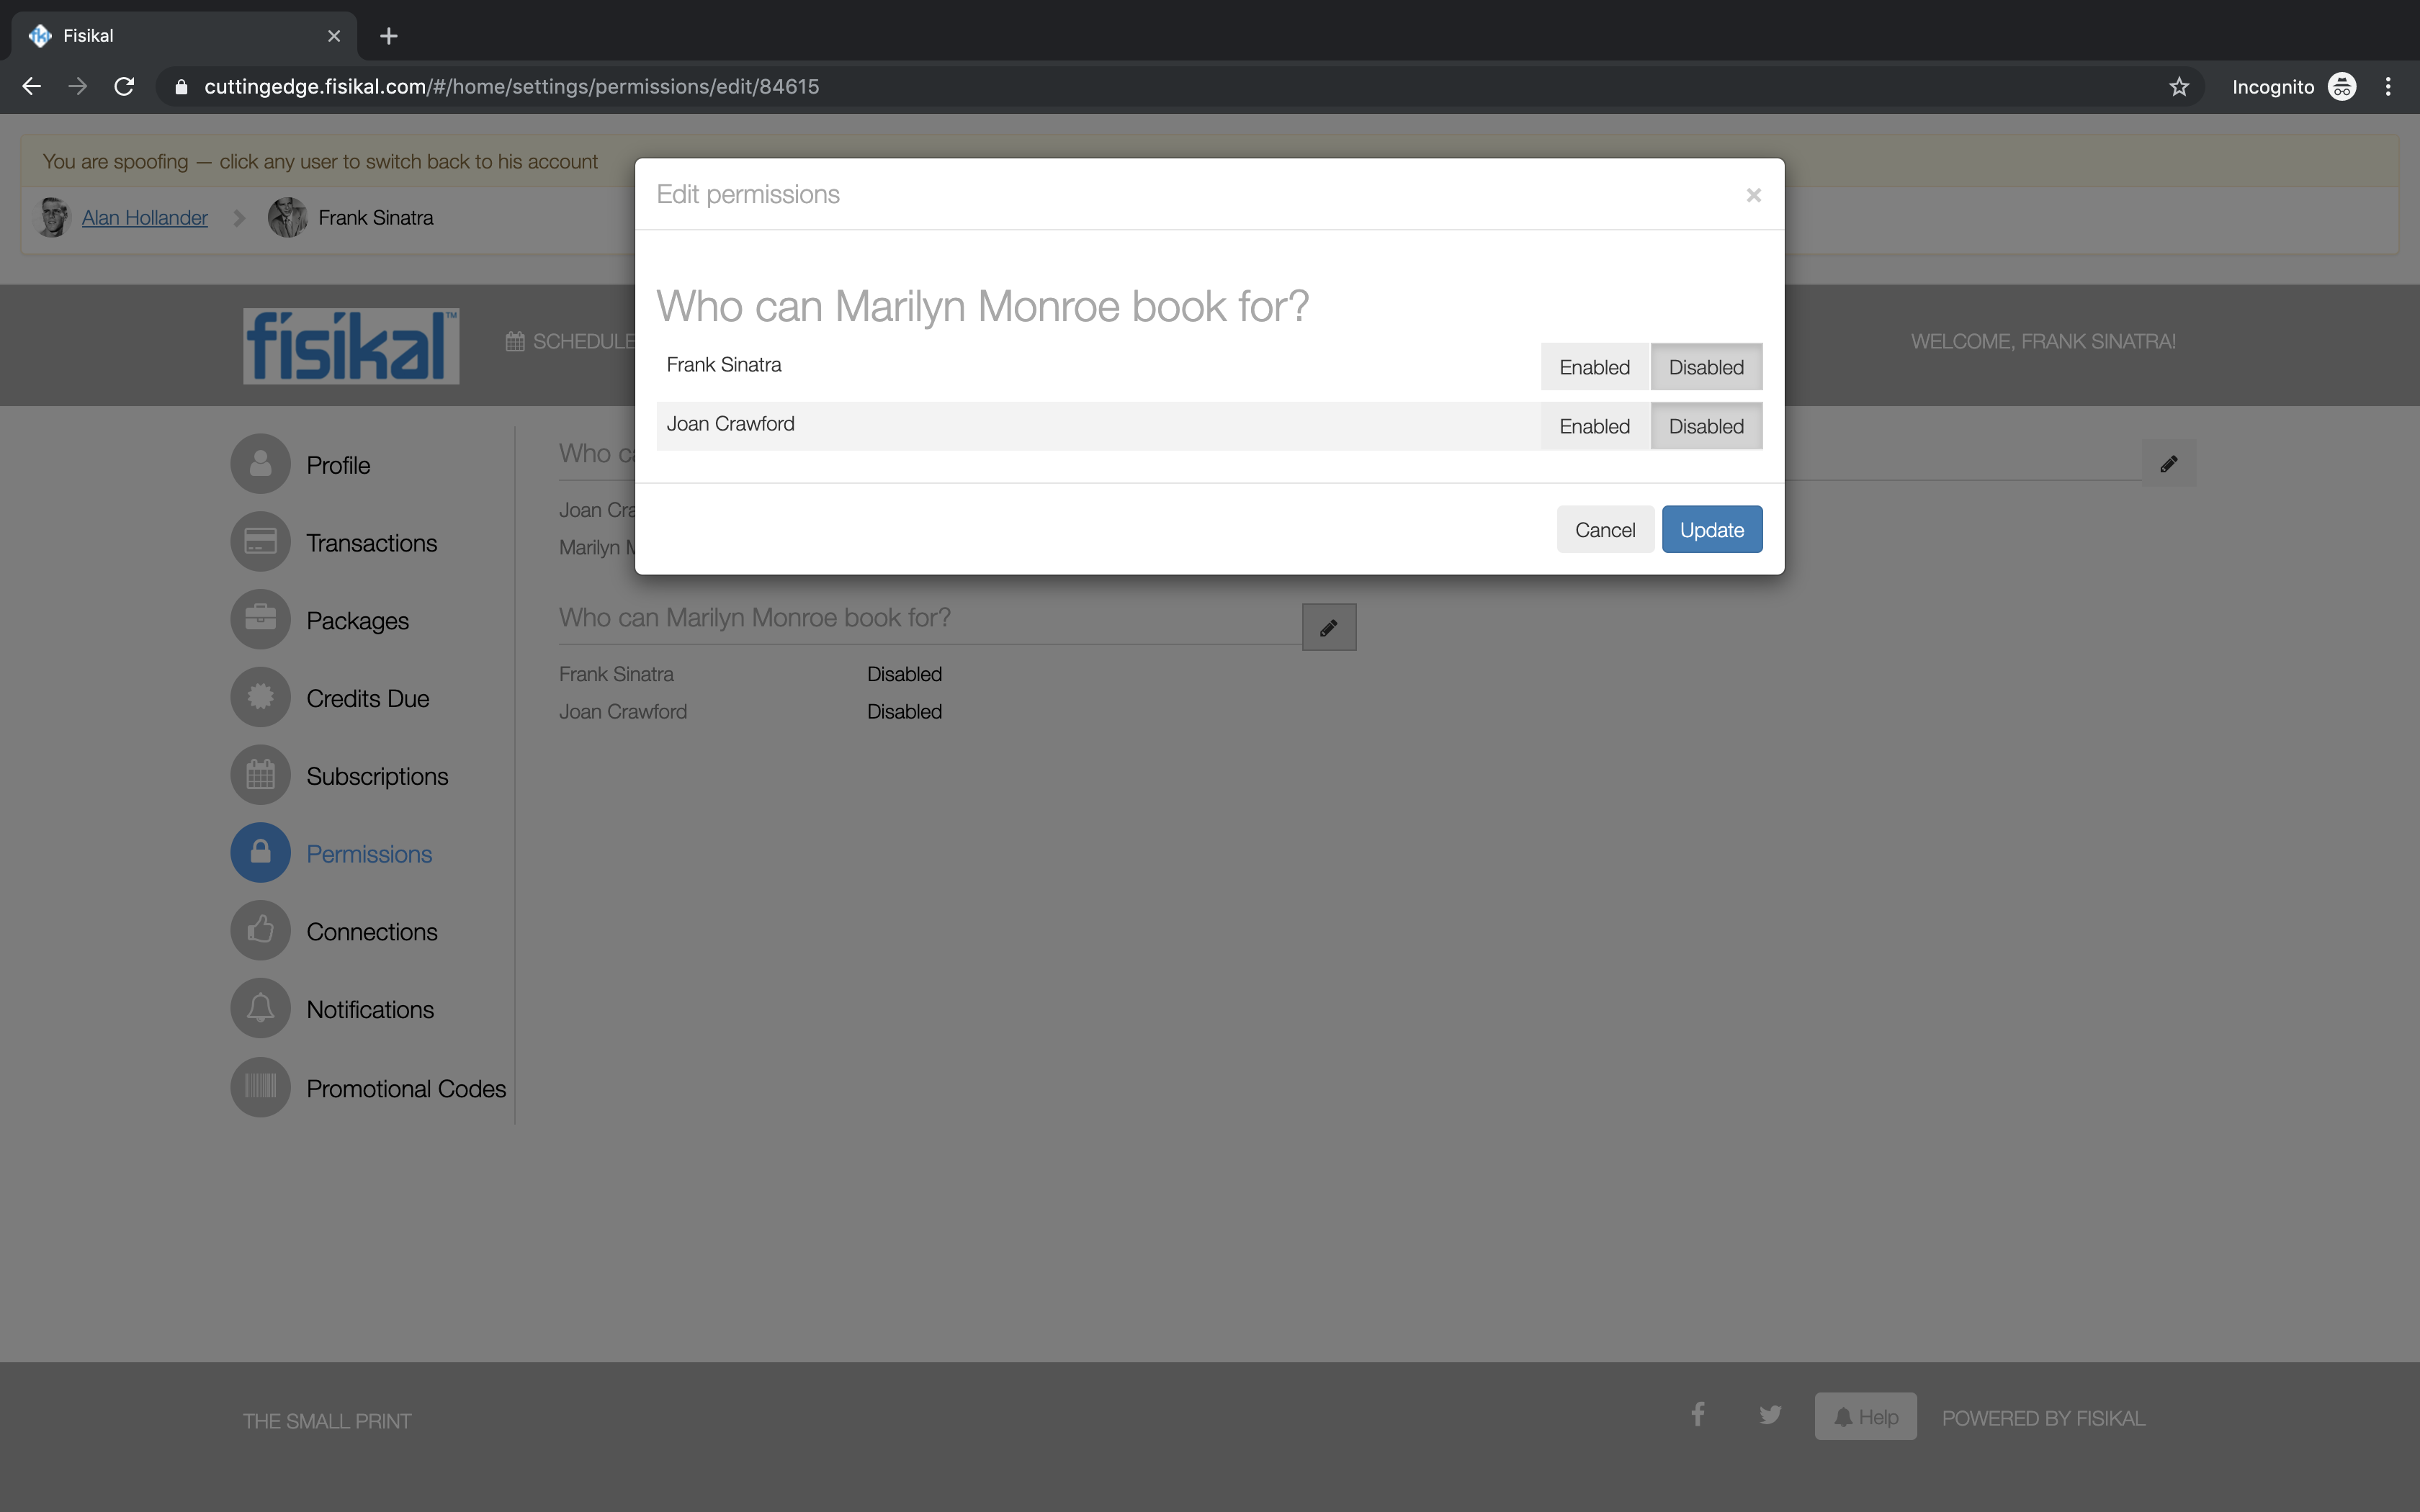
This option allows the Lead Client to manage which specific Linked Clients they want to be able to book for. To manage these permissions Users should select the EDIT button and they will see the form where they can select ENABLE or DISABLE for Linked Clients.

WHO CAN [LINKED CLIENT NAME] BOOK FOR?
This option allows the Lead Client to set the booking permissions for a specific Linked Client so that the Linked Client can make bookings on behalf of the others that are linked. Lead Clients can configure these permissions for each Linked Client that they are the Lead Client for.
Once booking permissions have been configured Users should select UPDATE to save the changes to the form.
BOOKING FOR LINKED CLIENTS
Once the booking permissions have been enabled by the Lead Client for all Linked Clients and themselves, Clients can then make bookings on behalf of all Clients linked together. To do this Clients should navigate to the Schedule and they will see the BURGER icon (three stacked horizontal lines) shown in blue on the Schedule. This booking burger button is only shown when Clients have permission to book for other Linked Clients.

To make a booking on the web for a Linked Clients, Clients should select the booking burger button which will show a list of the Linked Clients that this Client has permission to make bookings on behalf of. Clients should simply select JOIN like they would for their own booking. The booking will be made to validate the usual booking permissions as configured by the Club for this specific Service.
To make a booking via an app for a Linked Client, Clients should select their initials on the right hand-side of the footer menu to show a Client selector. Once the Linked Client has been selected, the Client can then make a booking on behalf of the other Client.
The flow may vary for this depending on the type of booking the Client wants to make for the Linked Client as the Timetable and Trainer booking flows are quite different with the Member app platform. Whenever the Clients initials are displayed on the footer menu and booking permissions have been configured as Enabled for Linked Client bookings, Clients will be able to select their initials to show the Linked Client selector box. Once selected, Clients can then make Class, Service or Trainer bookings as outlined below.

Once a booking has been successfully made, Clients can go to MY SCHEDULE on the web and filter the Schedule by the name of the linked Clients to view and manage these bookings.
Once a booking has been successfully made, Clients can go to MY BOOKINGs on the app and filter the Schedule by the name of the linked Clients to view and manage these bookings as shown below.

BUYING PACKAGES FOR LINKED CLIENTS
This functionality is only available for the Lead Client to do and Linked Clients cannot purchase for other Linked Clients or the Lead Client. Lead Clients can purchase for Linked Clients on the web and also in the Member app.
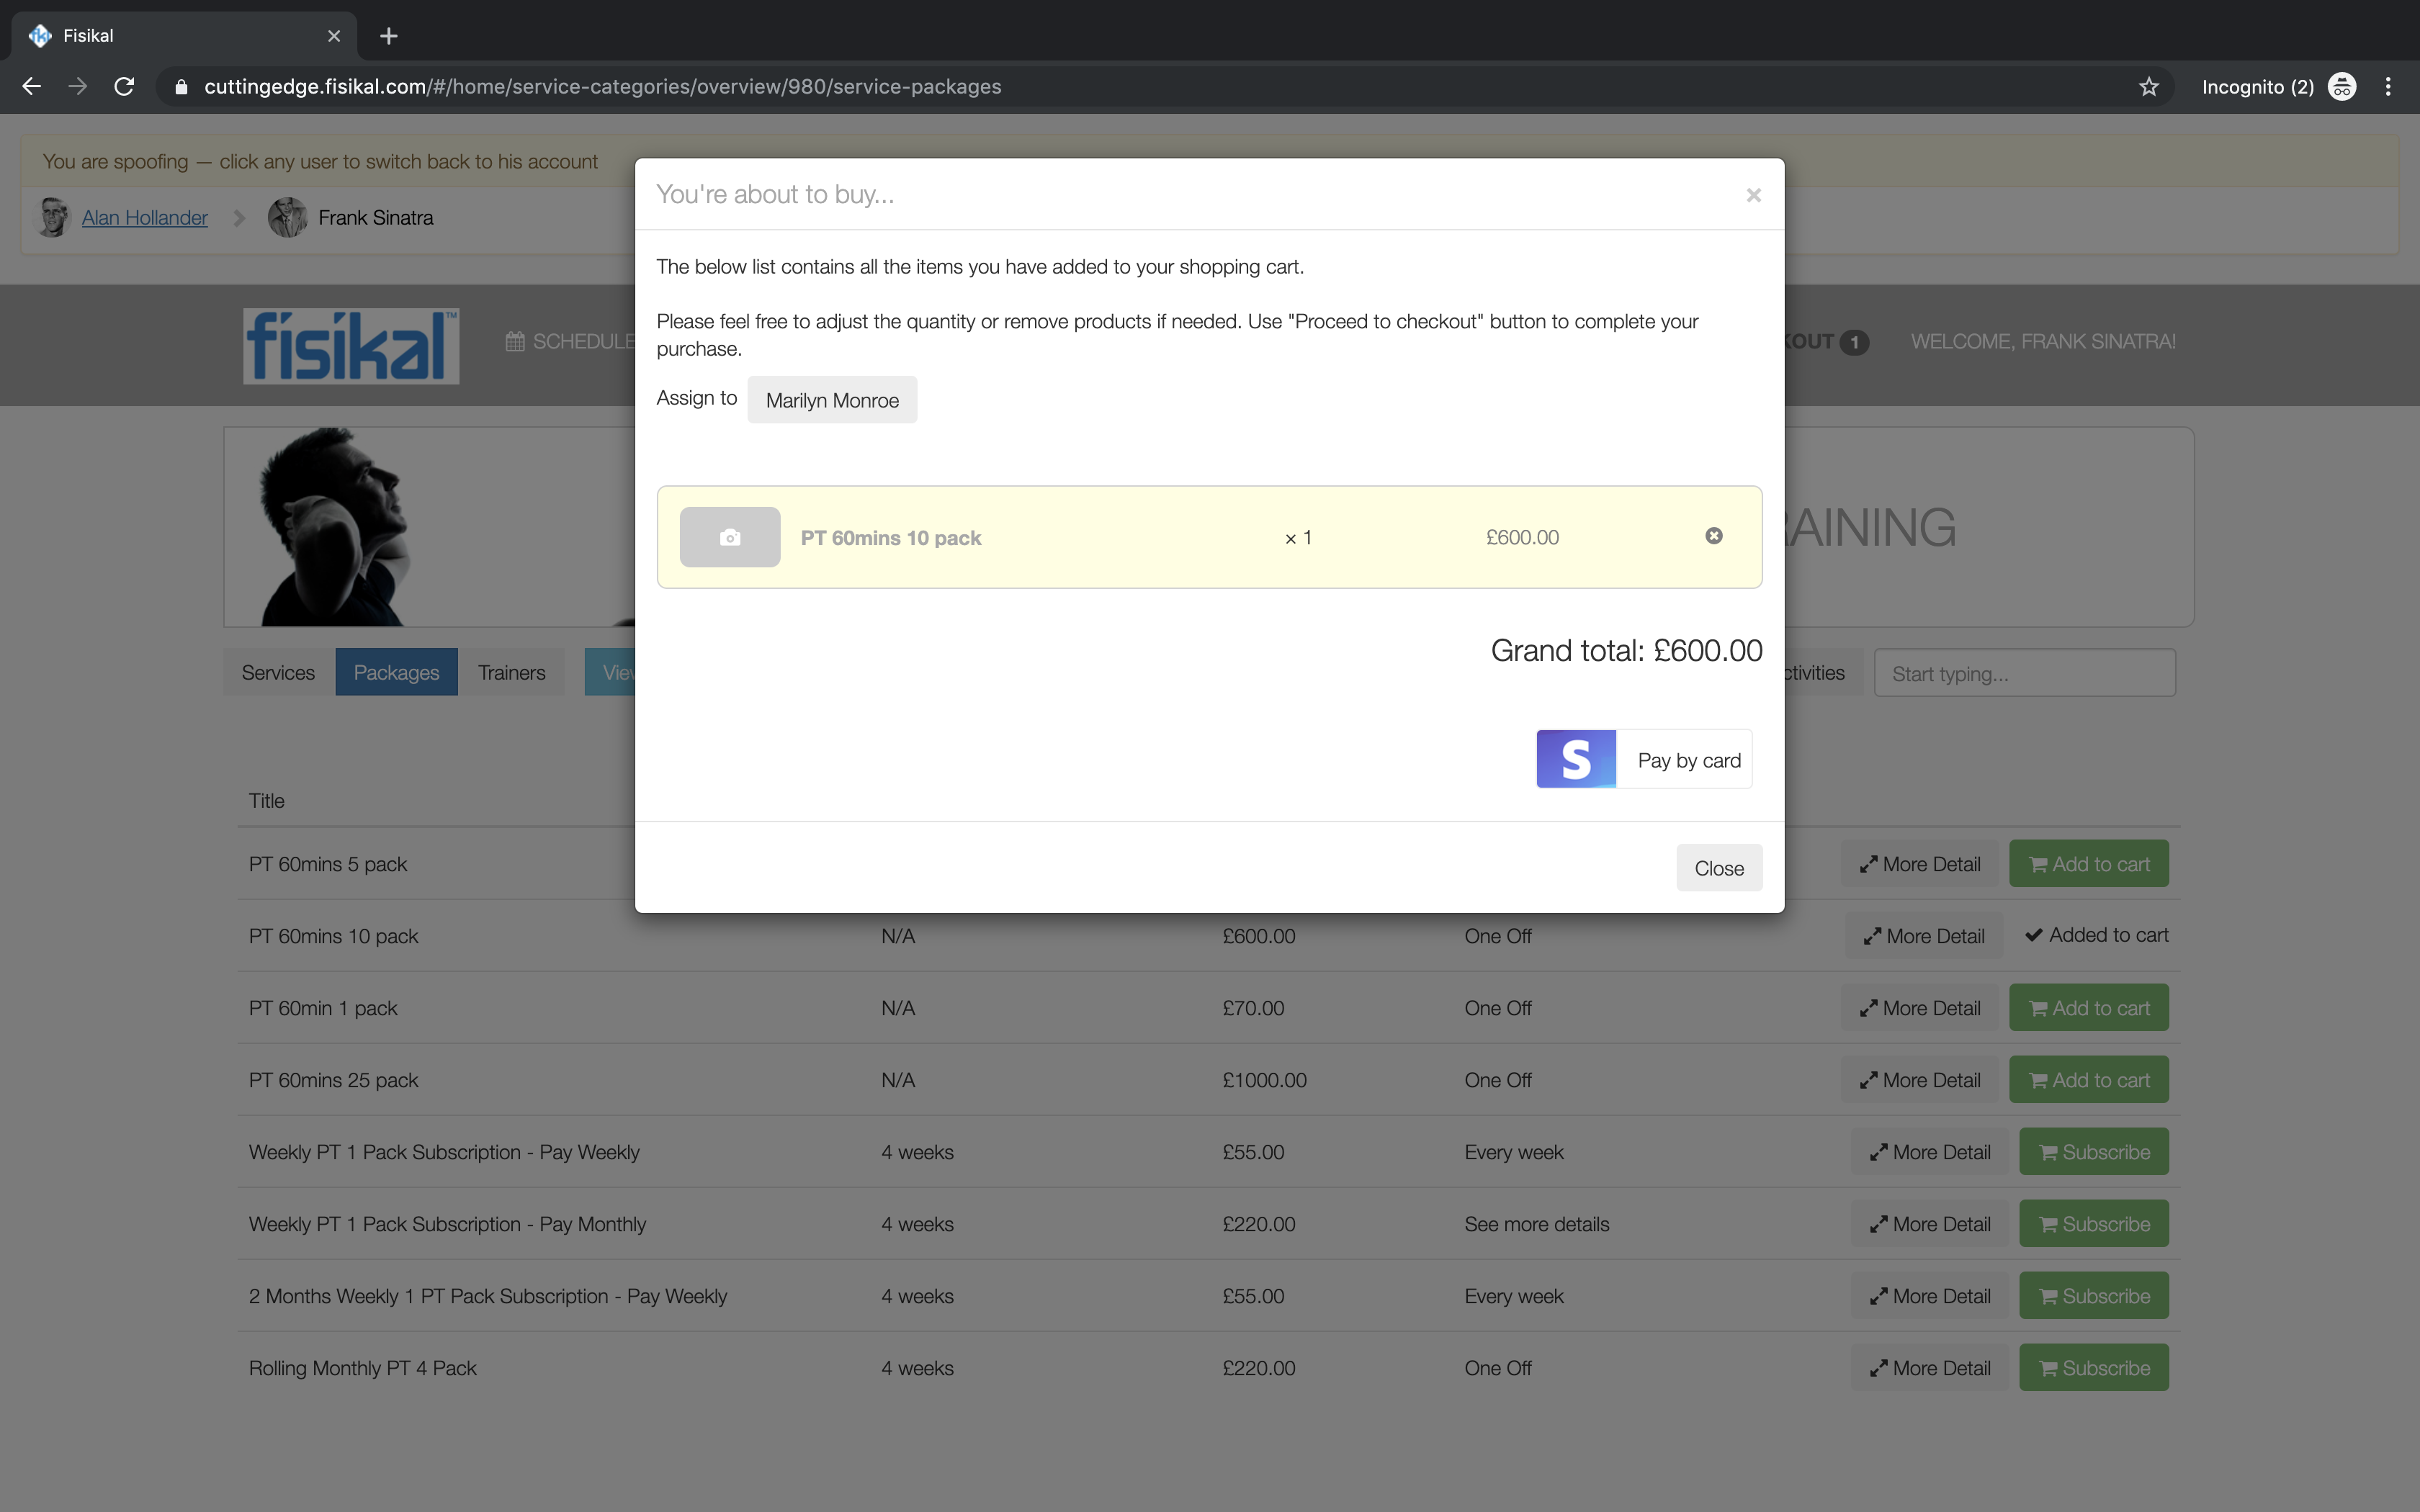
To buy a Product on behalf of a Linked Client, the Lead Client simply goes to the Products page and selects the Product(s) they wish to purchase. Once the Product(s) have been added to the Cart, Clients should select the CHECKOUT link which will take them to the payment screen. On this page, Clients can select the ASSIGN TO field which allows the Lead Client to select which Client the Product(s) should be associated to - the default option is MYSELF.
Once the Assign To section has been configured, Clients can select the payment options which are shown under the total bar and can complete the transaction.
Lead Clients can also purchase products for Linked Clients within the Member app. On the Products page the Lead Client will view their initials in bold which indicates that they have other Linked Clients they can purchase Products for. If a Client's initials are not shown in bold they can select them but no Client selector will be displayed. The screen below shows how the Client selector form works when viewed within the app on the Products page.

The Products page always shows the price that the selected Client should be charged for the Products. If the Lead Client has custom pricing for a specific Product and then selects a Linked Client from the Client selector, the specific pricing for the selected Client will be displayed which may be different from the Lead Client's own pricing.
SHARING PACKAGES BETWEEN CLIENTS
It is not possible to have multiple Clients use credits from the same Package. So it technically is not possible share a Package.
There is a solution that is often used by Clubs and Trainers to help solve this challenge as outlined below. This solution requires Clients to be linked and also Services to allow Trainers or other Staff Roles to make bookings when a Client has no credits assigned to their profile. The process should be administered frequently in order adjust Client Package Credits and their linked Clients' negative Credit balance. There are a few steps to administer this process which are outlined below.
If Clubs do not want to allow Trainers to book Clients for sessions where they have no credits assigned to their profile - this solution will not work for their business.
BENEFITS OF THIS SOLUTION
- Once Client linking and Service configure is completed, the structure of allowing Client to go into a negative Credit balance happens automatically
- The PAYASYOUGO Report quickly identifies which Clients have a negative Credit balance and which Clients they are linked to
- It is easy to adjust a transfer credits to the Lead Client from Linked Clients
DOWNSIDES OF THIS SOLUTION
- Clients must be linked and this may take time to do this depending on the number of Clients that want to share Credits
- Services must be configured to allow Trainers or other Staff Roles to make bookings for Clients that have no credits assigned to their profile
- Unless a reconciliation process is managed frequently, negative Credit balances can quickly build up. Any negative balance shows sessions owed and often this may have a financial consequence
- Specific Roles may abuse the remove the booking removal and Clients that should not be booked in for sessions unless they have paid in advance may slip through into a negative balance
STEP 1 - LINK CLIENTS
Clients that want to "share credits" should be linked together as outlined in the LINKING CLIENTS section above.
STEP 2 - ASSIGN PACKAGES
A Package should be assigned to the Client that is likely to use most of the sessions. For more details about assigning Packages to Clients select HERE.
STEP 3 - SERVICE BOOKING PERMISSIONS
Service booking permissions should be configured to allow Trainers or other staff members. For more details about configuring Service permissions select HERE.
STEP 4 - ENABLE PAYG SERVICES
The PayAsYouGo Service area should be made visible on the Client Summary page. This makes it easier for Trainers and Staff Roles to view if a Client is in a negative Credit balance. To learn more about how to make this visible click HERE.
STEP 5 - SHOW LINKED CLIENT CREDITS
It is possible to configure to show Linked Client PayAsYouGo Credits on the Lead Clients' Summary page. To do this, Users should go to SETTINGS > USER PERMISSIONS and select the User Role (such as Manager or Trainer) permissions. Users should select CAN SEE CLIENT SECTION > CAN SEE SUMMARY TAB > CAN SEE LINKED CREDITS and make this show as TRUE.

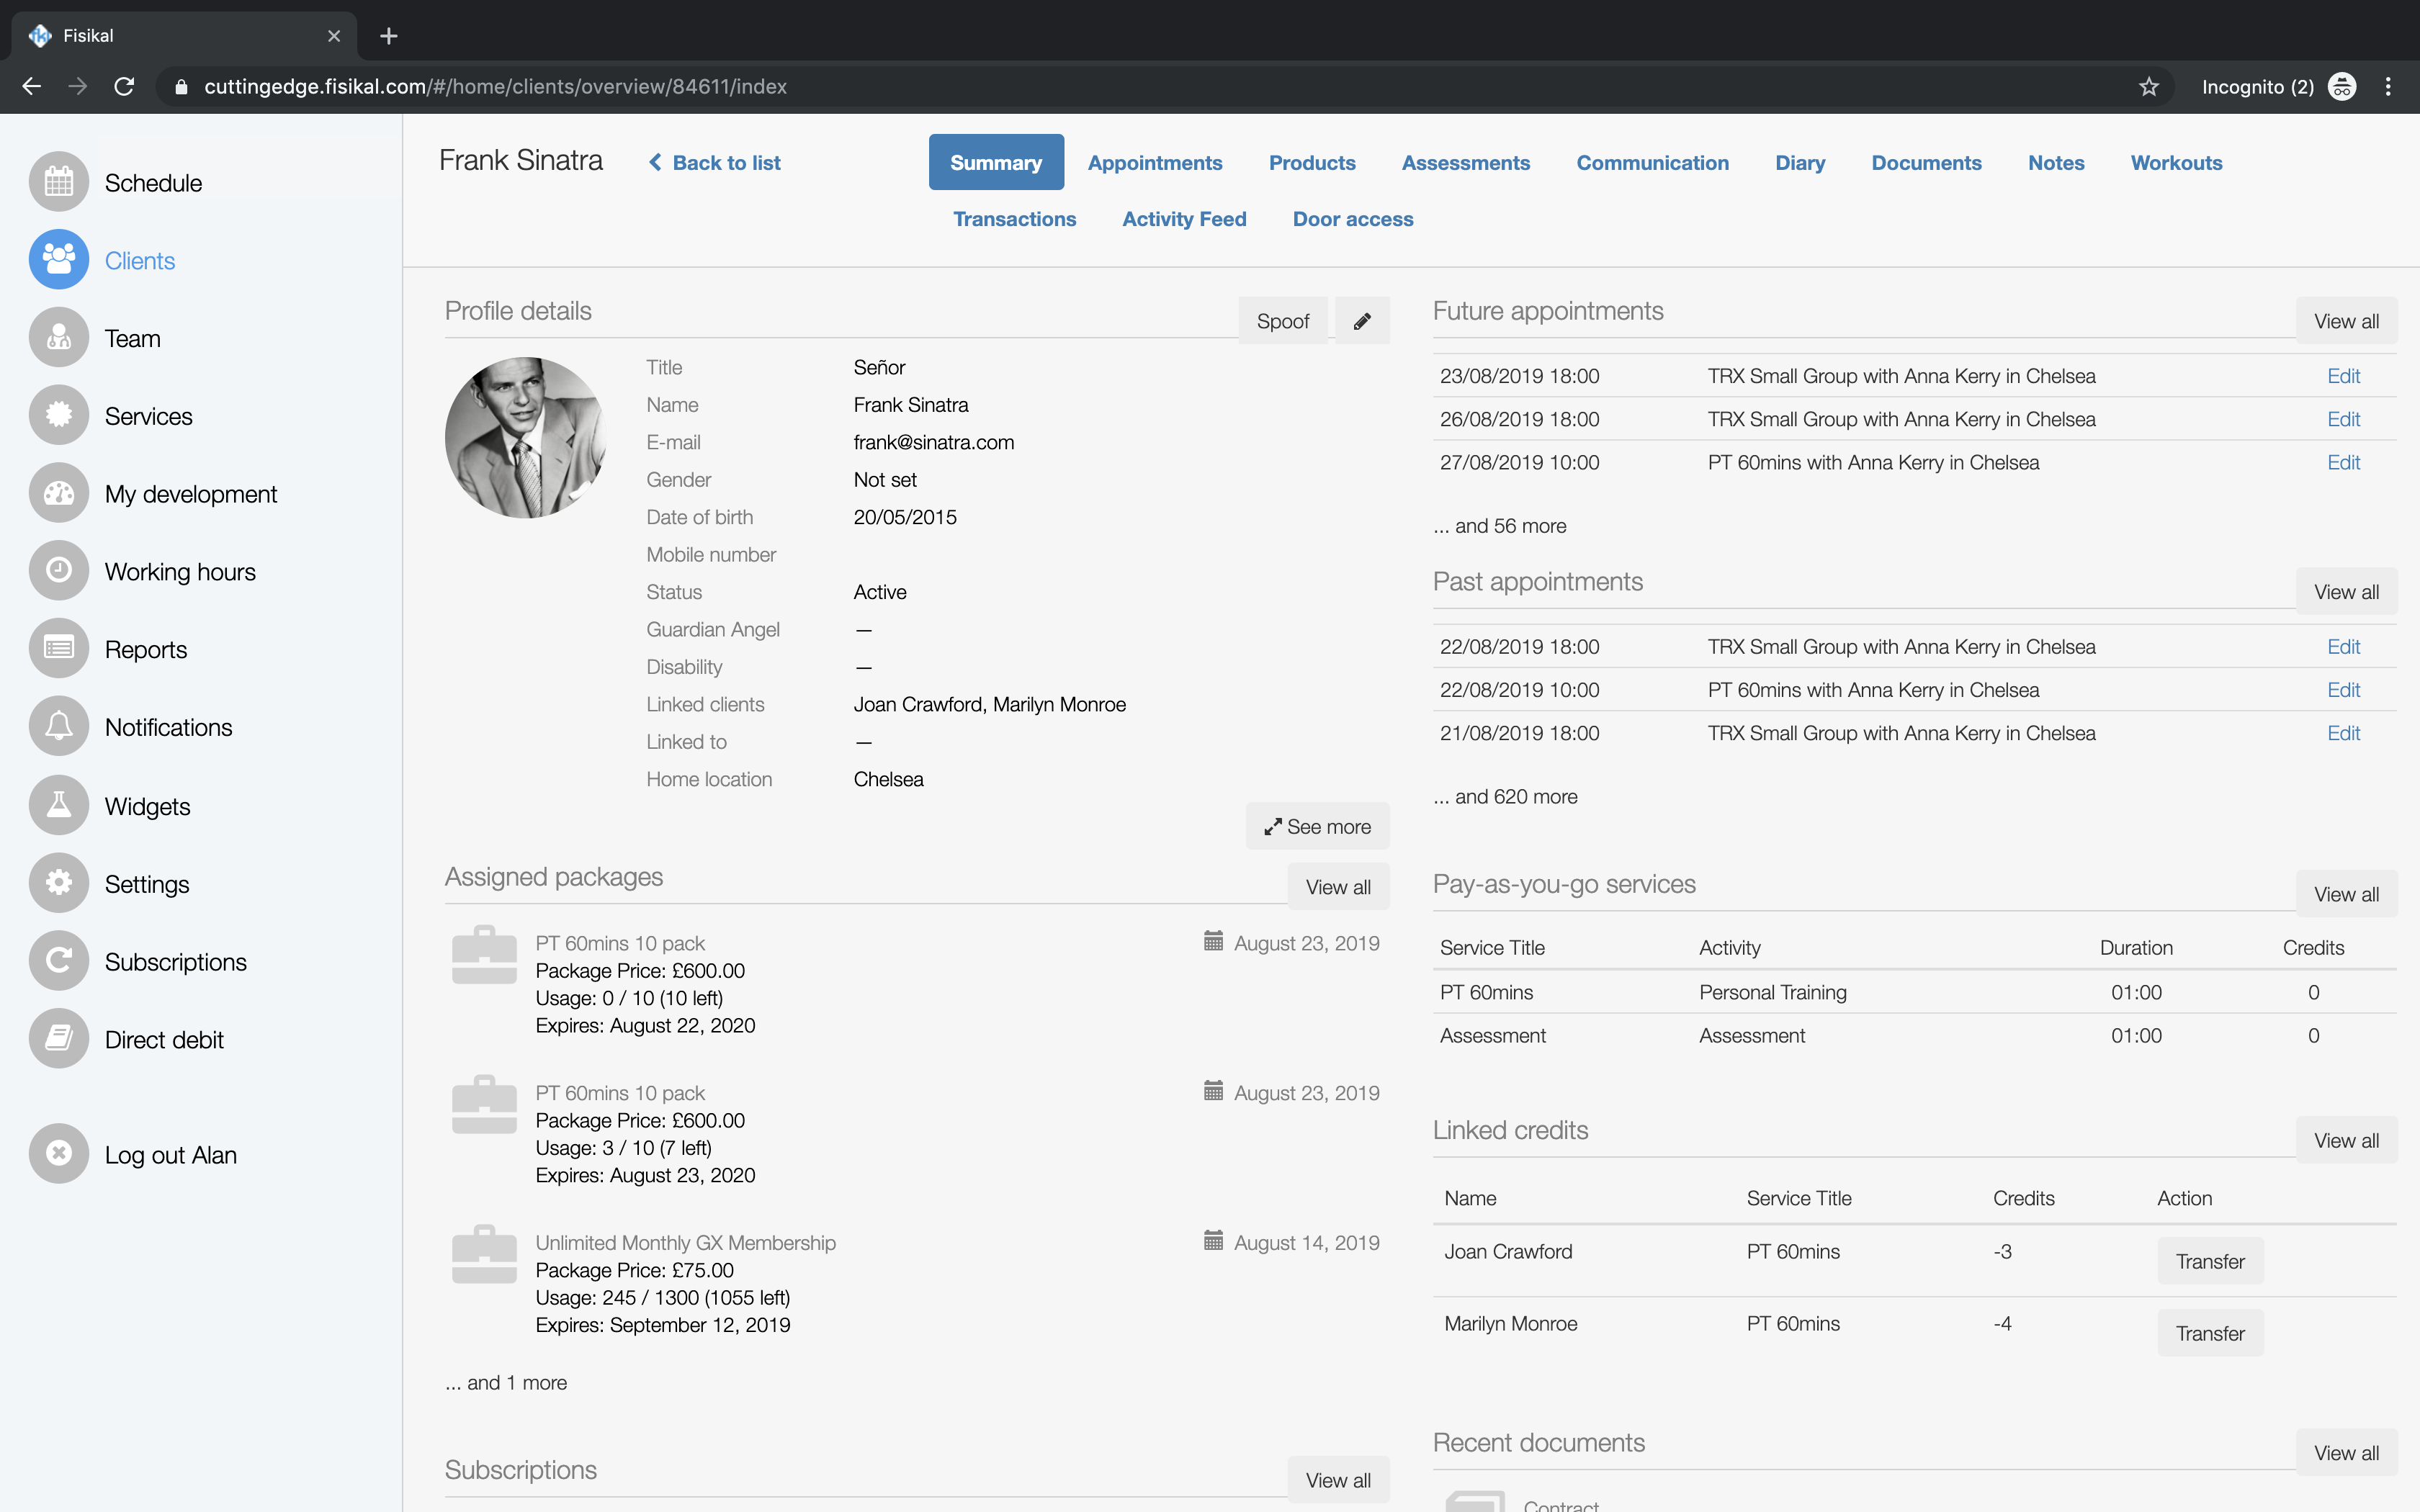
Once this has been enabled on the Client Summary page, Users should navigate to the Lead Clients profile to the view the Link Credits section.
STEP 6 - MAKE BOOKINGS
Bookings should be made for the Clients that want to "share credits". The Client with the Package assigned will have their Credits deducted for bookings automatically. The Client without a Package will start to go into a negative Credit balance as soon as bookings are made on their account.
Now that Clients are having bookings and Credits are being deducted from Packages or being assigned to the PAYG Services section, it is time to create a Credit balances reconciliation process. We recommend that this process is done at least weekly in order to make sure that you have been paid for the sessions you have delivered.
STEP 7 - PAYG CREDITS REPORT
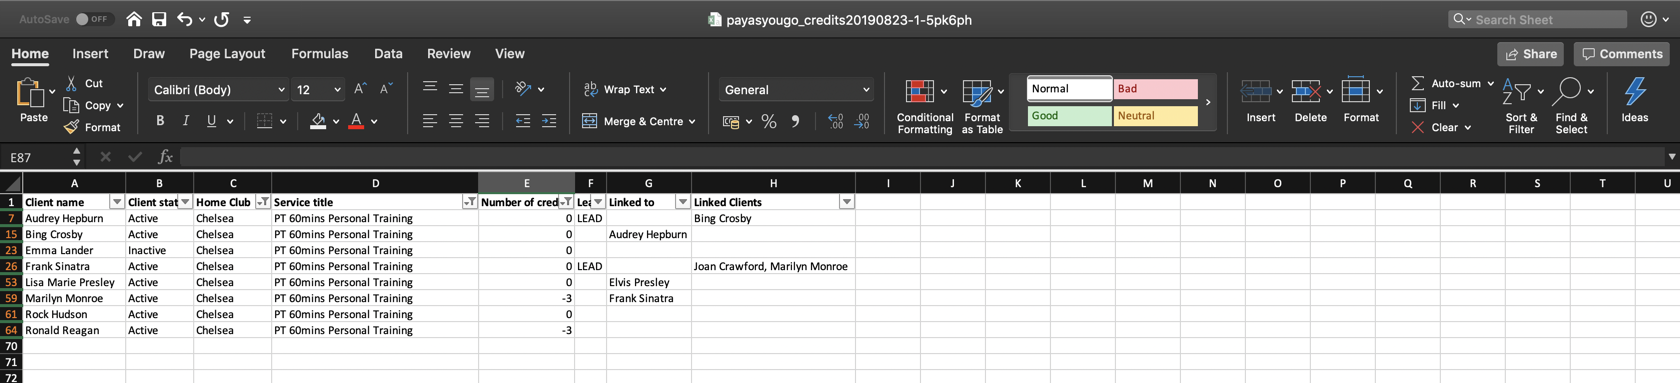
Users should go to Reports and select to generate a PAYASYOUGO CREDITS report. This Report will show you which Clients have a negative Credit balance and which Clients they are associated to. Once you have downloaded the Report you will see a list of Clients that have negative Credit balances and who their Lead Client is.
In the example below, you see that Marilyn Monroe has -3 PT 60mins owing. She is linked to Frank Sinatra. When the Client that owes session is the lead, this will show in column F.
Now you have a list of Clients that you need to either chase for payment or to adjust balances from with their Linked Clients.
STEP 7 - TRANSFER CREDITS
Users should go to the Client that has the Package assigned to the profile so they can view which Client balances they wish to transfer to their profile. Users can see this in the Linked Credits section.

Users should select the TRANSFER button the Linked Client to move their negative Credit balance and associated it to the Lead Client's balance.
If the Lead Client has a Package containing the Credits that have been transferred to them, then their Package will automatically consume the transferred balance. i.e. if Frank has 10 Credits and -4 Credits are transferred to his Profile, then after the transferred takes place, Frank will have 6 remaining Credits in his Package.
If the Lead Client has no Packages assigned, the Credits will be transferred to them and the negative Credits will be assigned to the Lead Clients' PayAsYouGo Services section. The next a Package is assigned that contains the Credits for the owed Services, they will be automatically deducted from the PayAsYouGo Credit balance.
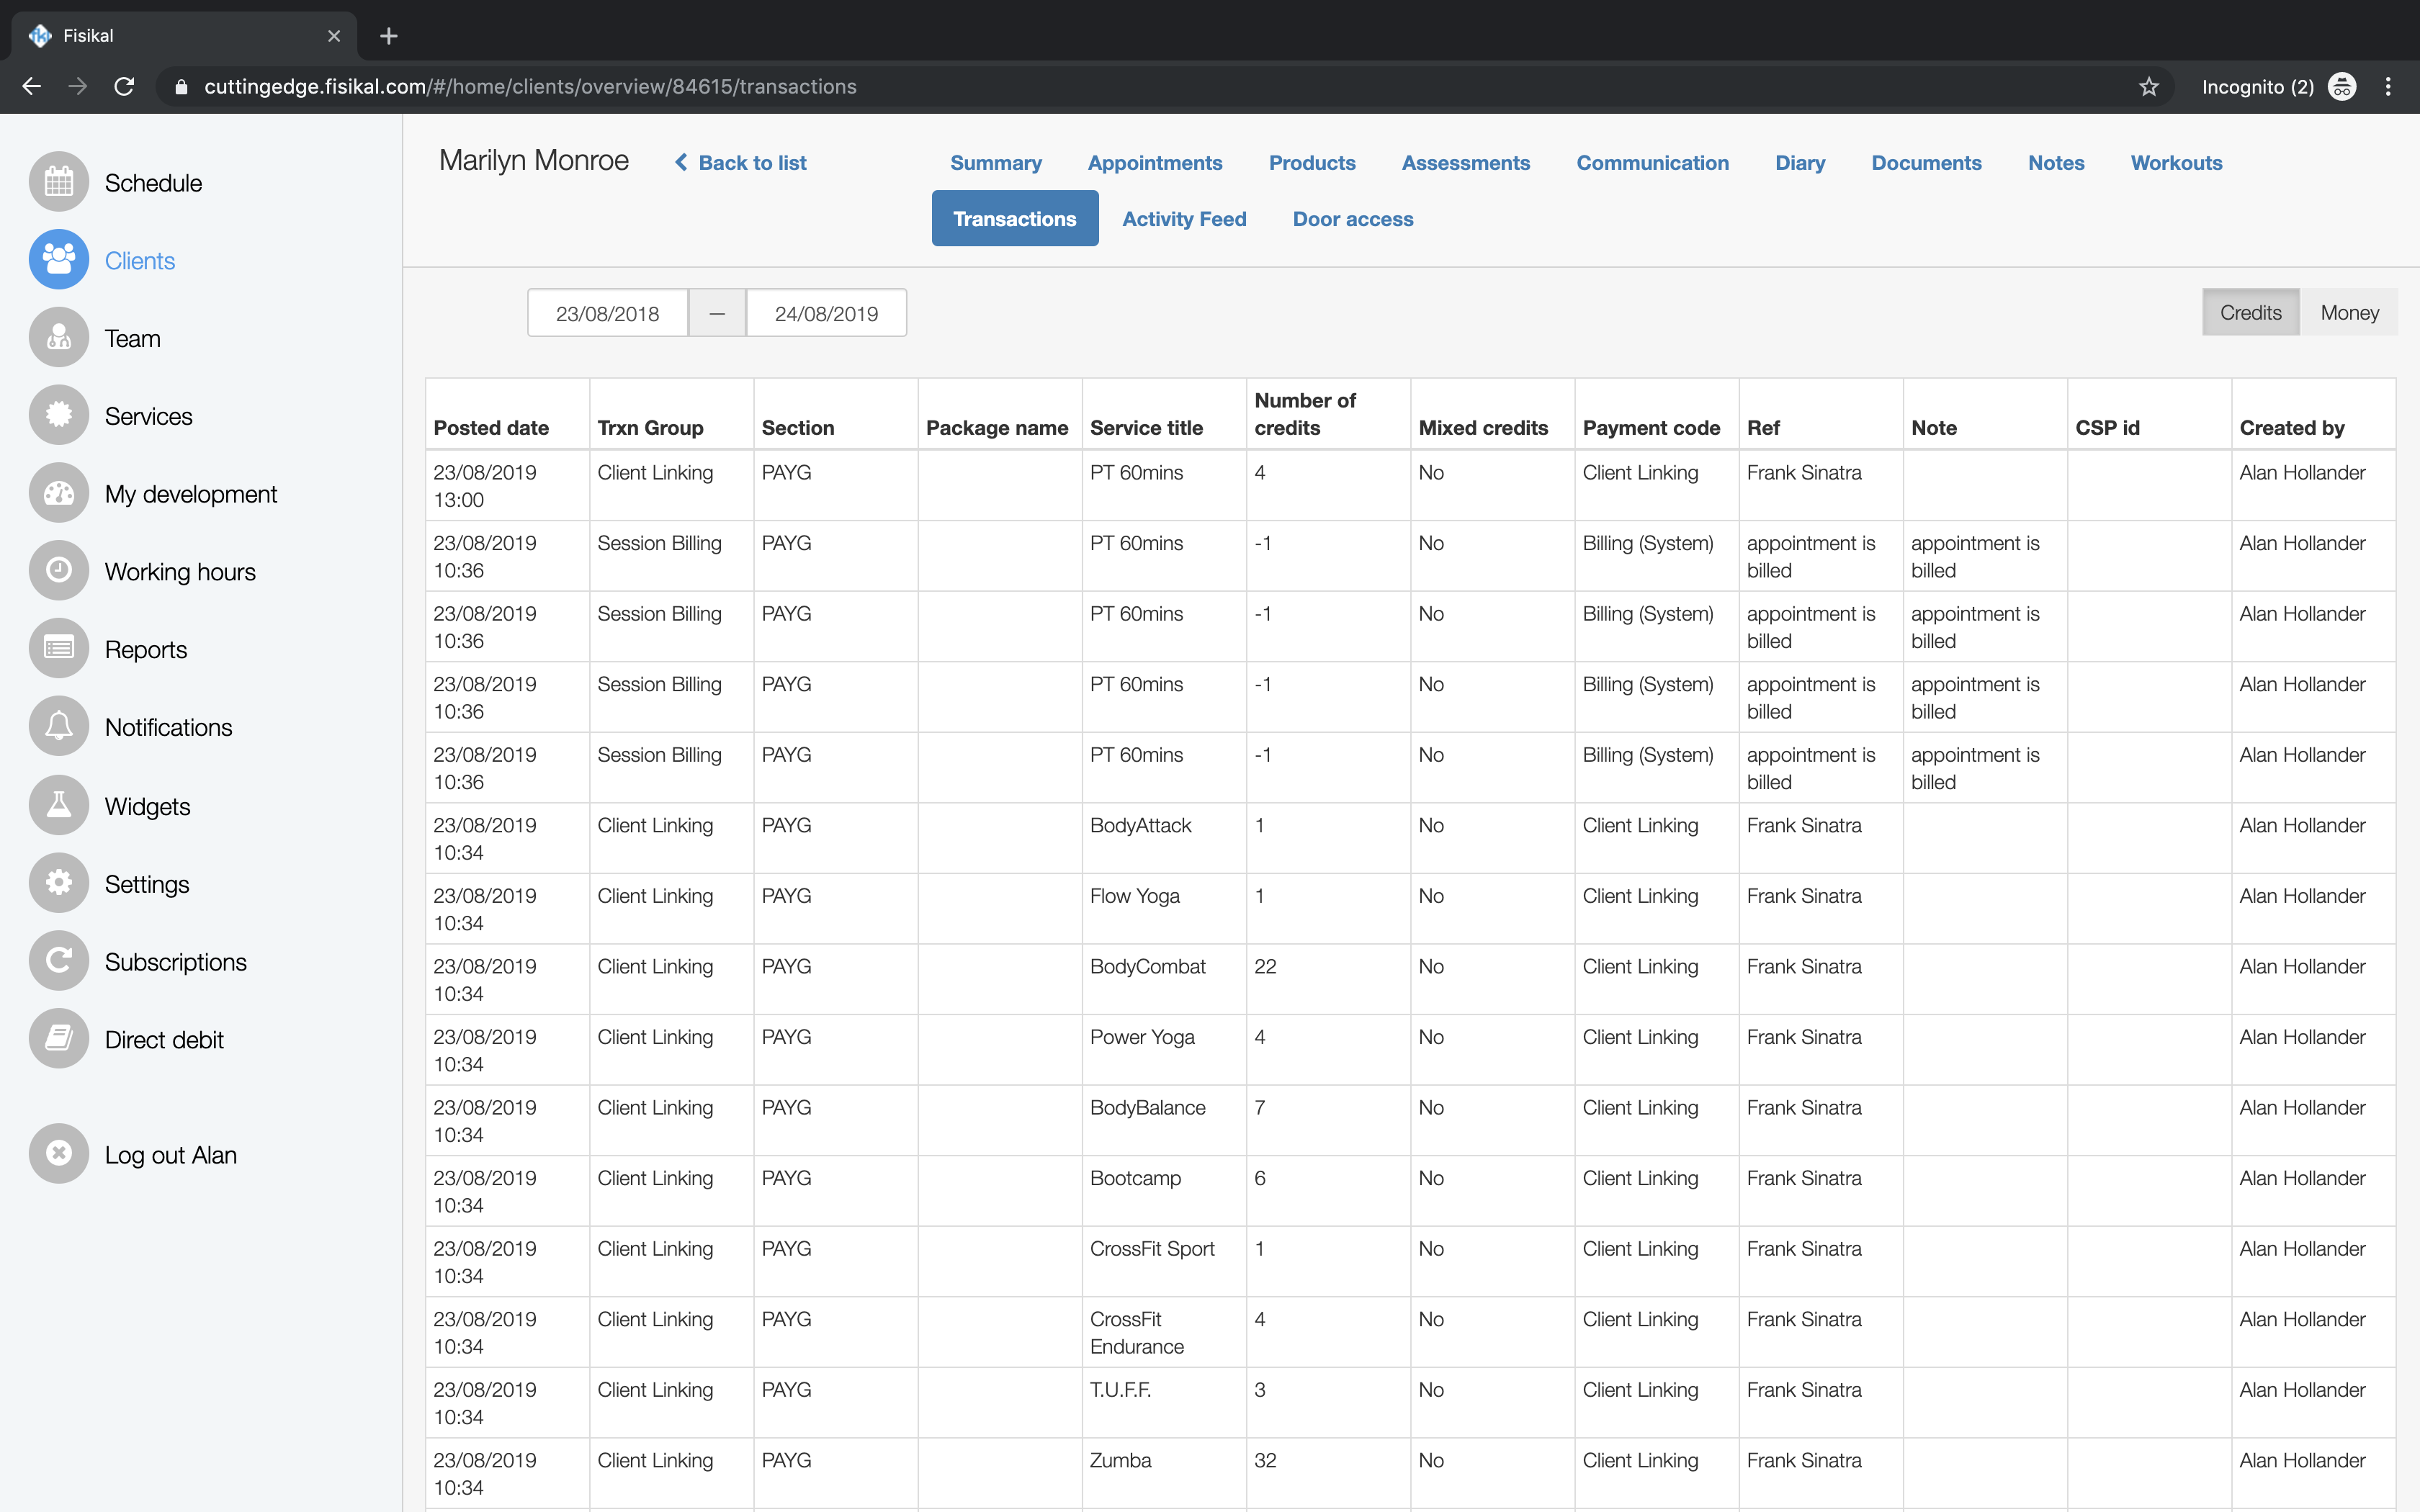
Once the Transfer has been successfully completed, the owed Credits will no longer show on the Linked Credits section for the Linked Client that has just had their Credits transferred to the Lead Client. Details of the Transaction are shown on the Lead Client's Transaction page as shown below.

Details of the Transfer are also shown on the Linked Clients' Transaction page who owed Credits. This should as CLIENT LINKING in the Payment code and the number of credits are shown that have moved.
STEP 8 - RE-RUN PAYG CREDITS REPORT
Once you have transferred all the credit balances for the Linked Clients to the Lead Clients, you should re-run the PayAsYouGo Credits Report to make sure you have not missed any transactions.
This process should be repeated frequently in order to minimise being out of pocket financially.