- Define the time group clearly before commencing, the time group specifies the times when a client CAN do an action.
- Click Settings > Time Groups
- Either edit an existing time group using the
 button or add a new time group by pressing the
  button.
 - Enter the details of the time group
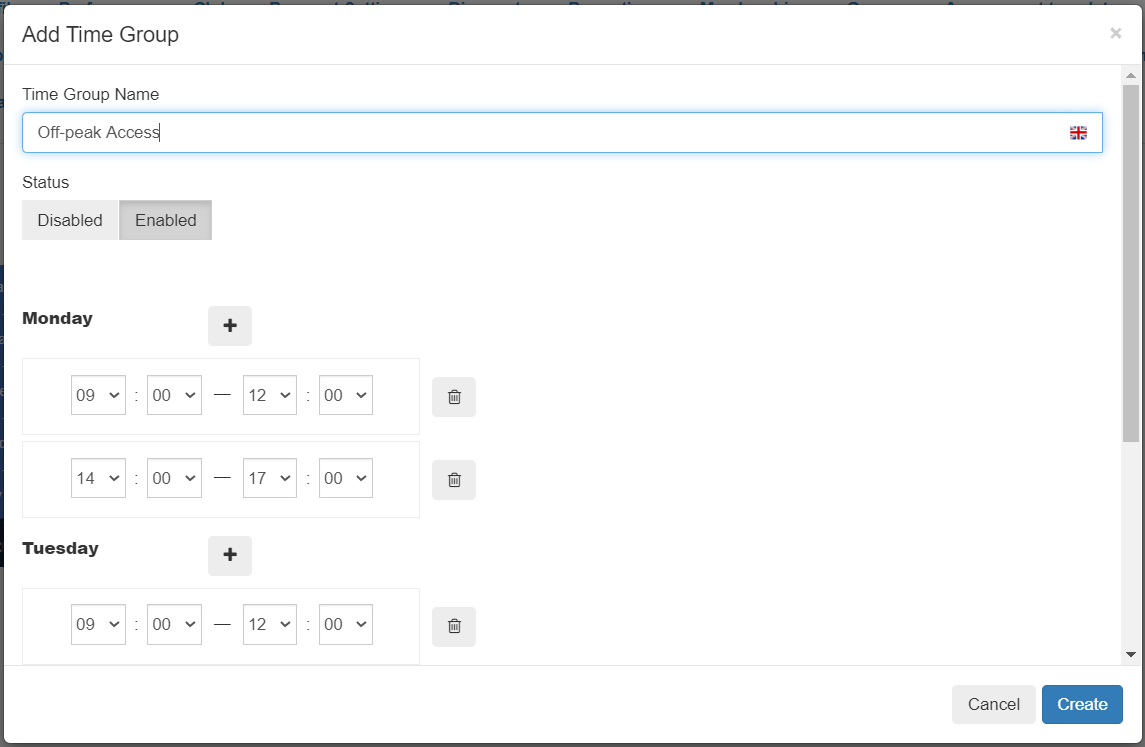
- Enter a useful Name for the time-group.
If you are using different time-groups to define access times vs booking times then make sure that is clear from the title. - Use the Status to determine whether a time-group is available for selection when editing access control schemes. Disabling a time-group does NOT affect clients who already have a package with this time-group.
- For each day of the week define the start and end time of the periods when a door access request will be granted. Use the
 button to define a period for the day.
For example, if a client is allowed access only after 9am on Mondays, and not after 12 noon, then define the Monday start time as 09:00 and the end time of 12:00. If the clients are also allowed in after 2pm until 5pm then add another period using the button with a start of 14:00 and an end of 17:00.
If a door access request occurs in any defined period then it will be granted. If it is outside the defined times then it will be denied.
If there is no time period defined for a day at all, then the whole day will be denied access.
- Enter a useful Name for the time-group.
- Click Create or Update to save the details of the time-group.
English
![White Logo Blue Banner copy-100.jpg]](https://knowledge.fisikal.com/hs-fs/hubfs/White%20Logo%20Blue%20Banner%20copy-100.jpg?height=50&name=White%20Logo%20Blue%20Banner%20copy-100.jpg)