![White Logo Blue Banner copy-100.jpg]](https://knowledge.fisikal.com/hs-fs/hubfs/White%20Logo%20Blue%20Banner%20copy-100.jpg?height=50&name=White%20Logo%20Blue%20Banner%20copy-100.jpg)
ADDING CLIENTS
ADDING INDIVIDUAL CLIENTS
Users can select to add individual Clients to bookings by selecting EDIT on the Appointment and navigating to the CLIENTS TO ADD section of the form. Here they can start to type in the Name or Email of the Client and the Name of the Client will show for them to select. Users can select the DELETE button next to the Clients name if they want to remove them if they were added in error.
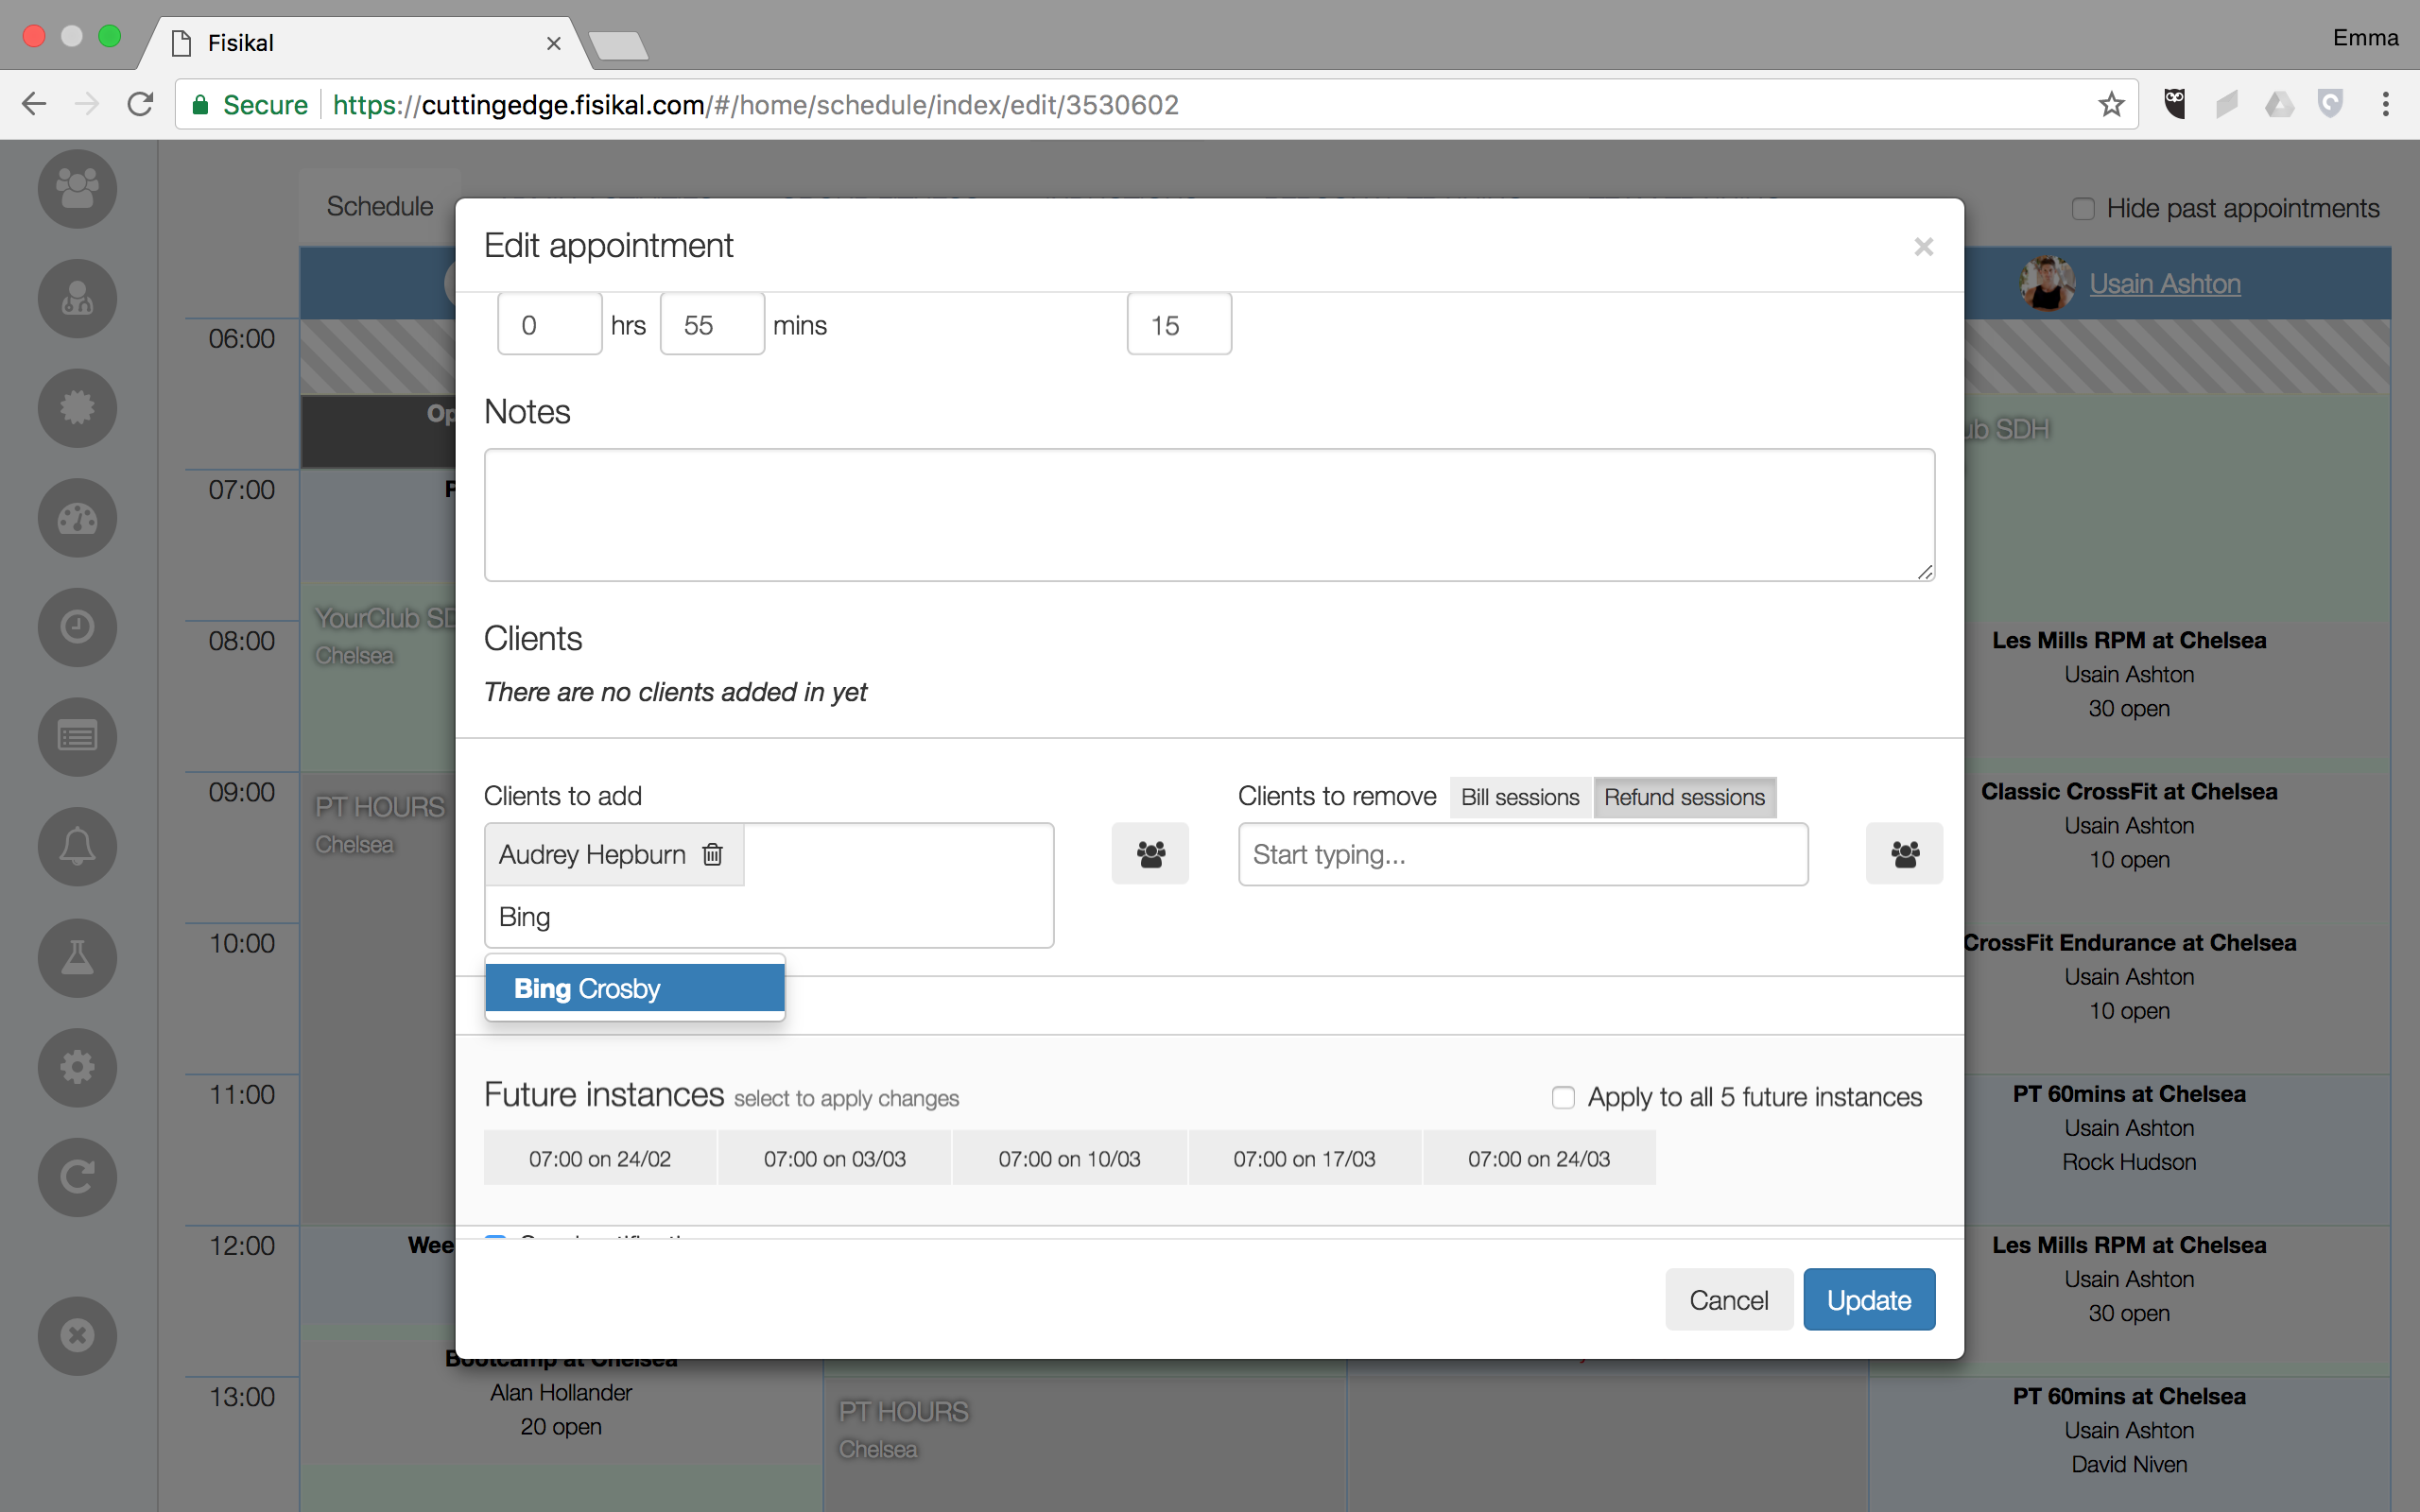
Once the Client name has been selected they will be added to the CLIENTS TO ADD section.
ADDING GROUPS OF CLIENTS
Users can select to add Groups of Client to bookings by selecting EDIT on the Appointment and navigating to the CLIENTS TO ADD section of the form. Here they should select the GROUPS icon next to the CLIENTS TO ADD box. The PICK ITEM box will load where Users can search or scroll to find the Group(s) of Clients to add to the appointment. Selected items will show in the CURRENT SELECTION section of the box.
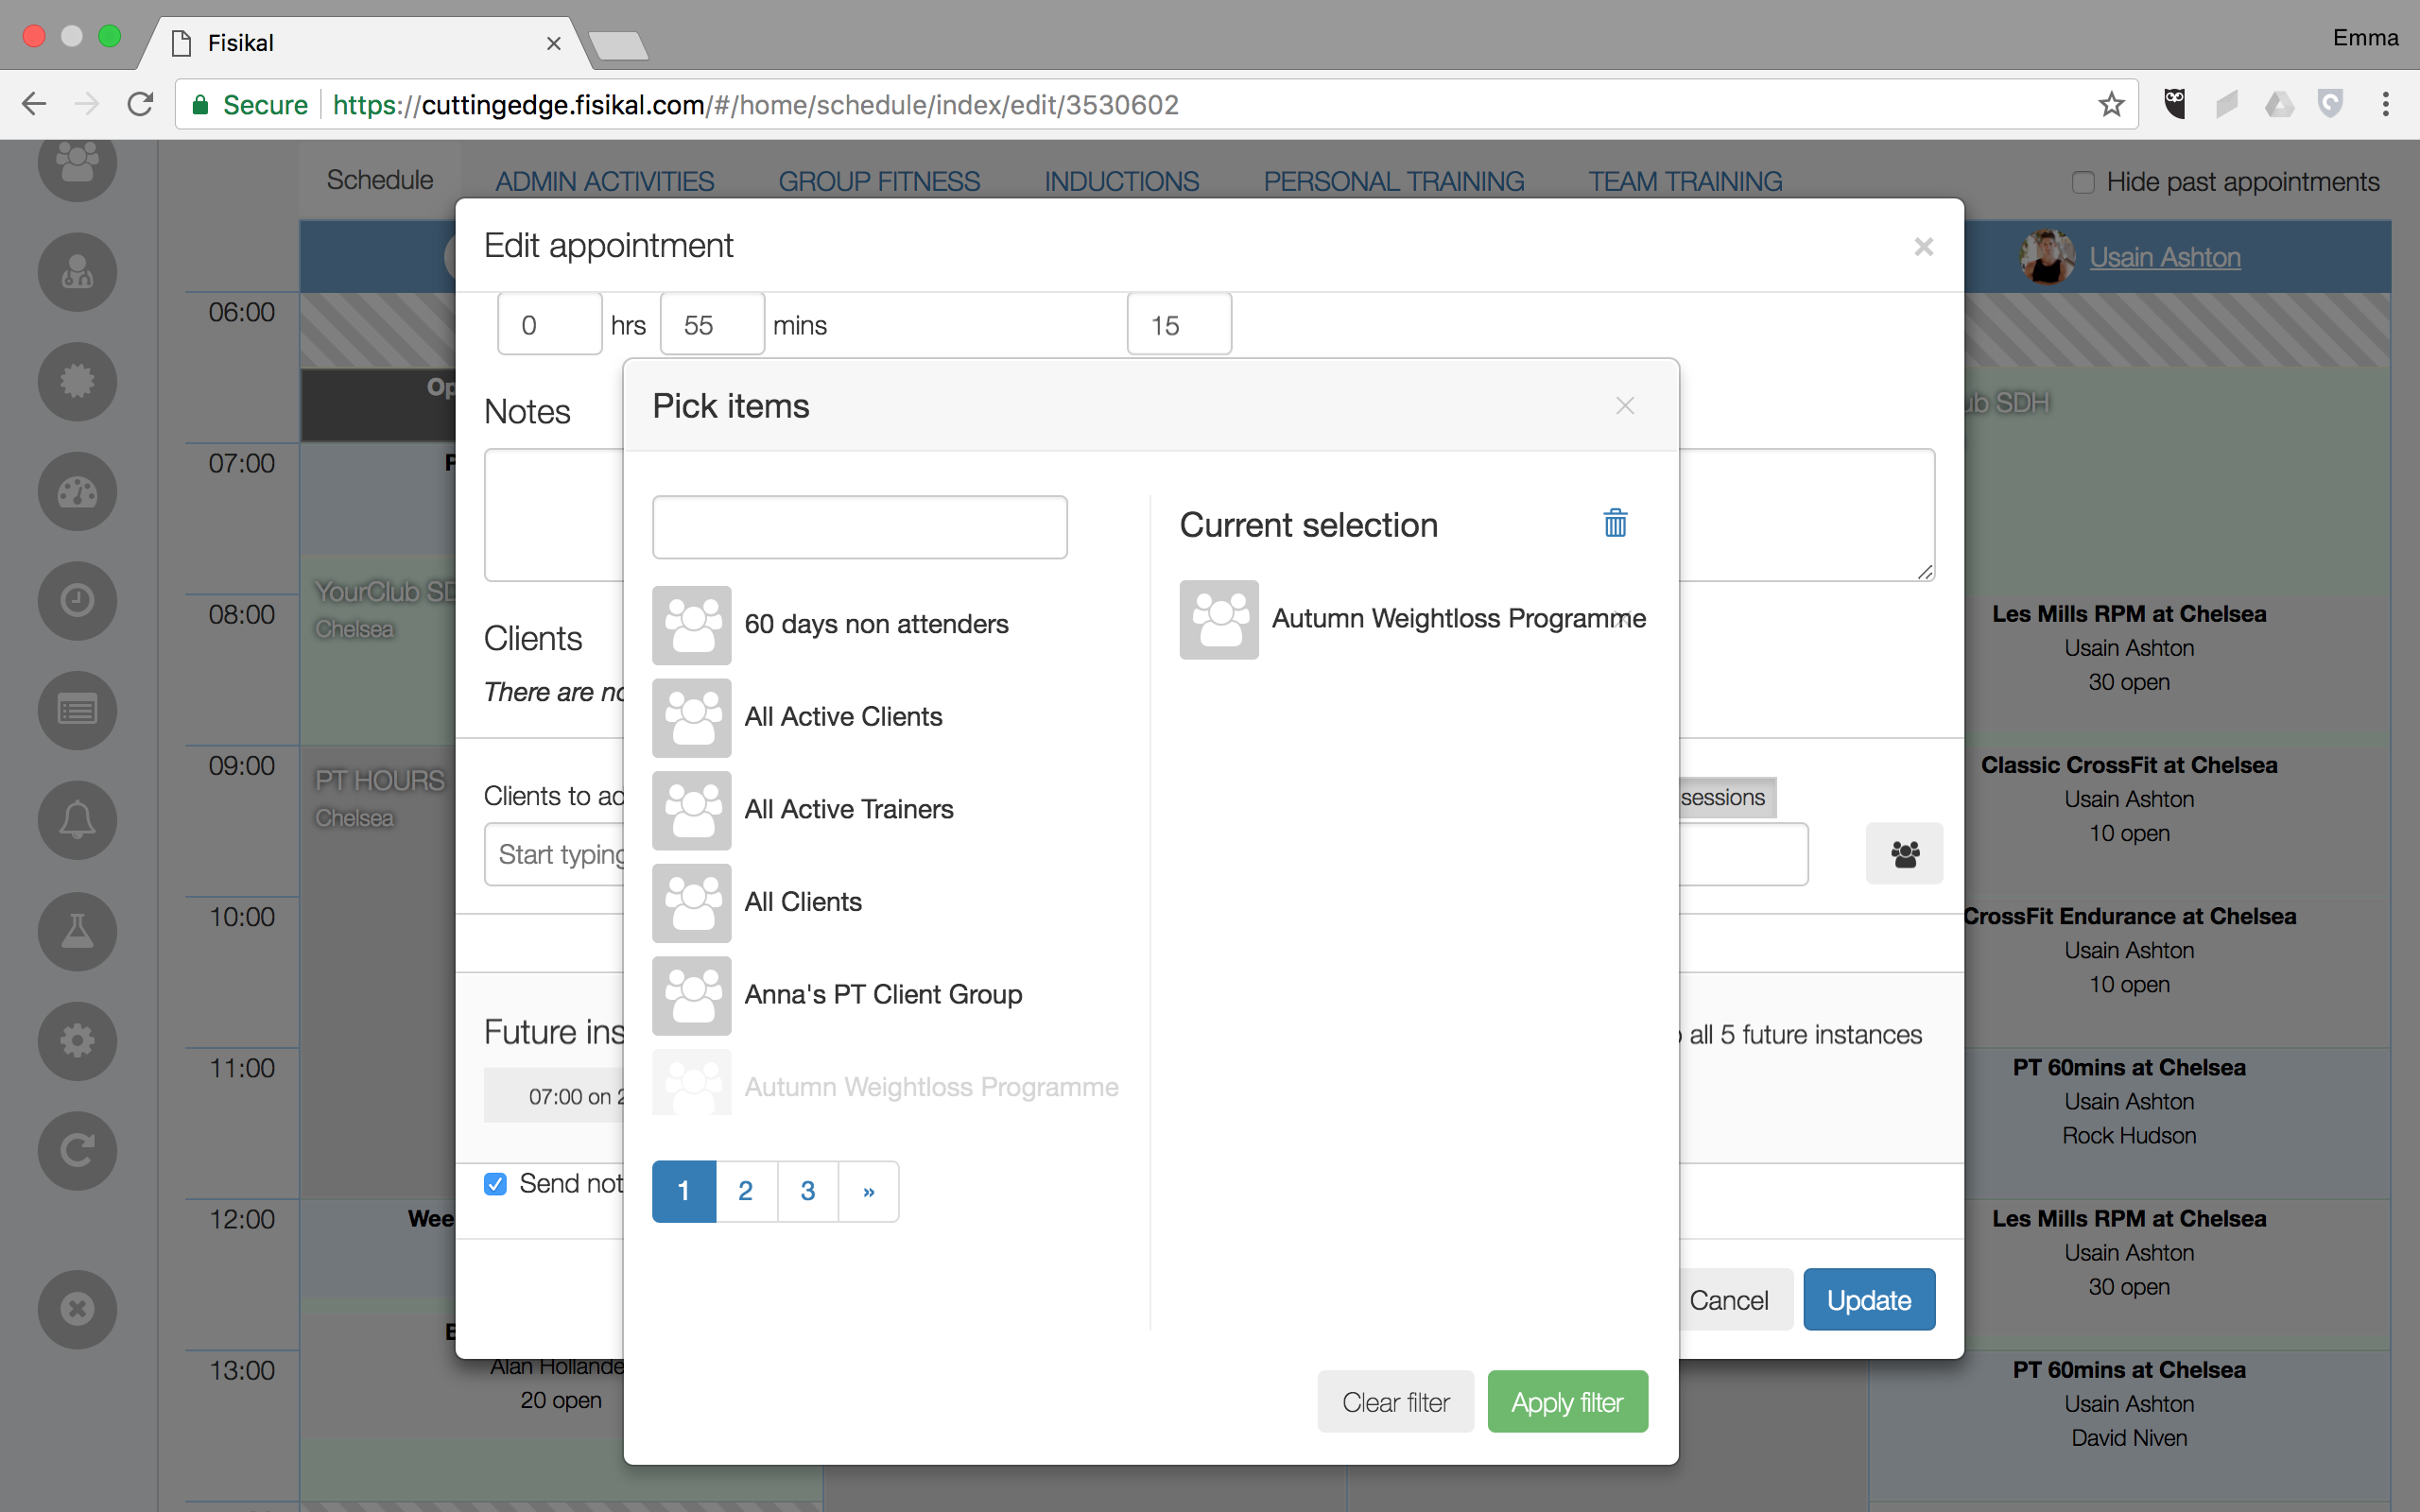
Users should select the APPLY FILTER which then saves selected items to the form and the Clients within the Group(s) selected will be listed in the CLIENTS TO ADD section of the form as shown below:

Once all Clients have been added as required, Users can select which future instances of the appointment they wish to add the selected Clients to. If the appointment does not have any future instances, this will not show any.
Users can select individual dates as shown above, or they can select APPLY TO ALL (x) FUTURE INSTANCES.
Users can choose to send notifications for the appointment(s) or choose to uncheck the SEND NOTIFICATIONS check box.
To complete adding Clients into the appointment(s), Users should select the UPDATE button. The appointment will go through the booking validation and will make the booking or highlight any errors / conflicts accordingly.
REMOVING CLIENTS
Users can select to remove Clients from bookings which have a Group Size >1. It is NOT possible to remove a Client from a booking and leave a booking with 0 Clients if the Group size = 1 as this is a fixed rule in the system where Individual Bookings (where group size =1) must have 1 attendee in order to be scheduled.
REMOVING INDIVIDUAL CLIENTS
Users can select to remove individual Clients to bookings by selecting EDIT on the Appointment and navigating to the CLIENTS TO REMOVE section of the form. Here they can start to type in the Name or Email of the Client and the Name of the Client will show for them to select. Users can select the DELETE button next to the Clients name if they want to remove them if they were added in error.
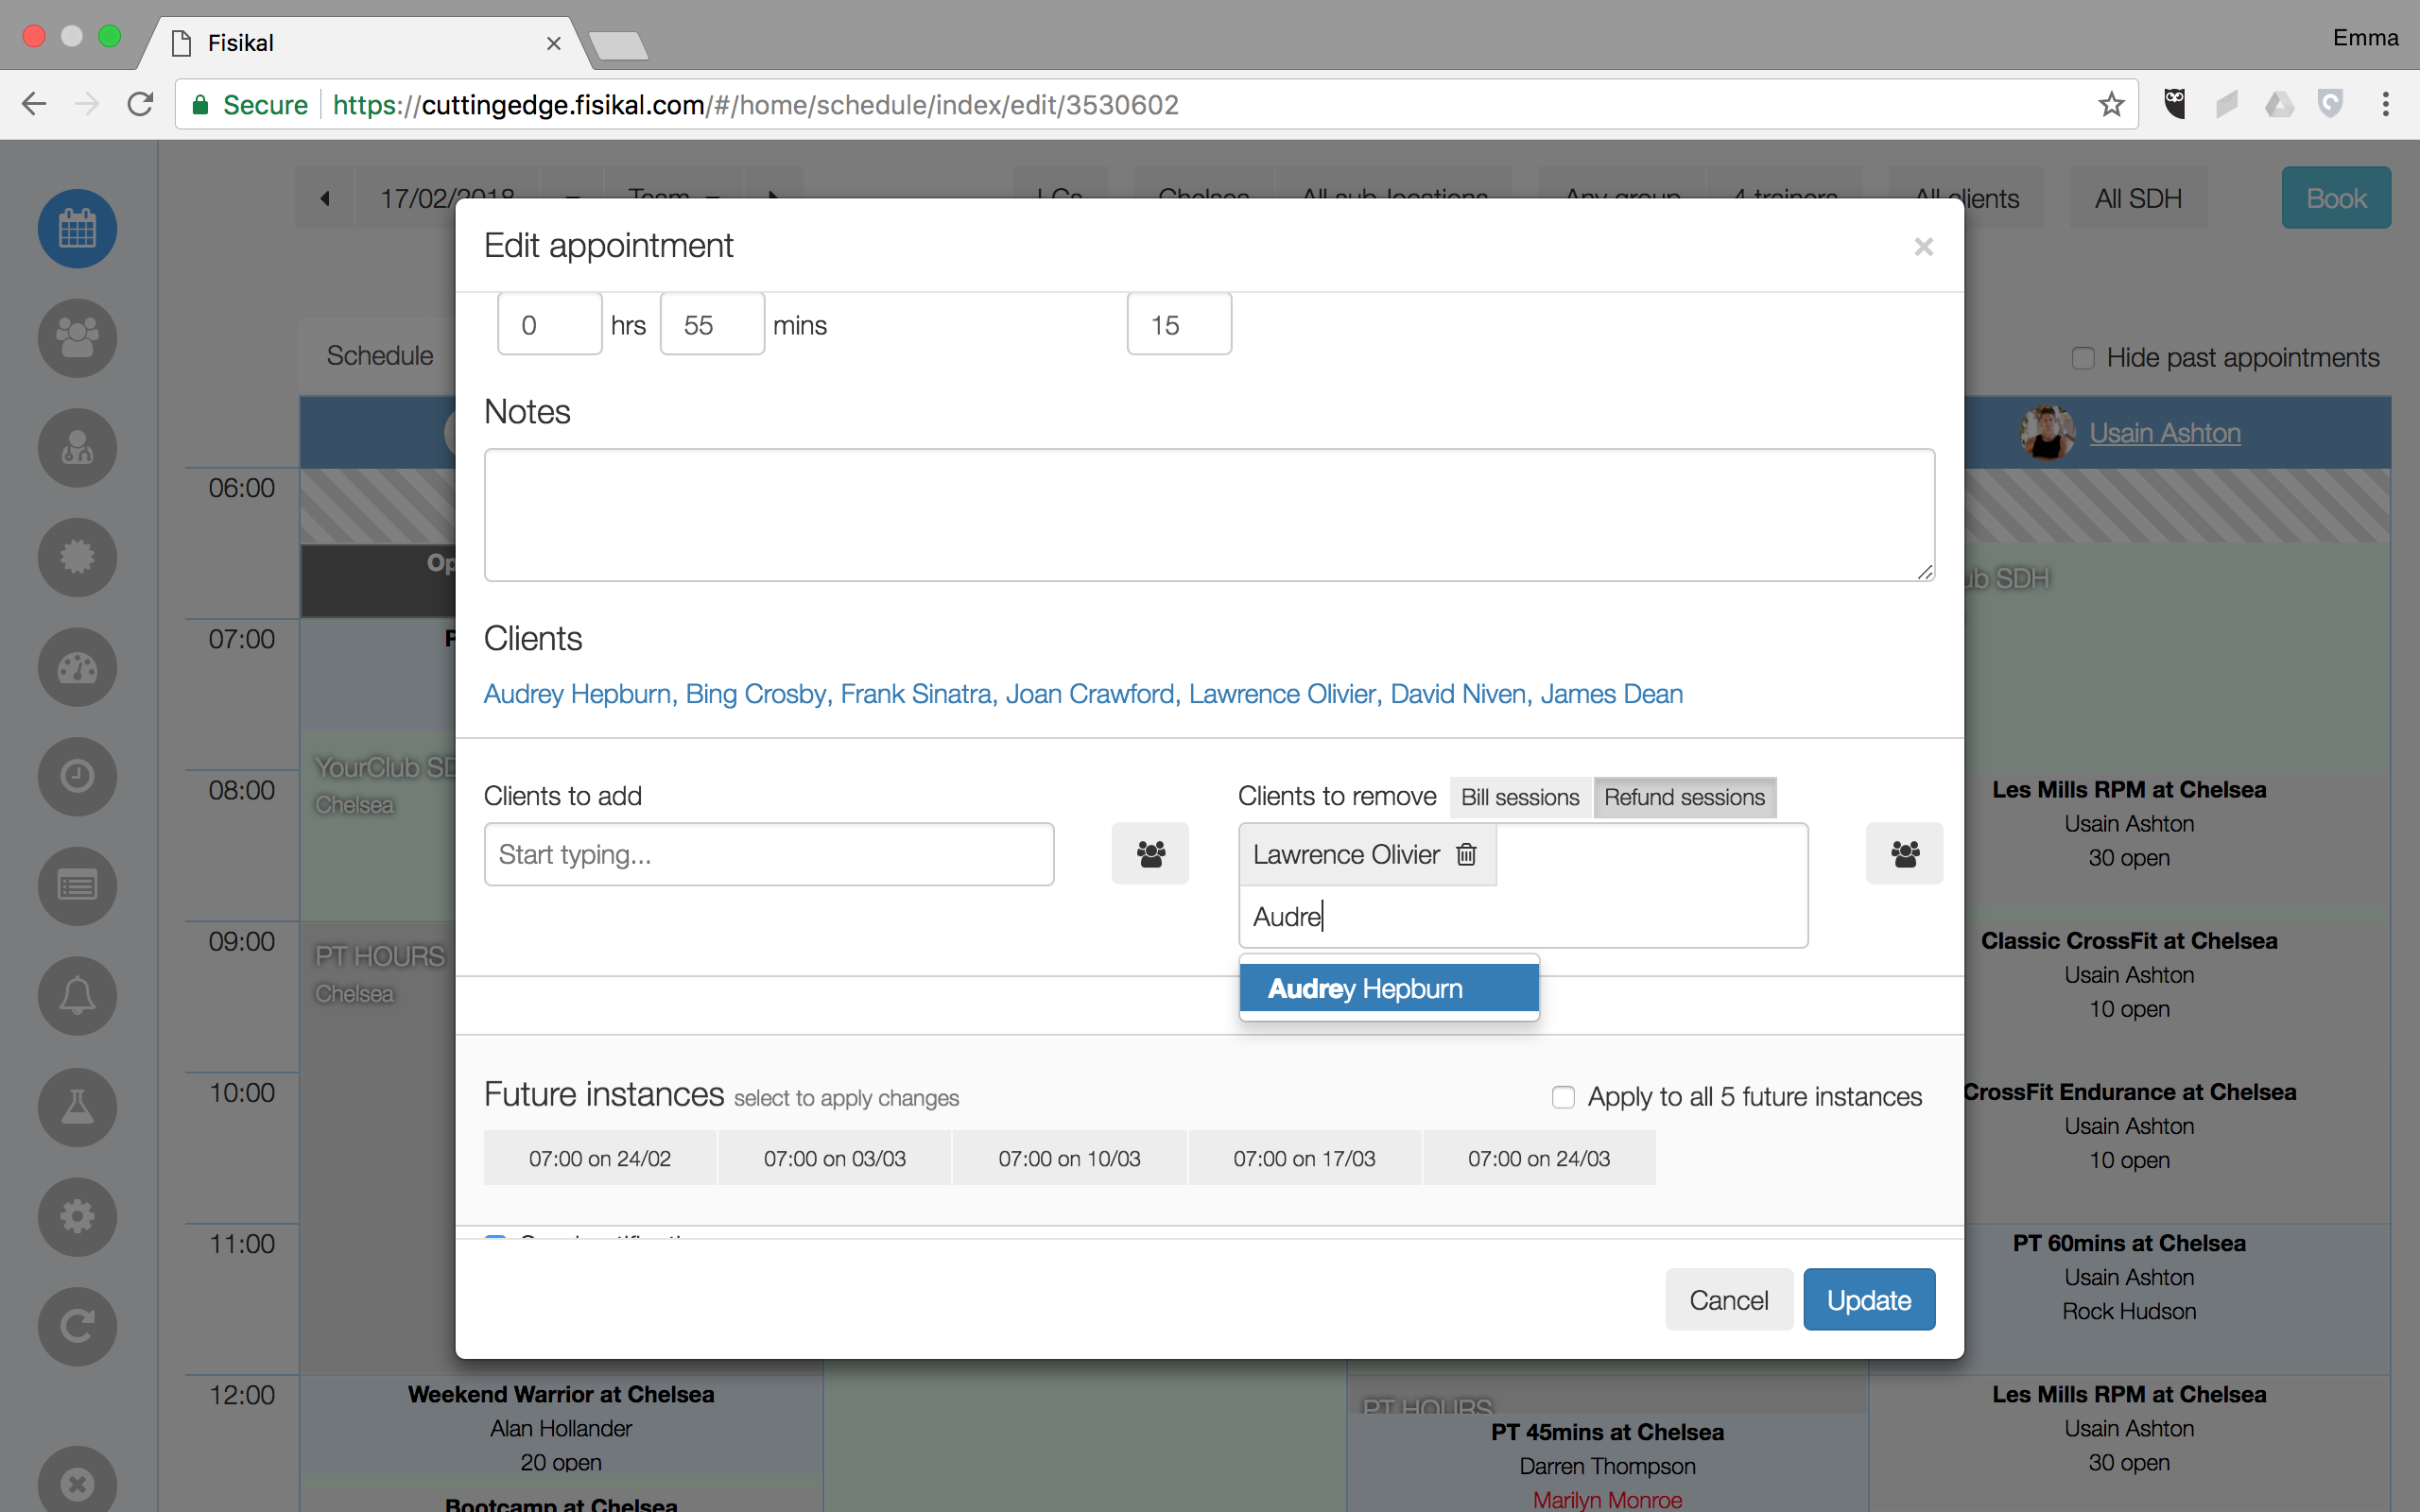
Once the Client name has been selected they will be added to the CLIENTS TO REMOVE section.
REMOVING GROUPS OF CLIENTS
Users can select to remove Groups of Client to bookings by selecting EDIT on the Appointment and navigating to the CLIENTS TO REMOVE section of the form. Here they should select the GROUPS icon next to the CLIENTS TO REMOVE box. The PICK ITEM box will load where Users can search or scroll to find the Group(s) of Clients to removed from the appointment. Selected items will show in the CURRENT SELECTION section of the box.
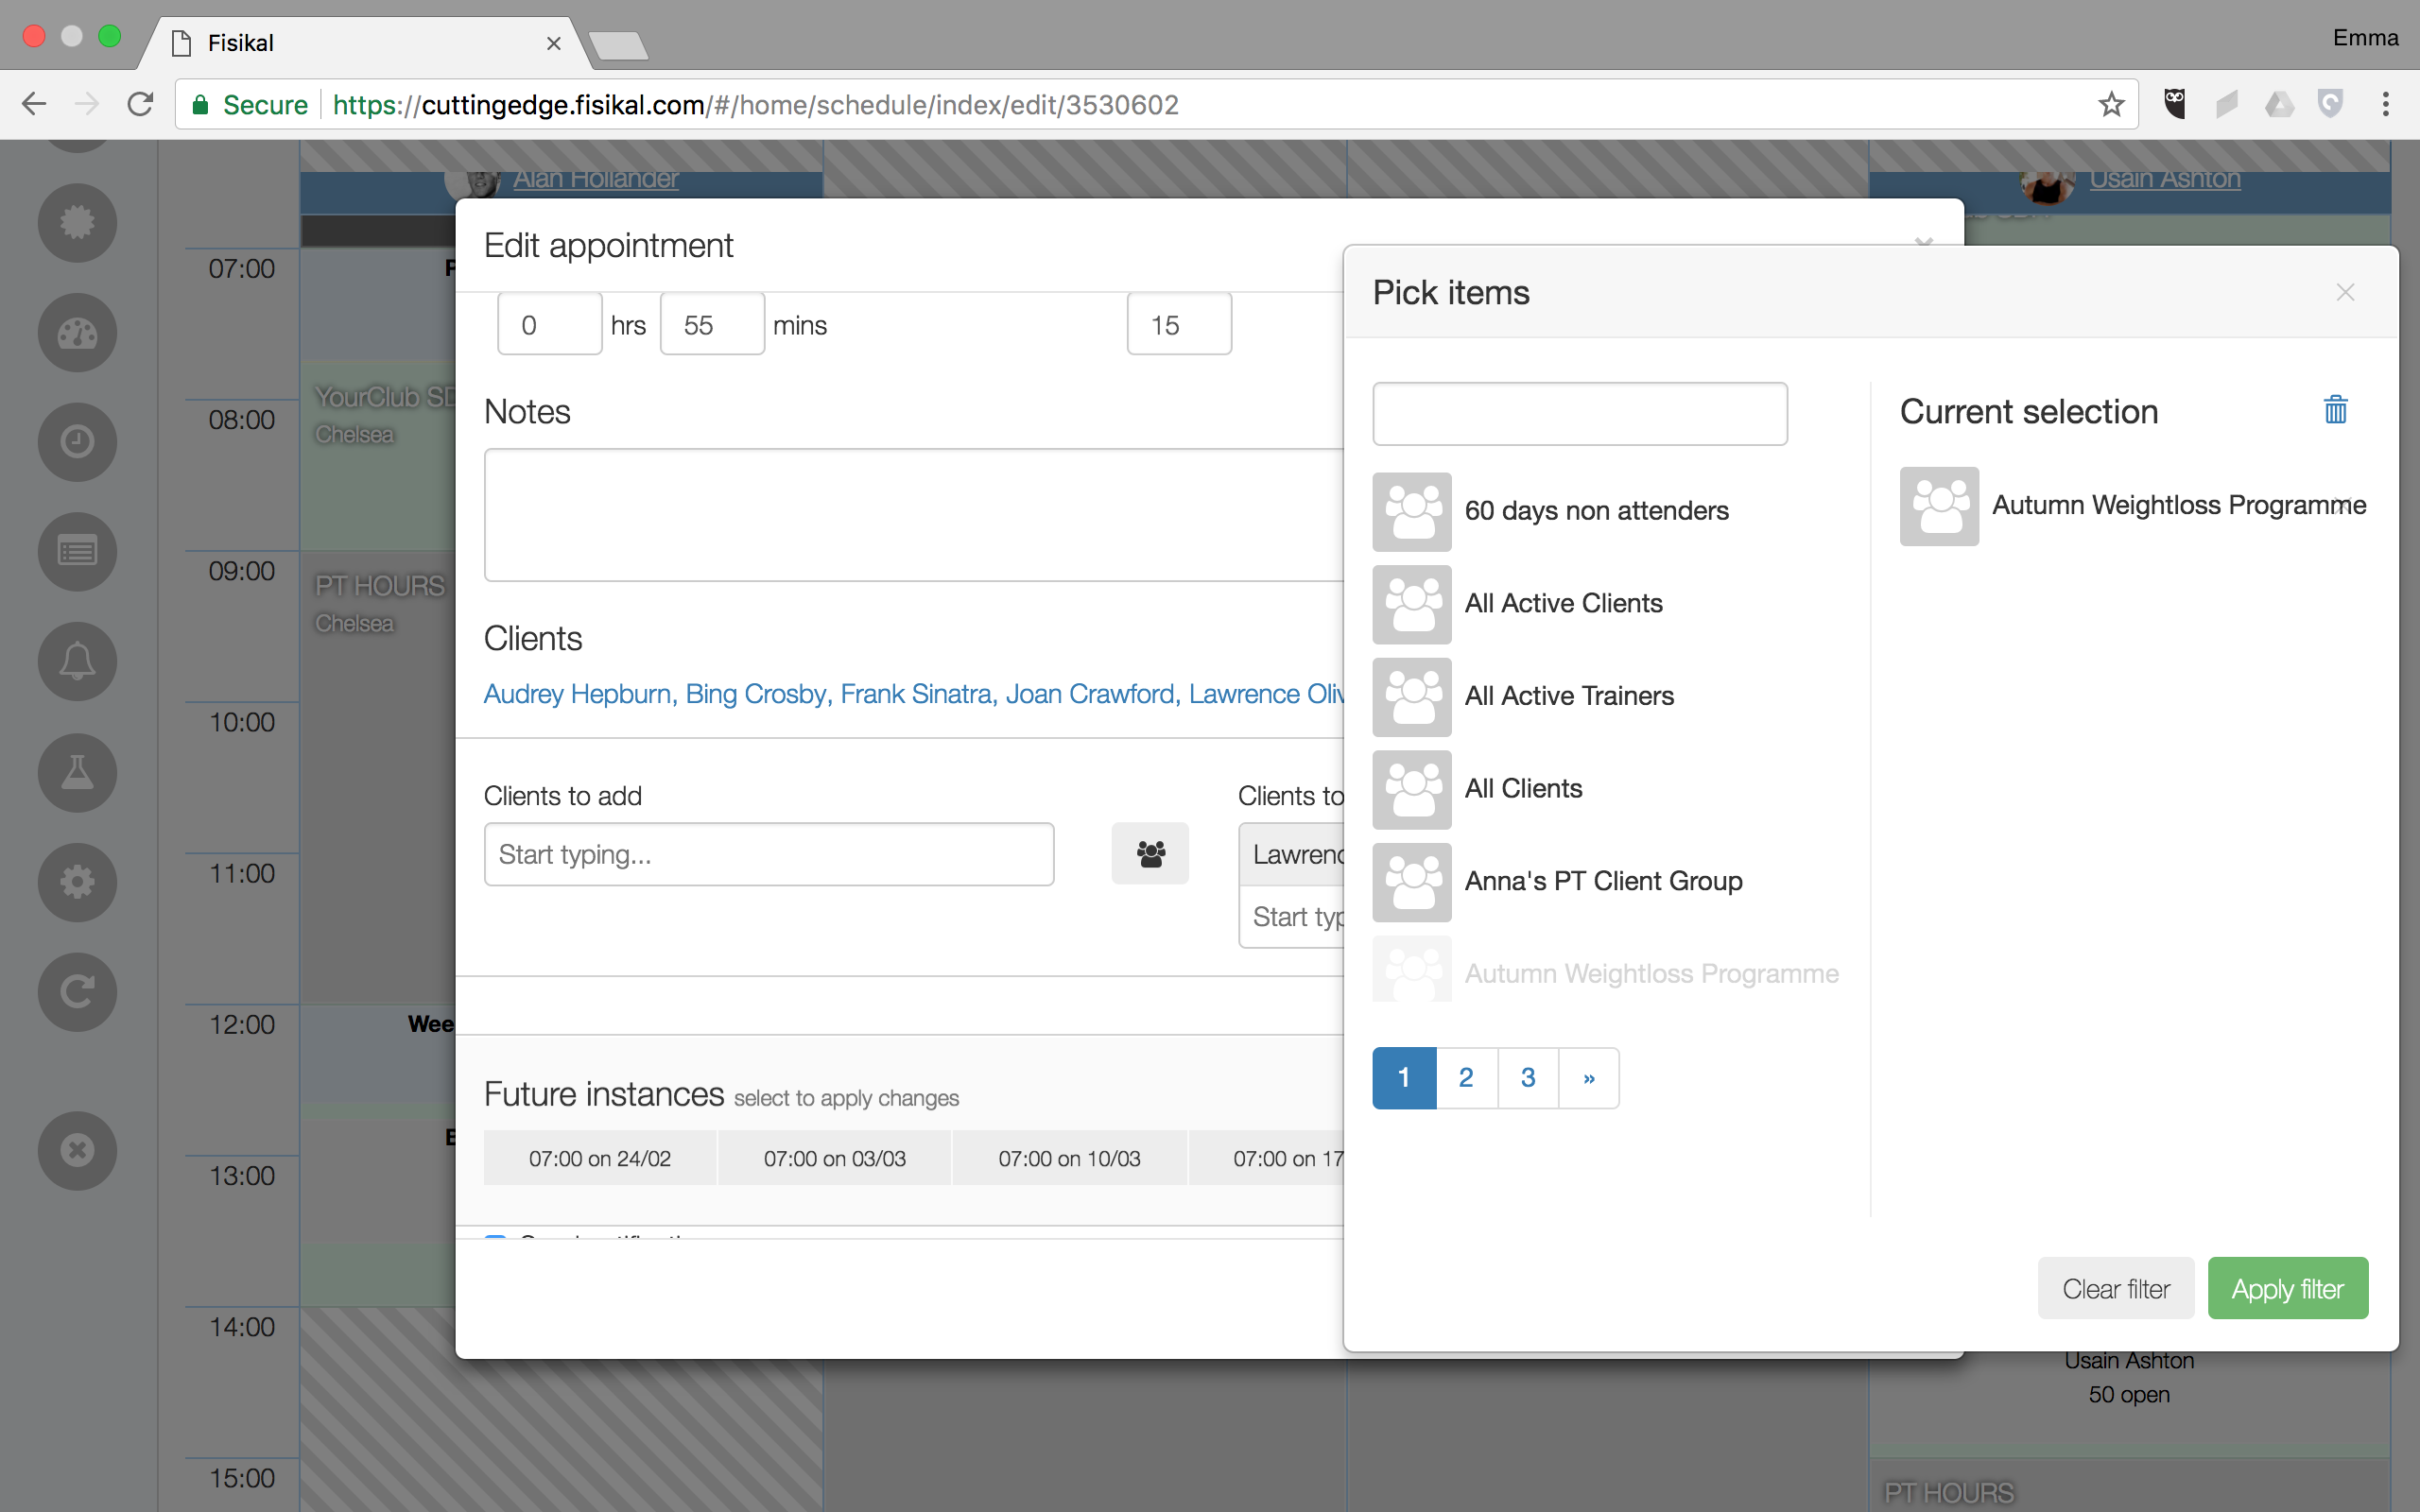
Users should select the APPLY FILTER which then saves selected items to the form and the Clients within the Group(s) selected will be listed in the CLIENTS TO REMOVE section of the form as shown below:

Once all Clients have been added as required, Users can select which future instances of the appointment they wish to remove the selected Clients from. If the appointment does not have any future instances, this will not show any.
Users can select individual dates as shown above, or they can select APPLY TO ALL (x) FUTURE INSTANCES.
Users can choose to send notifications for the appointment(s) or choose to uncheck the SEND NOTIFICATIONS check box.
To complete removing Clients from the appointment(s), Users should select the UPDATE button. The appointment will go through the booking validation and will make the booking or highlight any errors / conflicts accordingly.