CONFIRMATION FLOW
How to configure Confirmation Pop ups to be displayed to Clients when they log into Fisikal via the web or mobile app.
Confirmation Pop Ups can be an important legal step for Clubs to ensure that Clients are presented with specific legal information that they must acknowledge before using the app and the club's services.
If Confirmation Pop Ups are enabled to show, Clients will not be able to progress past the Pop Ups unless they select "I AGREE" for each individual Pop Up. A digital record is kept for each Pop Up and these can be analysed by going to REPORTS > POP UP USAGE REPORT. This is an important legal step that helps minimise any Client - Organisation law suit action.
There are 5 types of Confirmation Pop Ups as follows and the flow can be made up of any number of pop ups:
- Induction
- A free form text field that is displayed with 'I Accept' and 'I do not Accept' buttons
- Member PIN
- Displays a free form text message and the value of the Access Pin field for the client with a Next button.
- The Access Pin is set through integrations and cannot be edited in the Fisikal UI.
- Health Commitment Statement
- A free form text field that is displayed with 'I Accept' and 'I do not Accept' buttons
- (Same as an Induction)
- Questionnaire
- Displays the questions from an Assessment Template
- Stores the result as an assessment on the client's record
- Image Slides
- Displays a series of images in full screen with Next and Previous buttons
INDUCTION
Use an Induction step in the confirmation flow to inform Club Members that they should have an induction on the fitness equipment before using the Club facilities on their own.
The content usually outlines that if Club Members do not have an induction then they agree they are exercising at their own risk.
This pop up is a free text field that can include text and images.
MEMBER PIN
This option is used by Organisations that have an integrated proprietary Club Access Control system
The integration populates the Access Pin field on the client record.
The Member Pin pop-up displays the client their Access PIN during the Confirmation flow. This is the one and only time it is displayed.
Enter text in the Content field to describe to the user what the number is.
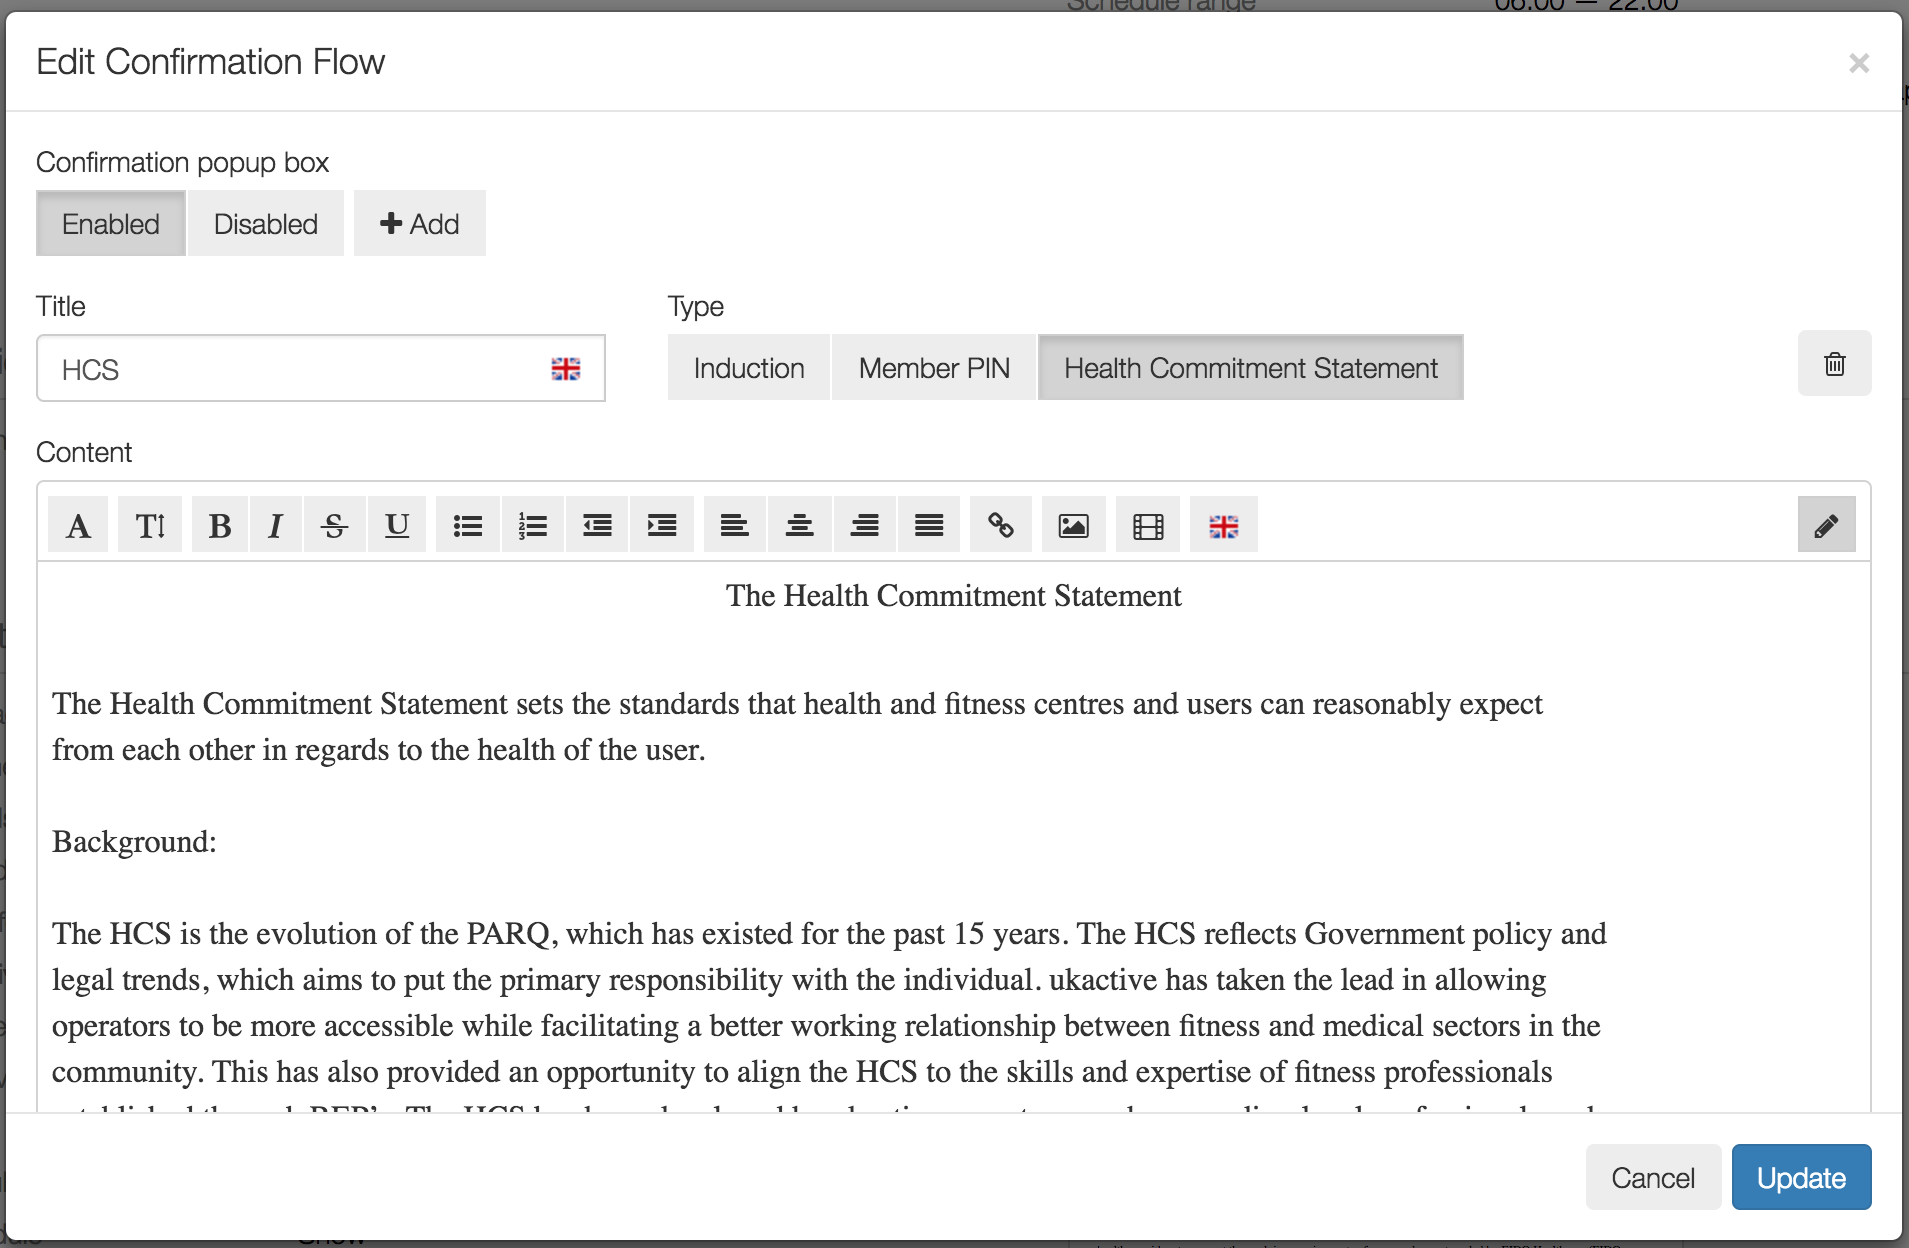
Create a new step in the confirmation flow
If ENABLED is selected, Users can select the "+ADD" button to enable them to see a new Confirmation Pop up.
TITLE
Users should enter a Title for the Confirmation Pop up, this will be reflected in any reports but is not visible to Clients.
CONTENT
Users can select the EDIT button (pencil icon) and then manually enter copy as required. Content can be added to the form in a variety of styling, formats and languages.

Users are able to select to add as many Confirmation Pop ups as they require. Do take into consideration that Client flow should be streamlined wherever possible making sure all legal points are clearly visible as required by law.
In order to apply the changes or the new Confirmation Pop up, Users should select the UPDATE button.
It is always recommended to test the flow from a Client perspective before publishing the site to all Clients. To do this Users should do the following:
- Create all the amendments to the Client Site and Confirmation Pop ups
- Make sure in NOTIFICATIONS that CLIENT is select on GLOBAL EMAILS and WELCOME EMAILS are configured to send
- Create a new Client that has an alternative email address than your Administrator email and that you can access, make sure SEND WELCOME EMAIL is configured to send when adding the Clients and select CREATE
- Retrieve your New Account Notification and sign into the Software. Check that you are happy with the form and number of Confirmation Pop ups and check that the Default landing is correctly configured
Users can repeat this test until they are happy to publish the platform to all Clients.
![White Logo Blue Banner copy-100.jpg]](https://knowledge.fisikal.com/hs-fs/hubfs/White%20Logo%20Blue%20Banner%20copy-100.jpg?height=50&name=White%20Logo%20Blue%20Banner%20copy-100.jpg)