CLIENT SITE SETTINGS
How to change the settings that control how Fisikal looks for client users.
Click Settings > Club > Edit Client Site Settings

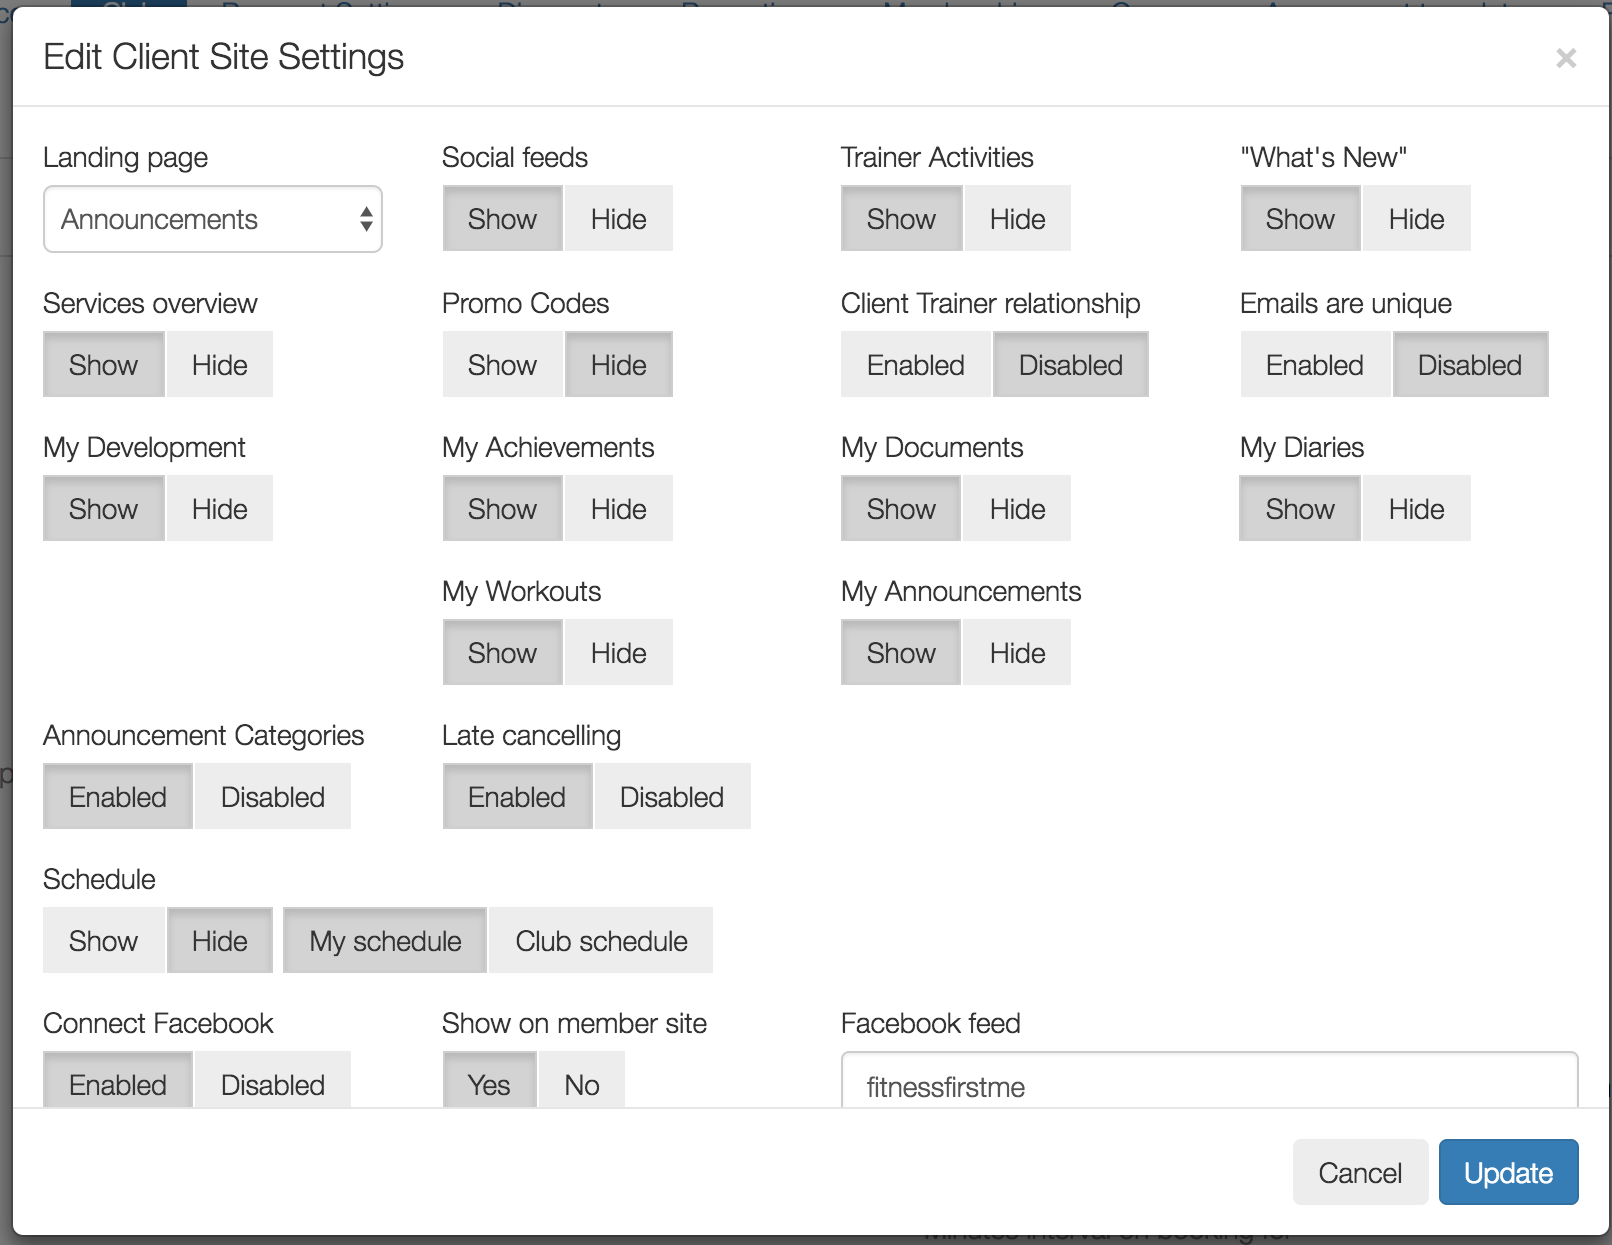
LANDING PAGE
When selected Users can choose from the following options:
- Default (as configured by the Club as the Club default landing page
- Dashboard (if one has been created for this role)
- Schedule
- Clients
- Team
- Announcements
- Announcement Categories
- Documents
- Media
- Workouts
- Reports
Whenever Users in this role log into the Software, whatever has been selected as the DEFAULT LANDING PAGE will be displayed first.
SOCIAL FEEDS
Users can configure if Social Media feeds are shown on the Home page of a Client's site.
If SHOW is selected, then configured Facebook and Twitter feeds will be displayed.
If HIDE is selected, no Social Media will be displayed.
TRAINER ACTIVITIES
Users can configure if Trainer Module are shown or hidden from the Clients Home page.
WHATS NEW
Users can configure if newly added Modules are shown on the Client's Home page.
MODULES OVERVIEW
Users can configure if the Module tab is shown on the Client's site.
PROMO CODES
Users can configure if the Promotion Code functionality is shown in the Client's Settings area.
CLIENT TRAINER RELATIONSHIP
Users can configure which Trainers are presented to Clients on the Trainer' Overview page.
If ENABLED is selected, Trainers will only be shown to Clients if one or more of the following is true:
- Client has a booking (past or future) with a specific Trainer
- Client has had an Assessment created by a specific Trainer
- Client has had a Workout created by a specific Trainer
- Client has purchased a Package where the Trainer was the payee
If DISABLED is selected (default option), Clients will be able to see all Trainers that have been configured to be shown to Clients on the Trainer Overview.
When enabled, the Trainer can only see a Client if they have contact with a Client - i.e. have created an assessment/workout for them.
EMAILS ARE UNIQUE
Users can configure if it should be possible for Users to be created in the Club and have unique E-mail addresses for each of them.
If ENABLED is selected, it will not be possible to create any User in the Club unless they have a unique E-mail address
If DISABLED is selected (default option), Users can create any User in the Club without any restriction.
Although it is possible for Clients to share E-mail addresses with each other, it is not recommended that Clients are created to have the same E-mail address as an Administrator, PTM, FOHM or Trainer as this may cause issues for the higher permissions Users use of the Software.
MY DEVELOPMENT
These are controlled through user permissions. For more information please click here.
MY DOCUMENTS
These are controlled through user permissions. For more information please click here.
MY DIARIES
These are controlled through user permissions. For more information please click here.
MY WORKOUTS
These are controlled through user permissions. For more information please click here.
MY ANNOUNCEMENTS
These are controlled through user permissions. For more information please click here.
ANNOUNCEMENT CATEGORIES
Announcement Categories can be shown or hidden – these should mainly be controlled through User Permissions. For more information please click here.
LATE CANCELLING
Users can configure if they should allow Clients to Cancel their bookings within the Cancellation Policy for the Club or for the specific Module.
If ENABLED is selected (default option), Clients will be able to Late Cancel a booking. They will be removed from the booking and will not have their credit refunded. The Client will be marked as Late CXL on the system. If the booking was an individual booking, the Trainer will be able to make a new booking in its place. If the booking was a group booking, the Client will only be removed from the occurrence and the event will still show on the Schedule.
If DISABLED is selected, Clients will not be able to Late Cancel a booking.
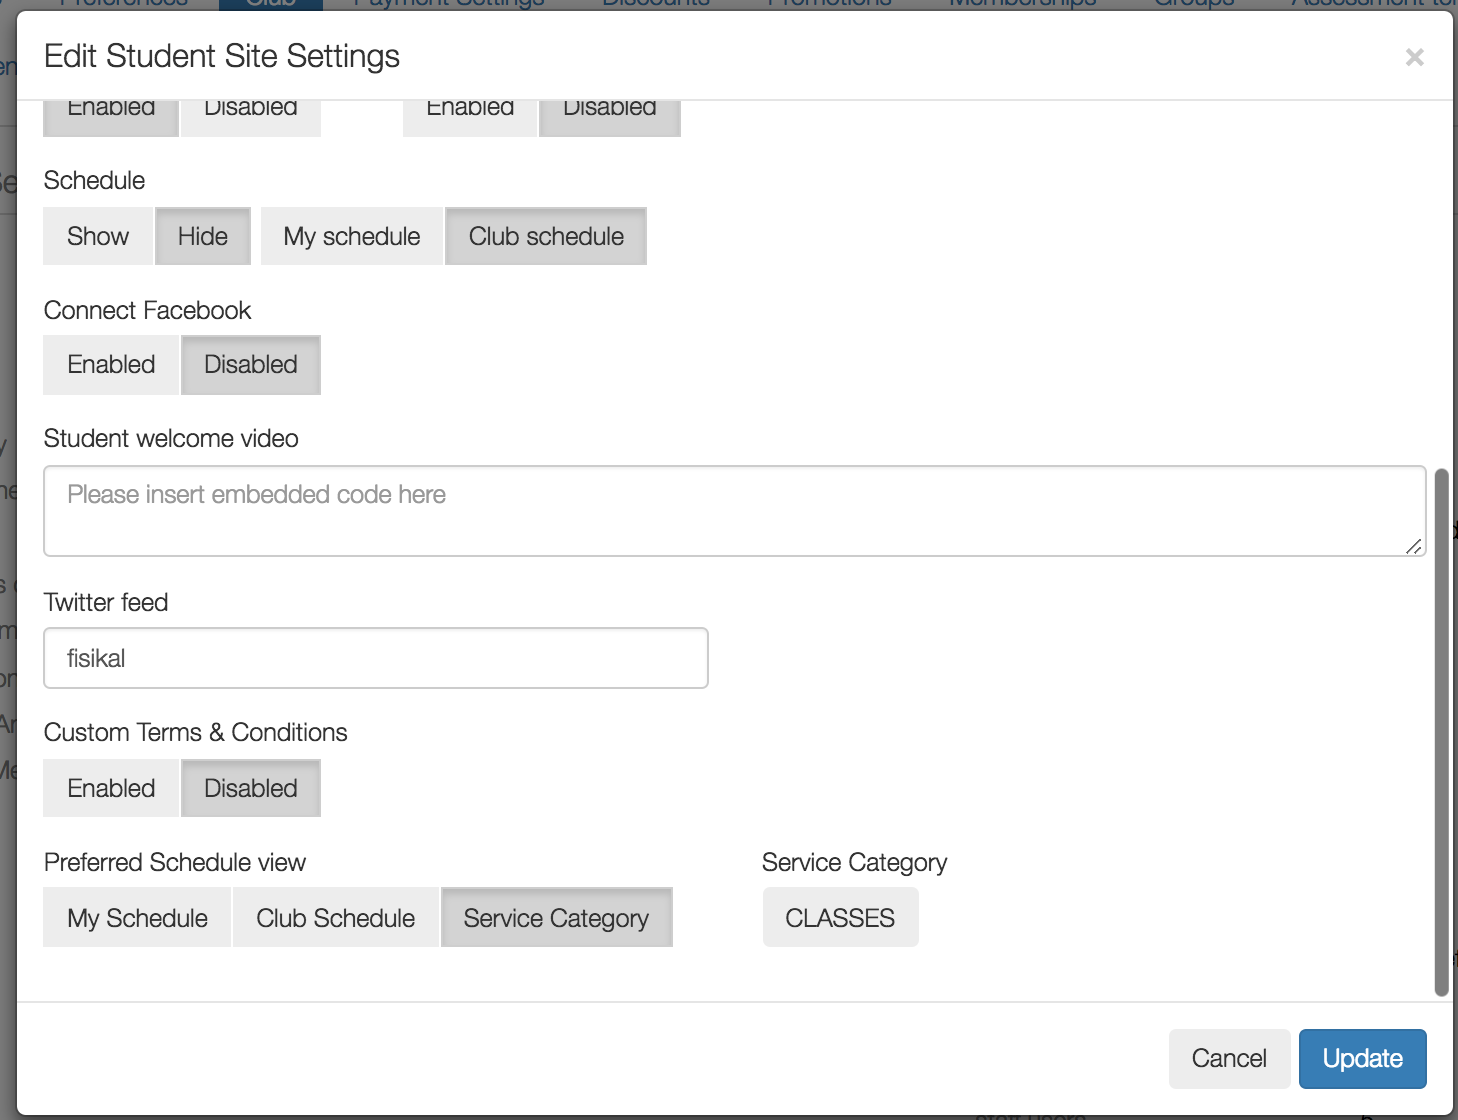
SCHEDULE
Users can configure the Schedules views that should be displayed to Clients.
If SHOW is selected (default option), Clients will be able to view all Schedule Categories and Views that have been configured in Module Categories.
If HIDE is selected, Users can configure to hide one of the following options:
- My Schedule
- Club Schedule
MY SCHEDULE is a specific Schedule shown to Clients that shows all bookings in all Locations.
CLUB SCHEDULE is a specific Schedule which can be shown to Clients that shows all bookings that the Client could join in a specific Location. The CLUB SCHEDULE is usually only shown to Administrators as they can see everything that is going on in one place.
CONNECT FACEBOOK
Users can configure the Client site to show a specific Facebook feed. They should enter the last part of the URL after the / to show the name of the specific page.
Example:
https://www.facebook.com/Fisikal/
Users should only enter "fisikal" in the field and do not need the rest of the URL.
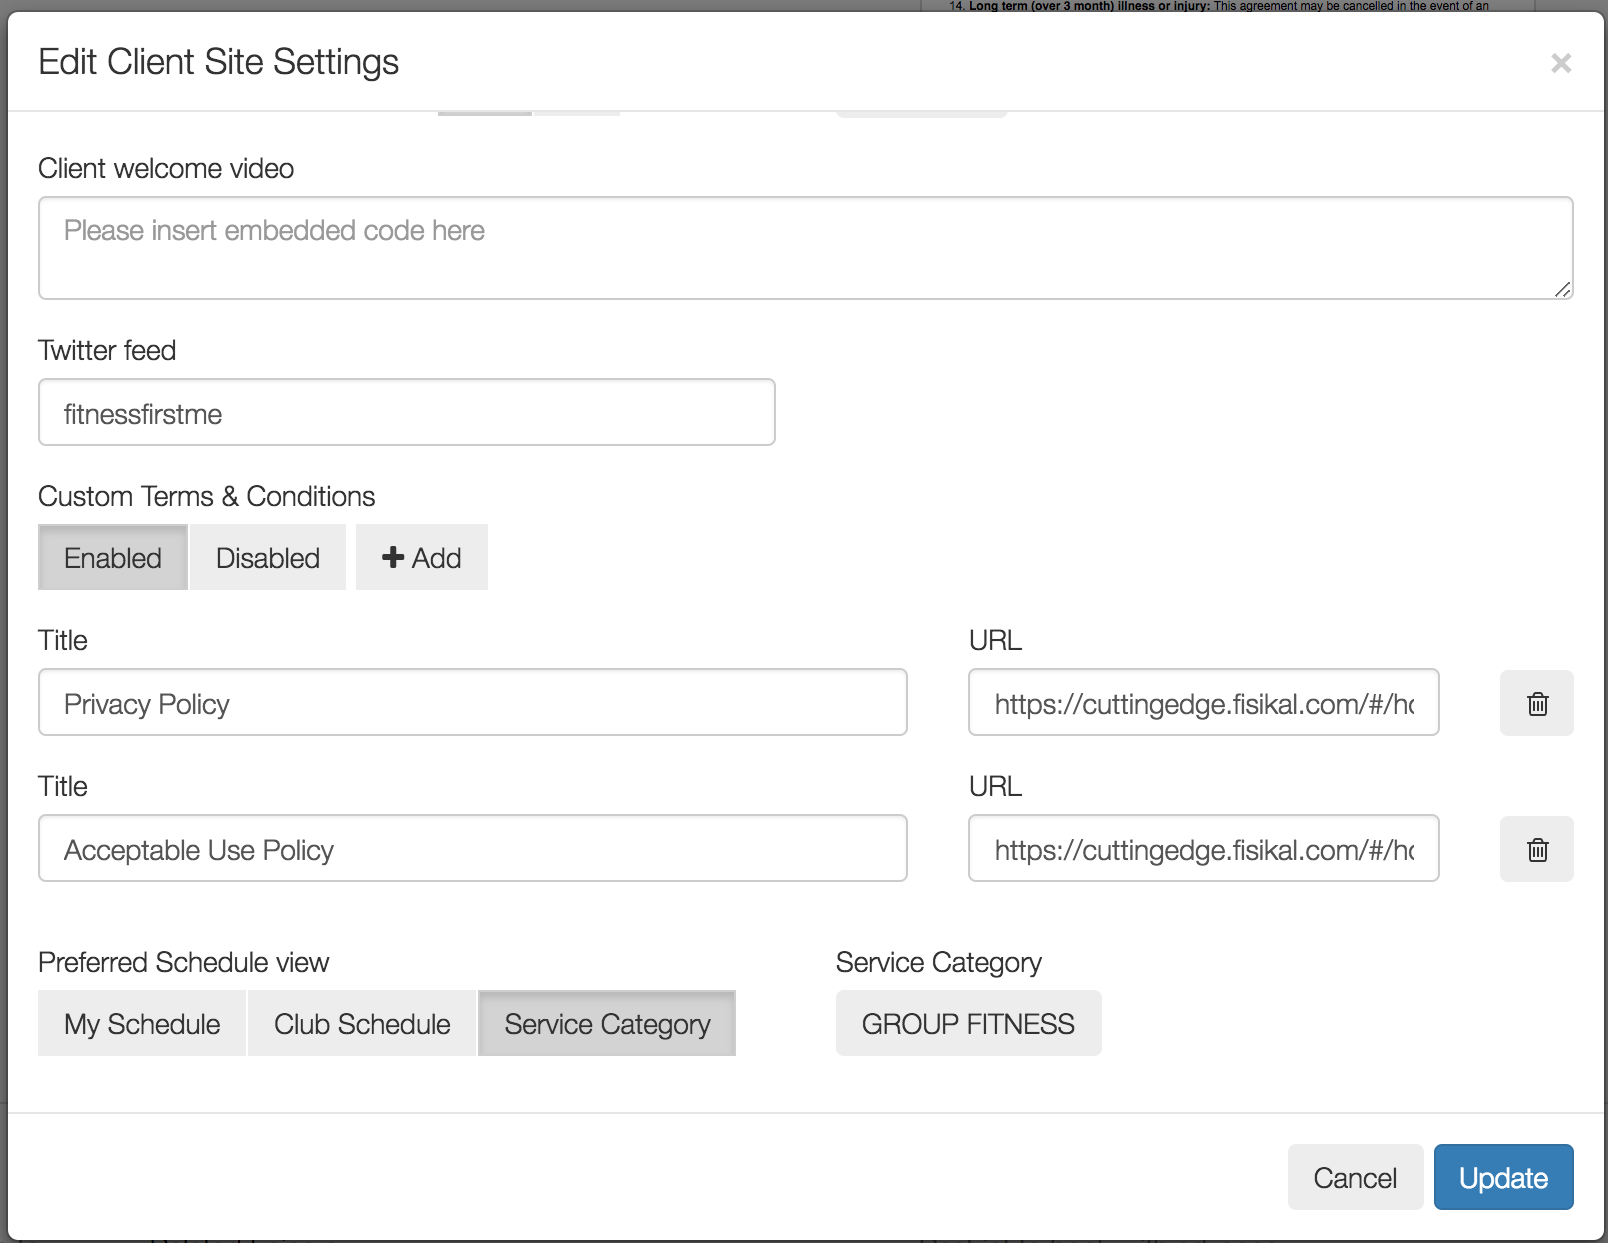
CLIENT WELCOME VIDEO
Users can configure if they want to embed a Client Welcome video which can be embedded on the Welcome Email template which is sent to Clients when they are added to the Software.
Users should go to YouTube or Vimeo to find the video they want to embed, then select the SHARE button and copy the EMBED CODE and paste it into the text box in the Software.
If Users decide to configure videos on Welcome E-mails, they should enter it here and then test how it is received by the Client. They can do this by doing the following:
1. Go to SETTINGS > EMAIL TEMPLATES and select Welcome for Client
2. Configure the template so that it has all the correct copy shown, the video box is displayed and then select UPDATE
3. Go to a Client profile that they have as a Test Client on the site, Edit their Profile and select RESEND WELCOME EMAIL and then UPDATE.
4. On this Client's profile select COMMUNICATION. If the Welcome E-mail has been correctly configured and Communications are NOT disabled to send, a copy of the Welcome E-mail will be shown for the User to preview.
TWITTER FEED
Users can configure the Client site to show a specific Twitter feed. They should enter the last part of the URL after the / to show the name of the specific page.
Example:
https://www.twitter.com/Fisikal/
Users should only enter "fisikal" in the field and do not need the rest of the URL.
CUSTOM TERMS & CONDITIONS
Users can configure to show Custom Terms & Conditions to Clients. If enabled these will be included in THE SMALL PRINT section of the Client site accessed through the Footer menu.

If ENABLED is selected, Users should select the "+ADD" button to show a new option for each individual Custom T+C to be applied.
Users should enter a TITLE and an external URL to point the link to for each of the Custom T+C's to be applied
Once the UPDATE button is selected, all Custom Terms & Conditions will be immediately visible for Clients to view in their portal.
PREFERRED SCHEDULE VIEW
Users can configure the preferred schedule view from one of the following options:
- My Schedule
- Schedule
- Service Category
If PREFERRED SCHEDULE VIEW > SERVICE CATEGORIES is selected, Users can configure a specific Service Category to be shown.
Whichever Schedule View is selected will become for the default range for this Role. Users can customise their own Preferred Schedule View when logged into the Software in the Preferences section.
To learn more about Schedule view options click here.
![White Logo Blue Banner copy-100.jpg]](https://knowledge.fisikal.com/hs-fs/hubfs/White%20Logo%20Blue%20Banner%20copy-100.jpg?height=50&name=White%20Logo%20Blue%20Banner%20copy-100.jpg)
