CLIENT MANAGEMENT
This article shows Users how to manage Clients and send Messages through the Software
ADDING CLIENTS
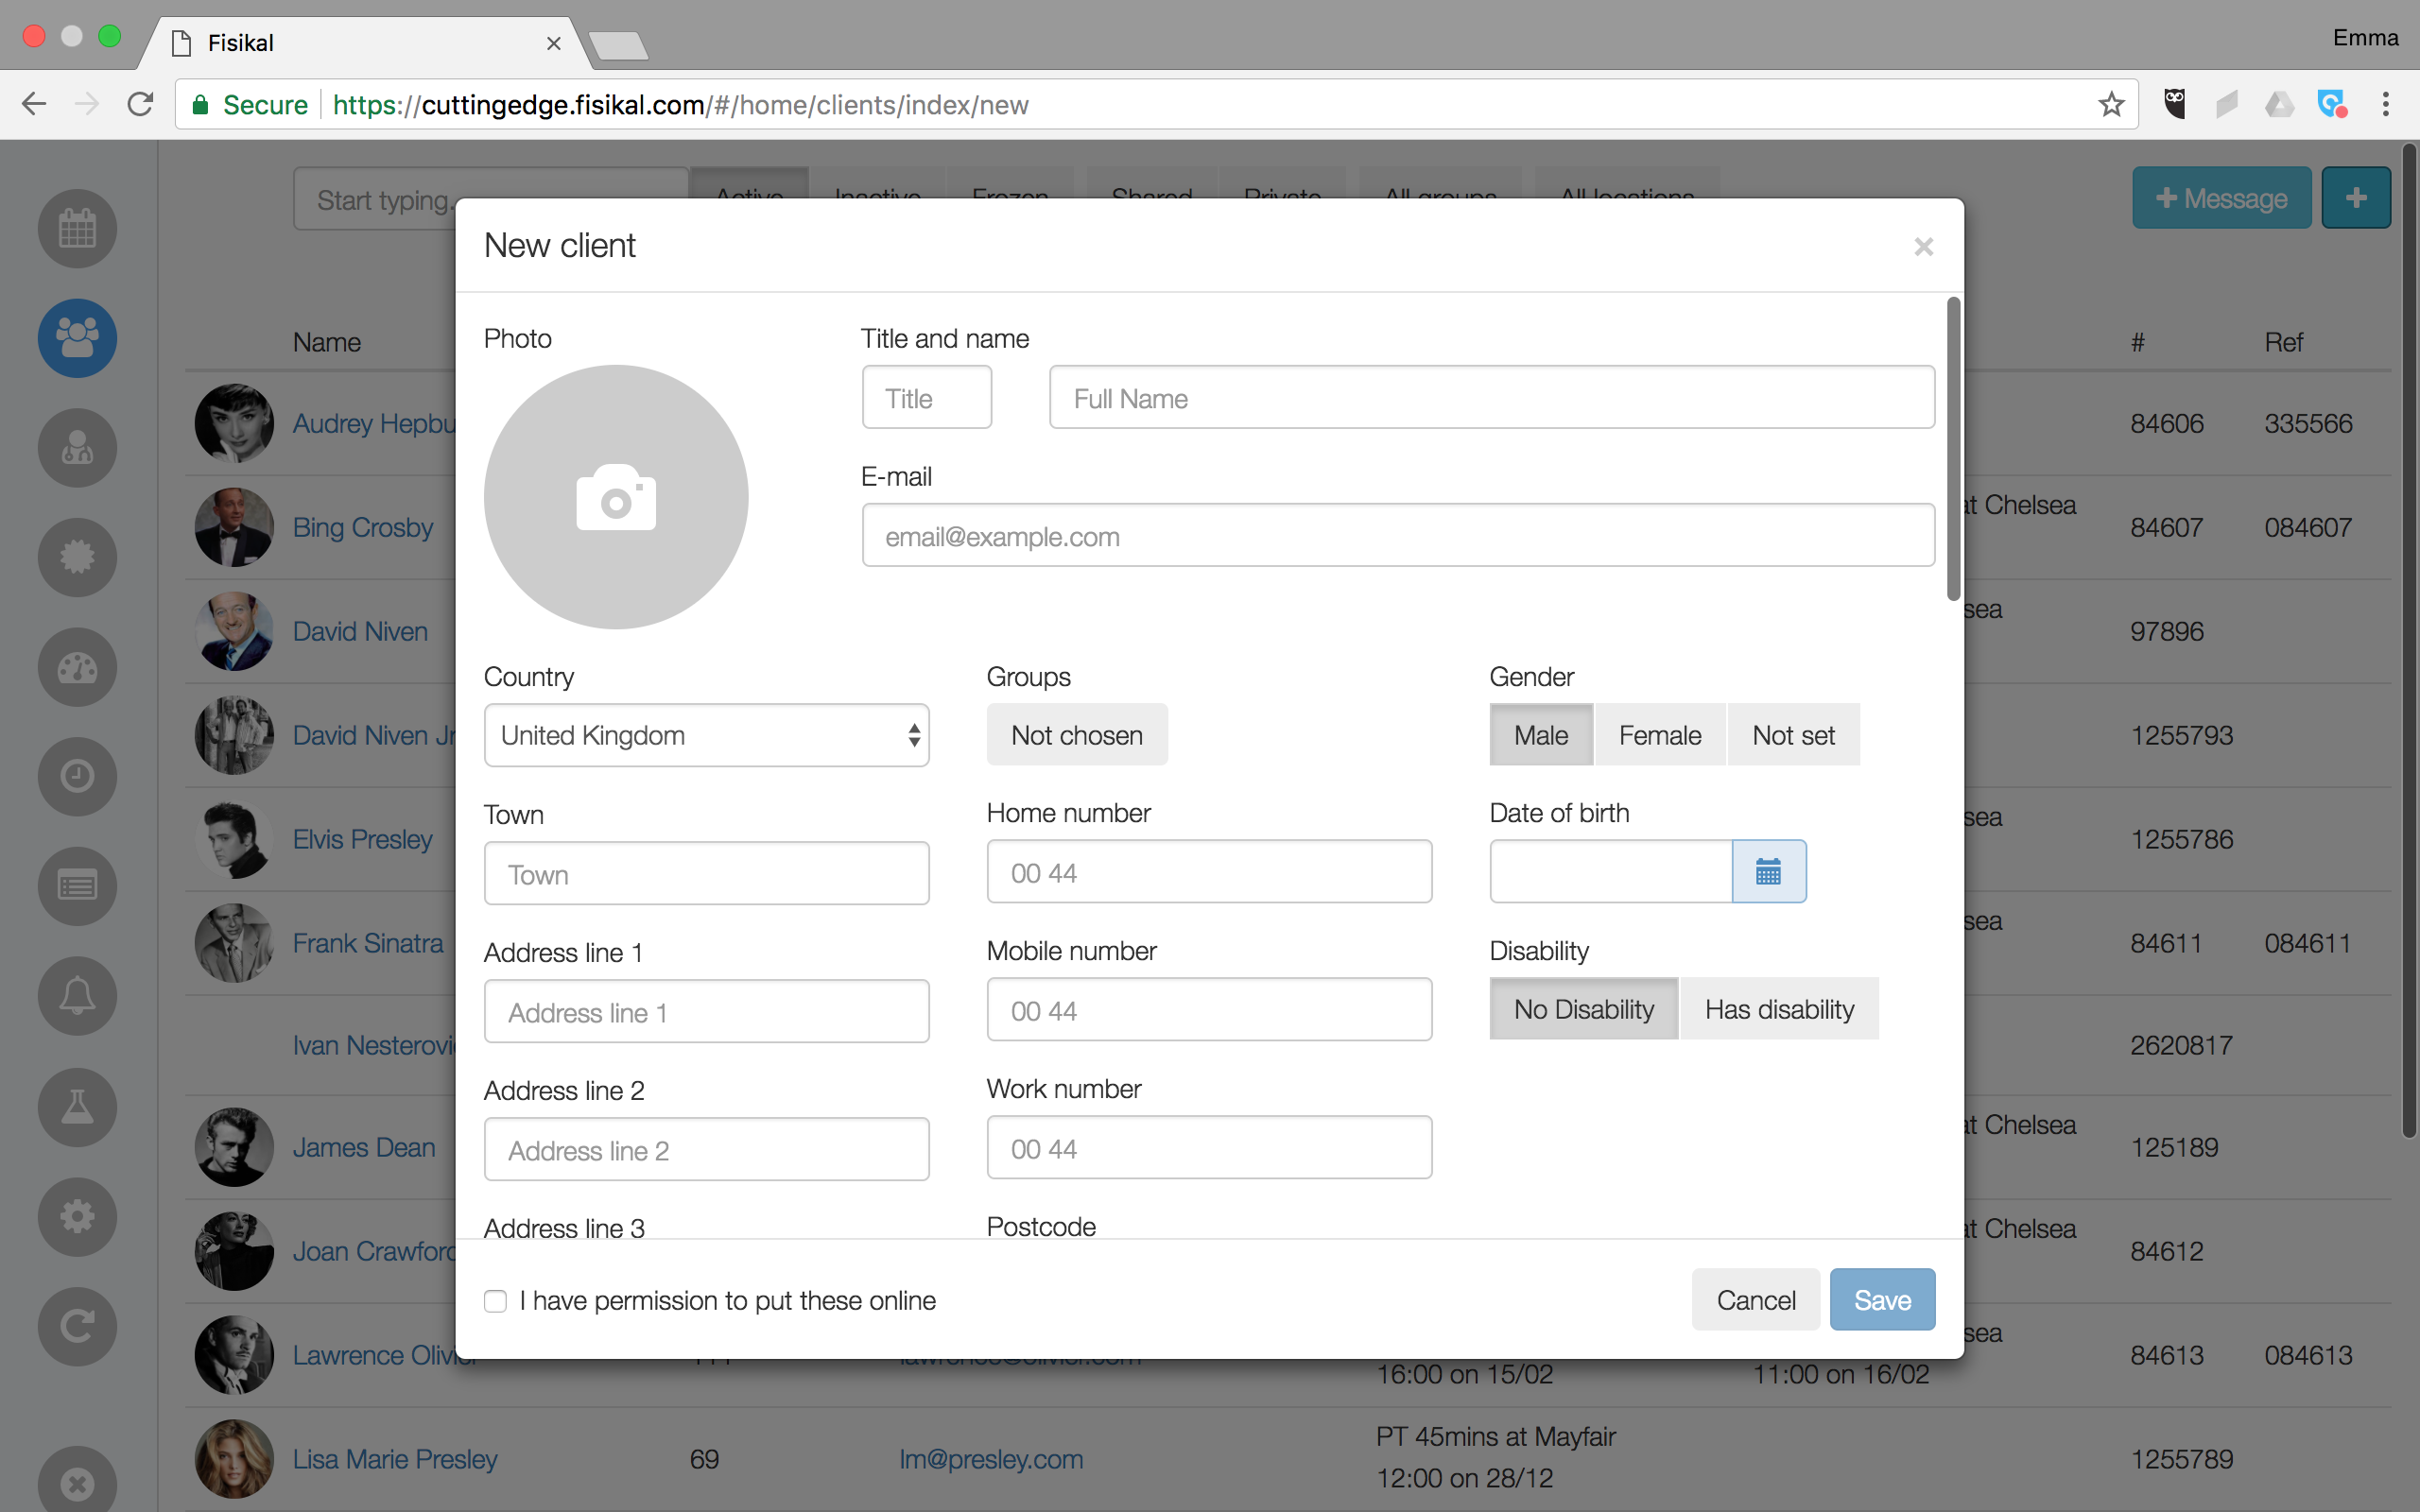
To add a new Client onto the system:
- Click Clients
 in the main menu
 - Select the blue + button

- Fill in the following minimum information:
- Name
- Home Club (Location)
- “I have permission to put these online”
- Click Save.
- By selecting SAVE (as long as notifications are turned on) a club branded email is sent to the Client. This notification contains the log in credentials required for the Client to access the system.

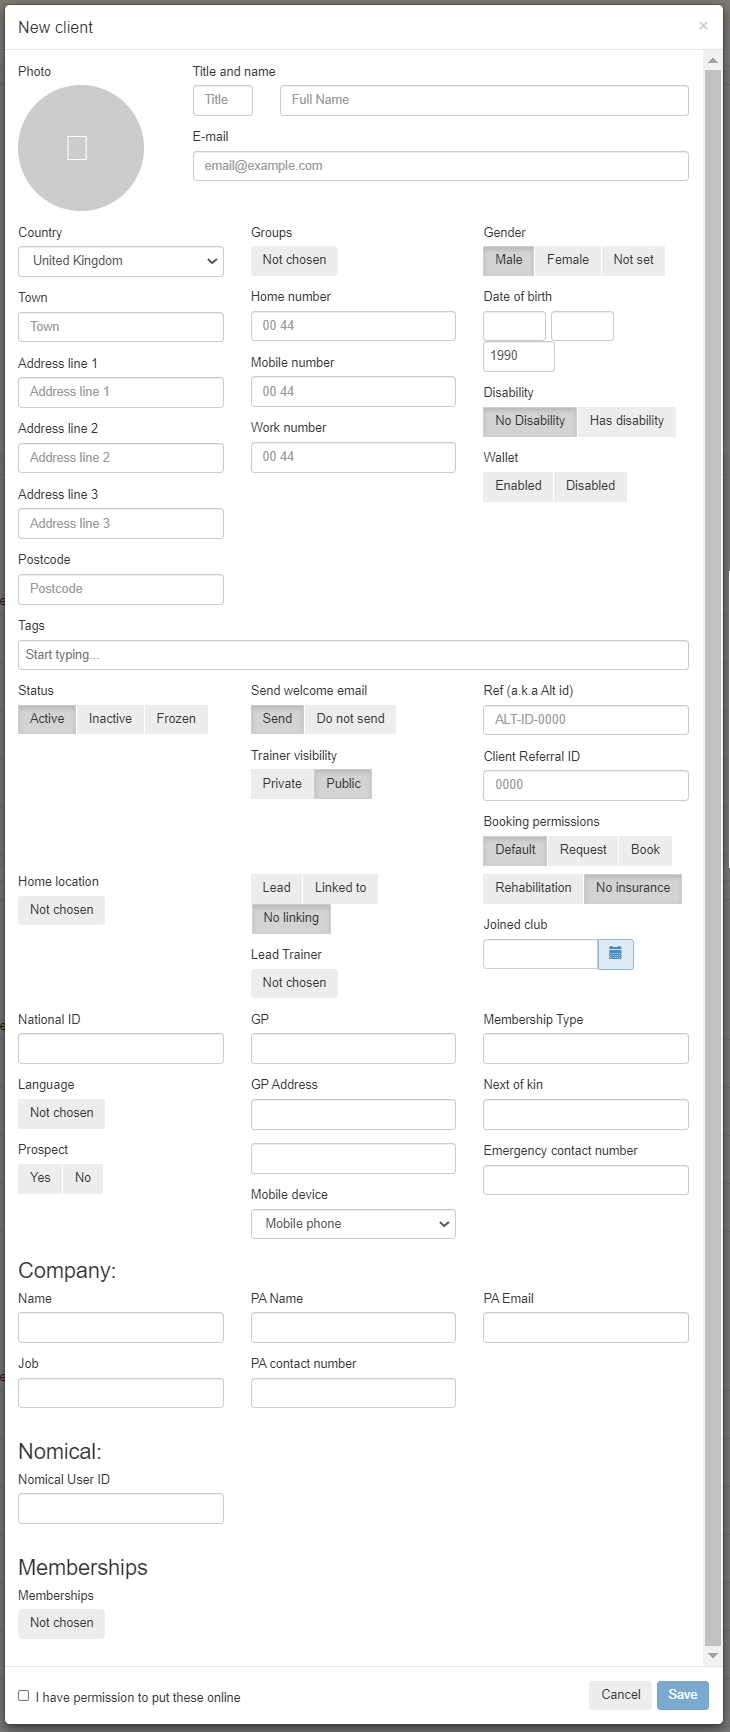
Other fields
Most of the fields on the client details form are self explanatory. Some are specific to Fisikal user records:
| Lead and Linked Clients |
Create relationships between clients by making one client a Lead client so that clients can be linked to them; for example make a parent client record a Lead client, and link their children client records to them. Only Lead clients can be linked to. A linked client can only be linked to one Lead client. Lead clients can determine the booking permissions of their linked clients, allowing them to control their bookings, or let them book on their behalf. See the Linked Clients topic for more details |
| Lead Trainer |
Select a trainer record that most likely to be the trainer that delivers services to this client. Also known as a Guardian Angel trainer. This selection does not limit any access to the client, it just records the name of the client's main trainer. |
| Groups |
The client is automatically added to some Generic groups (All clients, all active clients, clients of their home location etc). Clients be added to manually created groups too. See the topic on groups for details. |
| Tags | Tag a client to assign them certain attributes. |
| Memberships |
Memberships in Fisikal determine which clubs or locations that the client is entitled to make bookings in. It is not the same as packages which determine which services the client can book. |

EDITING CLIENT INFORMATION
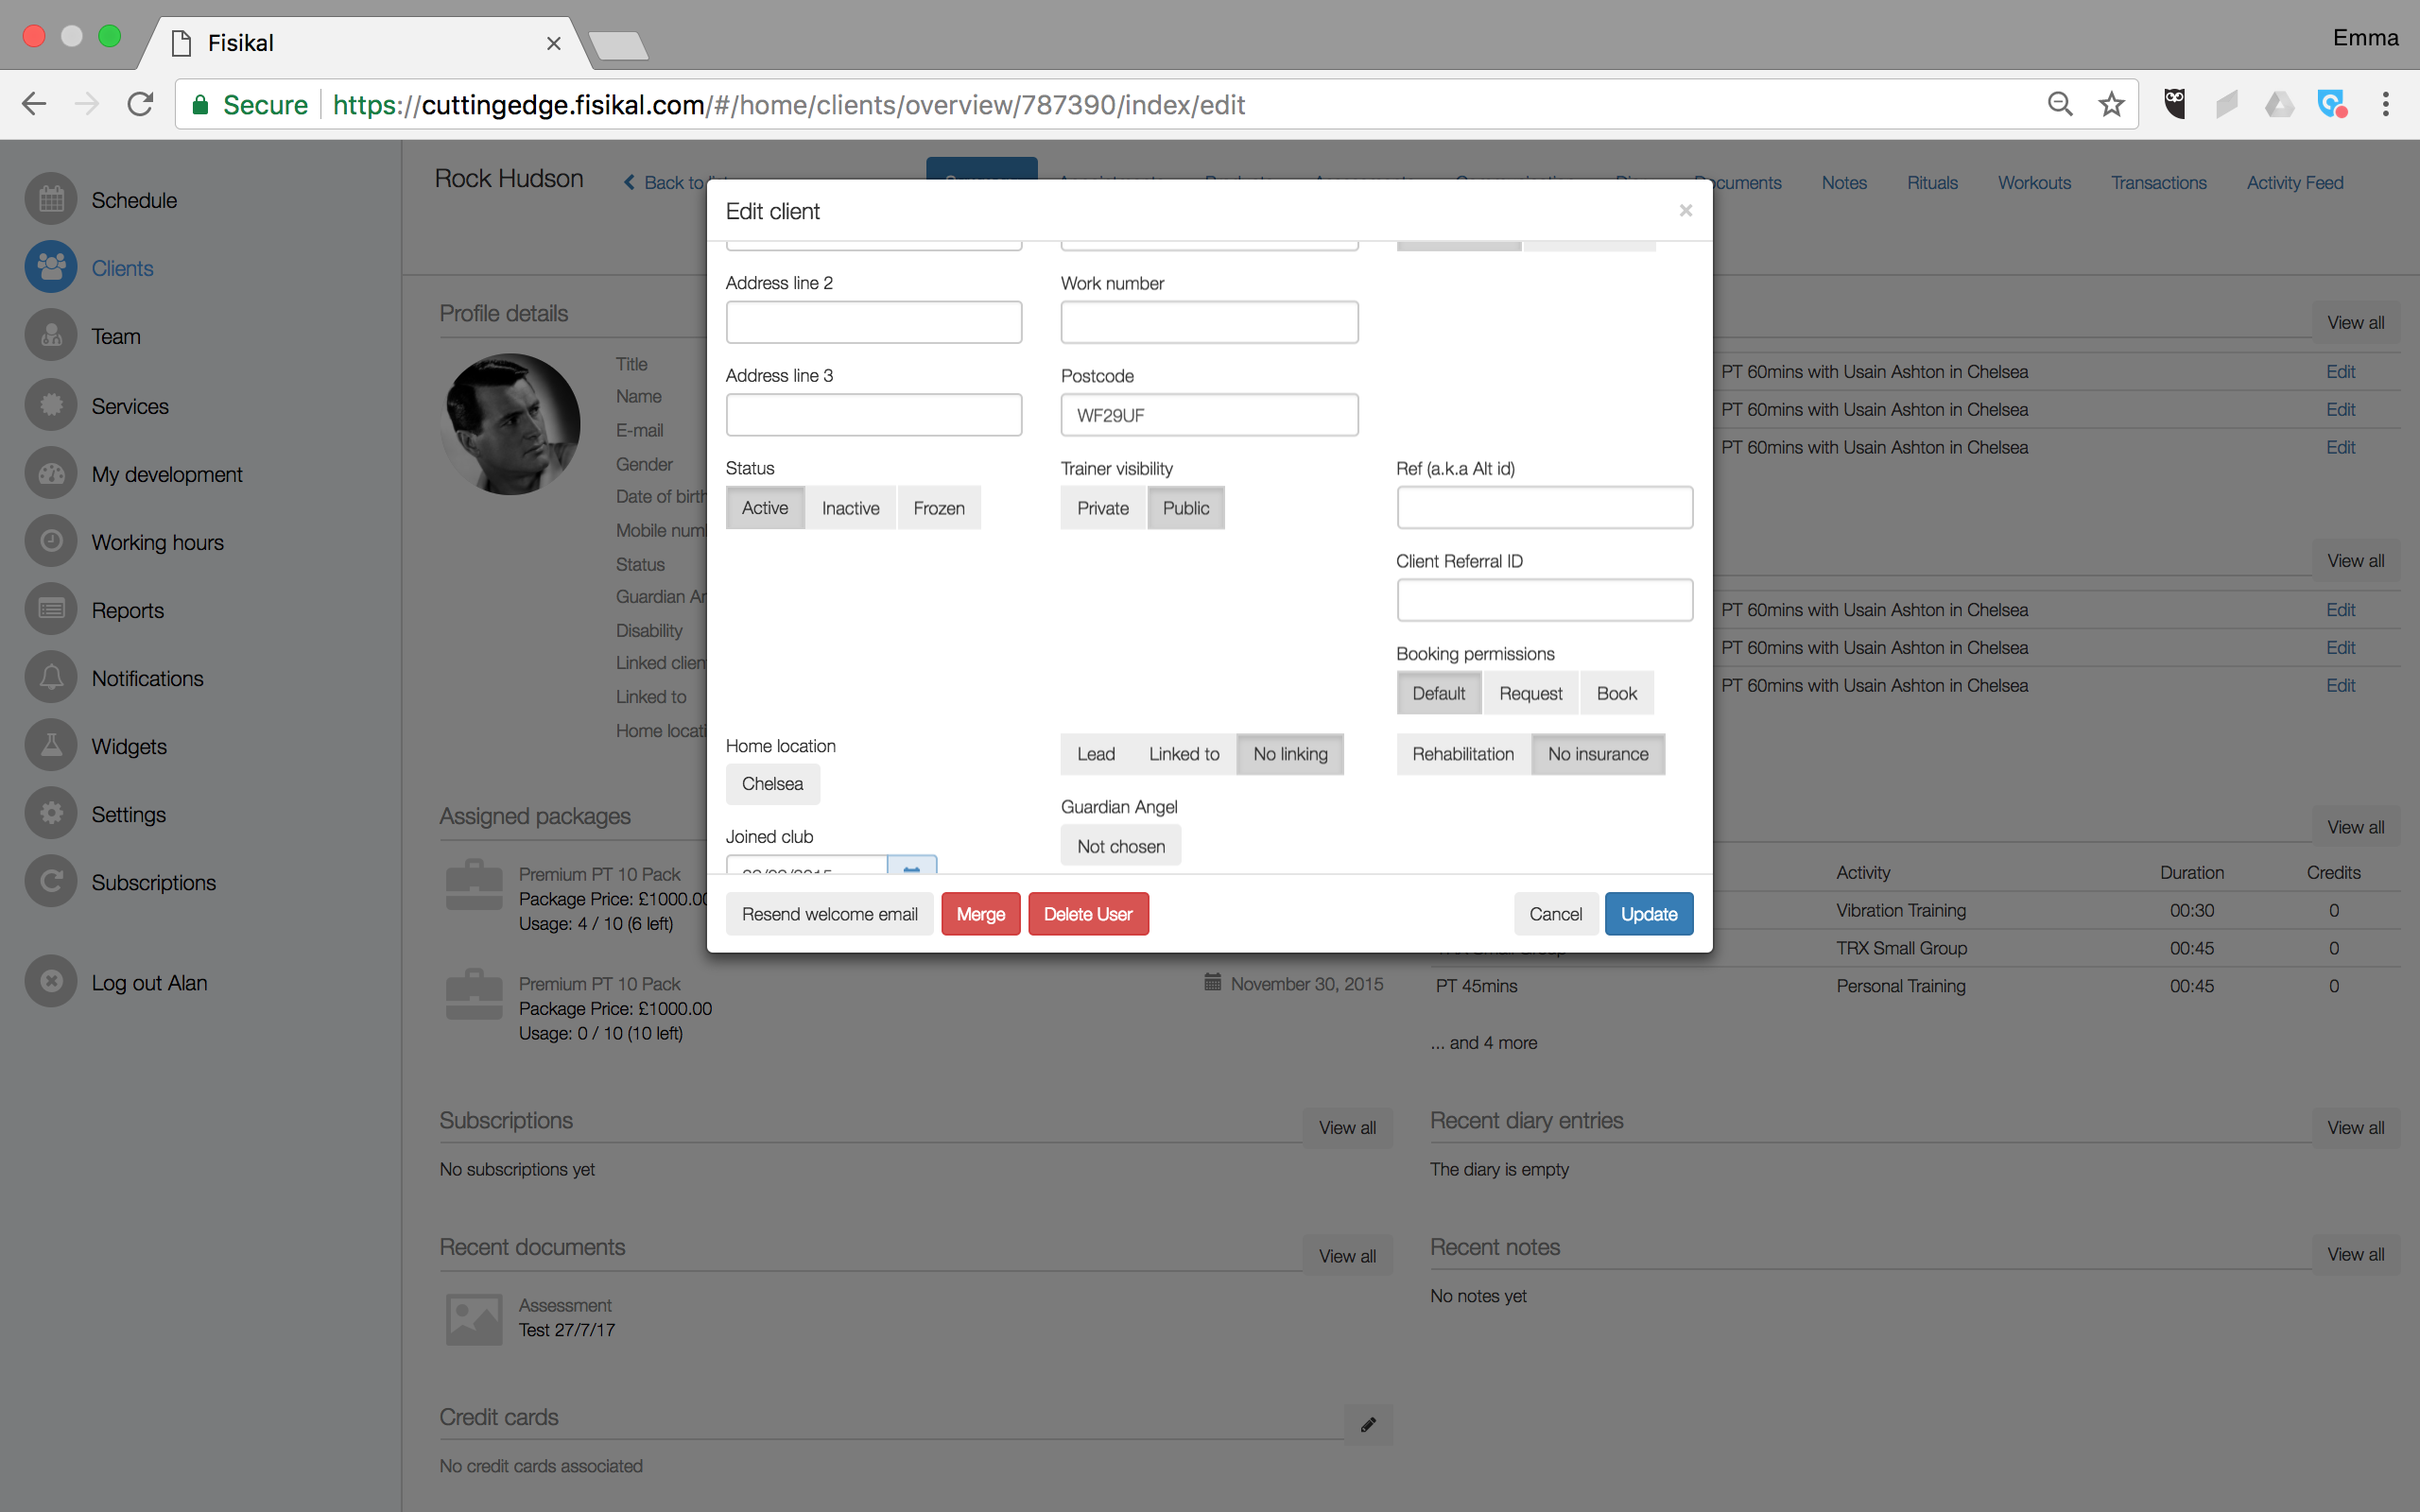
Users can EDIT any details of the Client’s record by doing the following:
- Click Clients
 in the main menu
 - Use the search bar or scroll down the Client list to find a specific Client
- Click the Client’s name to access their profile
- Select the PENCIL icon
 on the Profile Details
 - Amend relevant details
- Click UPDATE to save

DISABLING CLIENTS
If a Client needs to be blocked from accessing the system for any reason this can be done as follows:
- Click Clients
 in the main menu
 - Use the search bar or scroll down the Client list to find a specific Client
- Click the Client’s name to access their profile
- Select the PENCIL icon
 on the Profile Details
 - Select STATUS and change the option to INACTIVE
- If you want to block the Client for a particular period of time, you can change STATUS to FROZEN, where you can enter a reason and a date that they can access the system again
- By selecting UPDATE this will save any changes made

![White Logo Blue Banner copy-100.jpg]](https://knowledge.fisikal.com/hs-fs/hubfs/White%20Logo%20Blue%20Banner%20copy-100.jpg?height=50&name=White%20Logo%20Blue%20Banner%20copy-100.jpg)