![White Logo Blue Banner copy-100.jpg]](https://knowledge.fisikal.com/hs-fs/hubfs/White%20Logo%20Blue%20Banner%20copy-100.jpg?height=50&name=White%20Logo%20Blue%20Banner%20copy-100.jpg)
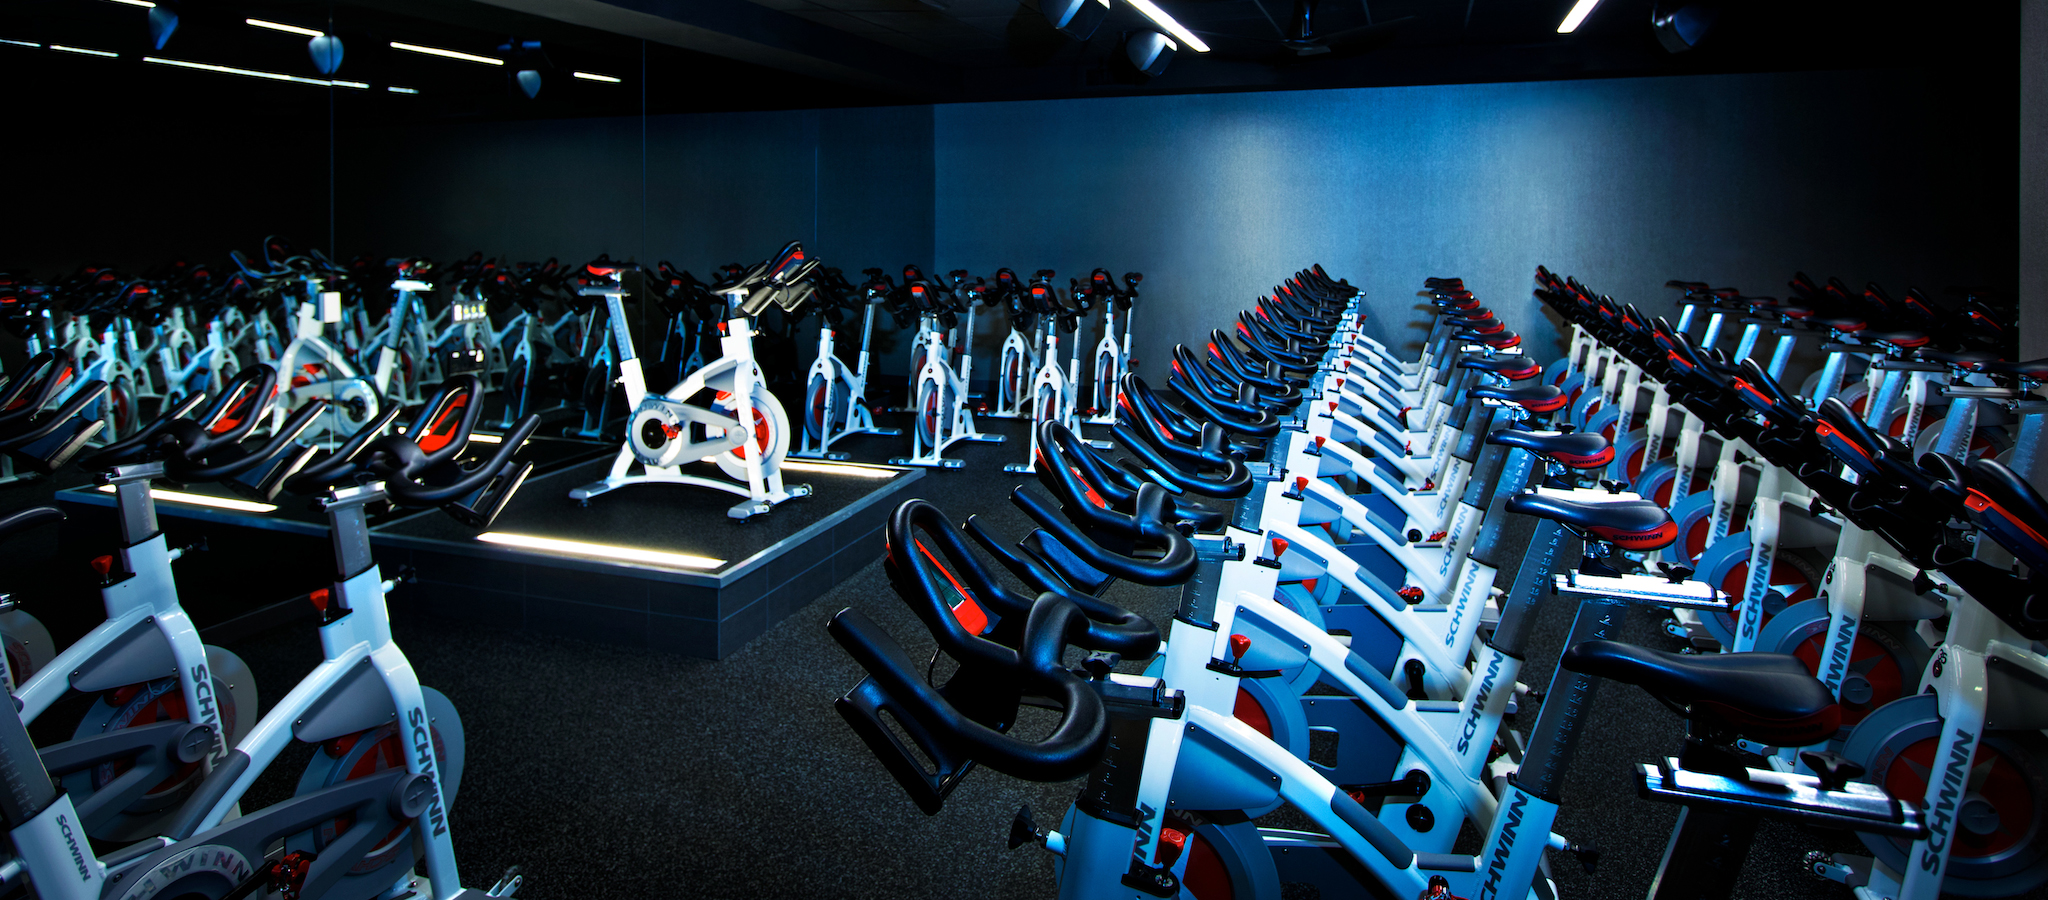
The main use for the Book a Bike feature is a spin studio where there are a fixed number of bikes in fixed locations in the room.
But the same function can apply to other bookings:
- Any workout equipment (bikes, TRX harness, trampoline etc)
- A seat or particular space in a room
OVERVIEW
Steps to use Book a Bike:
- Set-up
- Create a Room Map, one per layout of a room.
- You will also need a Location and perhaps a Sub-Location to be defined for the booking.
- Create a booking in the Location and select the Room Map to use.
- When Booking
- Clients book session as normal
- Upon booking they are presented with a view of the room map and can click on the numbered position they would like.


CREATE A ROOM MAP
Log in with an account that can edit Services (Manager, PT Manager or Admin)
Select Services section and then Room maps from the top menu
Click the  button to add a new Room map. The Room Map editor is displayed.

Name and Description
Enter a name for the room map that will allow the person creating the schedule to select the right one.
The description is optional.
Location
Select the Location that this Room Map corresponds to.
If the room map is for a sub-location then just select the Location at this point, you will be able to choose the sub-location if necessary when creating the schedule.
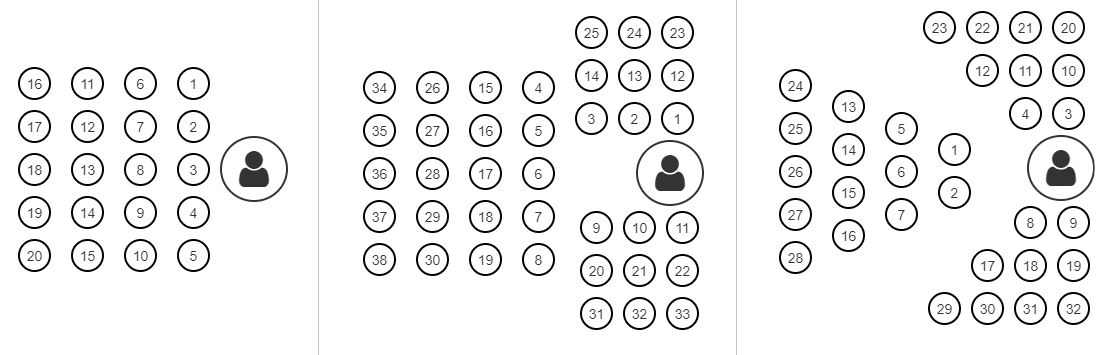
Seating Layout
The seating layout option determines which of the two types of room layout can be defined in the map:
- Linear
- Arc
The choice is determined by the shape of the room and how the equipment will be laid out around the instructor.
Linear Style Room Map
In a Linear style room map the equipment is arranged in:
- rows in straight lines
- usually with equal numbers in each row
- in front of the instructor
- and perhaps on either side of the instructor
Example Linear room maps look like this:
Configure Rows for a Linear Room Map
- Click the
 button to set the number of rows in the part of the map with the most rows.
 - For each row, enter the number of bikes that are in front of the Instructor (Centre), and how many are on each side (Left and Right). The Preview will update when you move to the next field.
Arc Style Room Map

In an Arc style room map the equipment is arranged in:
- rows in straight or semi-circular lines
- usually with a different number in each row
- in front of the instructor only
Example Arc room maps look like this:

Configure Rows for an Arc Room Map
- Enter a value for the Arc Height
This number between 0 and 150 determines the shape of the arc, the higher the number the more the bikes wrap around the instructor. - Click the
 button to set the number of rows.
 - For each row, enter the number of bikes in that row.
The Preview will update when you move to the next field.
Tip: Make sure the count of bikes is correct (the highest number is equal to the number of bikes in the room). This is the value used for the capacity of the class.
Colours Settings
There are colour settings available for bikes that are unavailable, available or selected. You can change the colour of the Border, Fill and Text.
Click the item to change and the colour selector is displayed.

Status
Use the Status setting to remove the Room map from being selected by users.
CREATE A BOOKING WITH A ROOM MAP
Click the Schedule and then either:
- Click the calendar where the booking will be
- Click Book and enter all the details
The Book an Appointment form is displayed. Note the Room Map option appears.

Complete the Booking as normal using the ADDING BOOKINGS guide for assistance.
CLIENT BOOKINGS
When a client books into a class with a Room Map attached they are presented with an extra step to allow them to choose which bike they want to use.
The process is the same in the Client Portal and in the Member App.

MANAGING ROOM MAPS
BROKEN BIKES
If a bike in a room is not working or not available for booking then the manager can edit the room map and make a bike unavailable.
- Log in with an account that can edit Services (Manager, PT Manager or Admin)
- Select Services section and then Room maps from the top menu
- Select the map to edit and click the spanner icon
 to view the Manage room map page
- Mark any bike that is unavailable as Inactive, this will change the colour of the bike on the map to the inactive settings and make it unbookable.
- Remember, when the bike is repaired to make it Active again on the map.