![White Logo Blue Banner copy-100.jpg]](https://knowledge.fisikal.com/hs-fs/hubfs/White%20Logo%20Blue%20Banner%20copy-100.jpg?height=50&name=White%20Logo%20Blue%20Banner%20copy-100.jpg)
For businesses that want to have a separate payment profile for each location, Managers will need to set up a separate Stripe account for each location.
When members select BUY, the platform first looks at if the Location has a specific payment gateway - if true, the payment will be sent there. If no location specific payment gateway is configured, then the payment will be sent to the Club payment gateway instead.
To create a Stripe account, users should register HERE. Please make sure that all details are filled in and that any verification has been done in advance of GO-LIVE.
To connect a Stripe account to a specific location, Managers should do the following:
- Go to SETTINGS > PAYMENT SETTINGS and select SET UP NEW PAYMENT SETTING
- Change the Club / Location filter to select the specific Location you want to add a new payment gateway to.
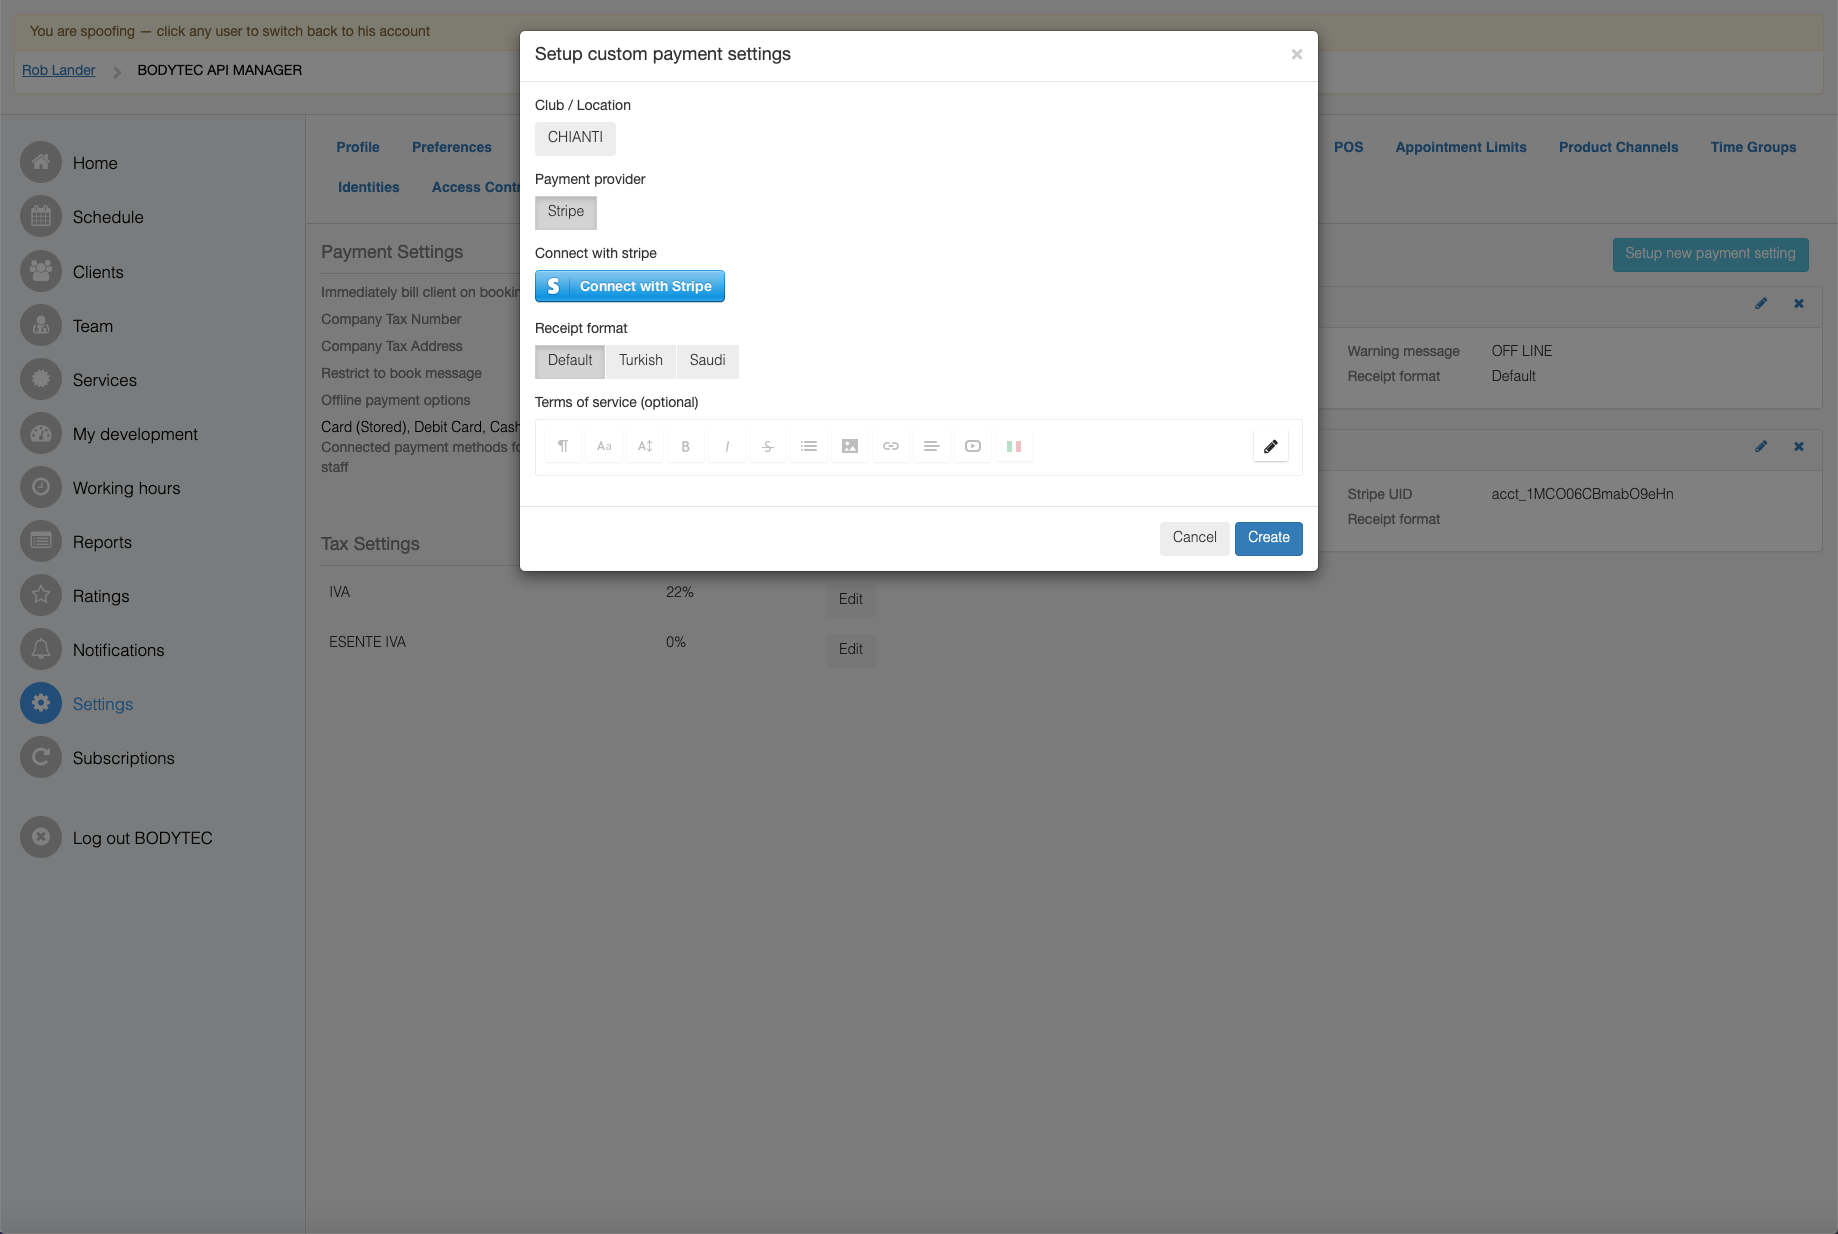
- Select the STRIPE payment provider and the DEFAULT receipt format and then select CONNECT WITH STRIPE button
- This will load a separate stripe authentication window. If your browser has BLOCKED POP UPS enabled, you wont be able to connect your site, unless you allow pop ups
- On the Stripe form
- Enter your email and password

- Once Stripe verifies your account, you will see the form below which will enable you to select a specific Stripe account to connect to Fisikal. Select the account and then select CONNECT.

- The pop up window will close and you will be directed back to Fisikal and you will see the screen to show STRIPE ACCOUNT CONNECTED in green. Select
- Select CREATE to complete the connection

- You will then see details of the STRIPE account connected as shown below.
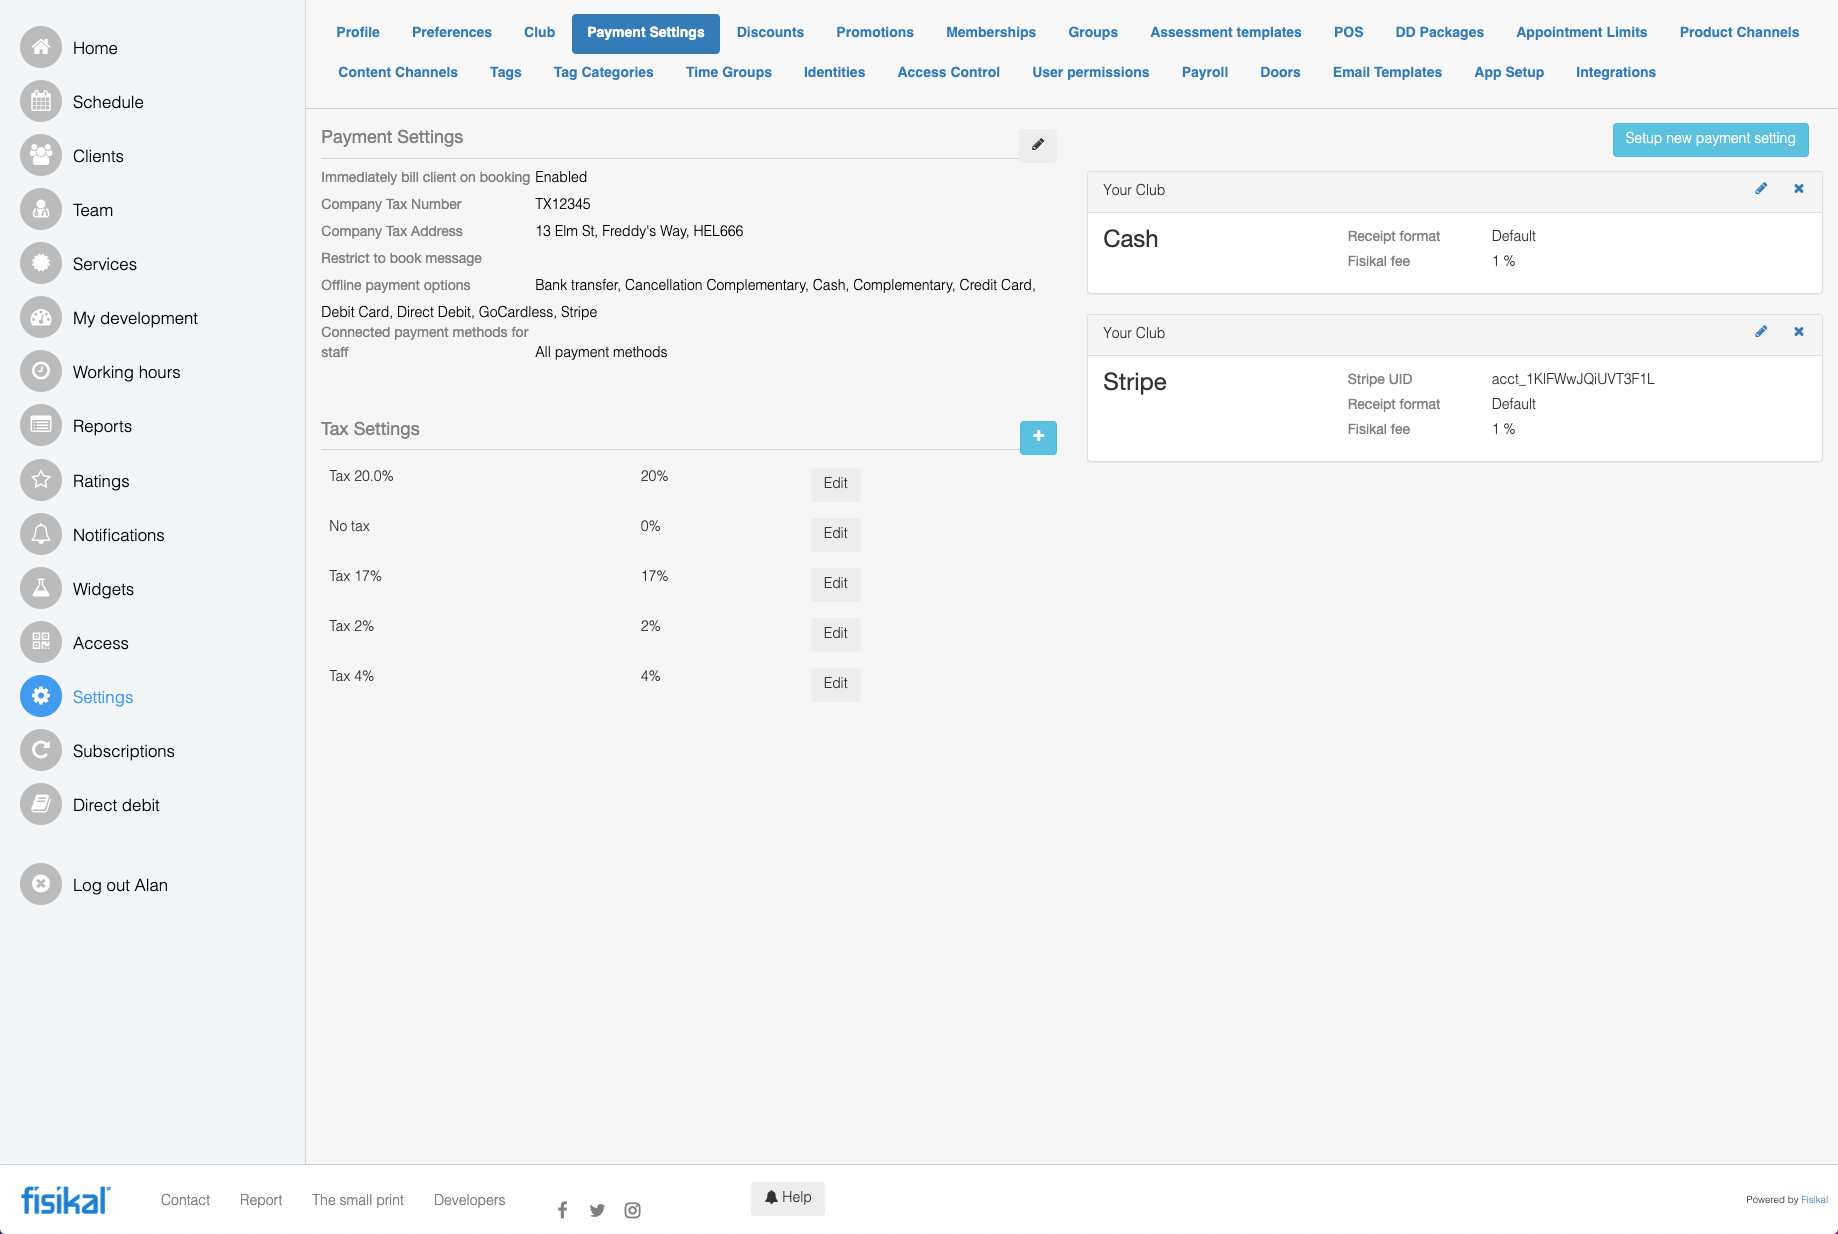
This completes everything you need to do on Stripe and Fisikal.